Feeds:
Posts
Comments

Archive for the ‘Recipes’ Category

Ireland has a long history of baking and an equally long tradition of passing these skills on to the next generation. From mother to daughter, father to son, in-law to outlaw, tried, tested and dearly loved recipes have been passed down so that food memories can live as long as possible and connect one generation and one family to the next.

Even in our home, this has happened. My mother-in-law and sister-in-law gifted me with family recipes and I, in turn, have spent the last twenty years teaching them to my daughters.

From the time our eldest was able to sit at the table in her highchair, my husband and I hosted a weekly family dinner night with all the family who lived locally or were visiting from abroad. And, when both our girls were toddlers, they stood on kitchen chairs at the hob {stove} or counter and mixed and measured alongside me. Now, in their late teens and early twenties, our daughters are able to help prepare the family high-holiday meals, host their own dinner parties, feed themselves, or bake for fun or stress-relief as has been the case during Covid.

So, you’d think that with all the cooking and baking I’ve done, across the many years, I’d know a thing or two about flour. Sadly, not so. Growing up American in the 70’s and 80’s, there was really only All Purpose and Self-Raising Flour, and I thought they were interchangeable. In coming to Ireland, I learned about Strong Flour, Extra-Course Wholemeal, and Plain Cream Flour, but I mostly reached for the AP and SR on the supermarket shelves, with only the slight twinge of “one day I’m going to sit down and figure out which flour is actually the right flour to be buying”. Well, that day finally came this past week.

As you know, it was St. Patrick’s Day on Wednesday. In celebration of the day, I made Irish boiled bacon, potatoes and carrots, following my mother-in-law’s recipe, along with pan-grilled cabbage, uniquely my own recipe. For pudding {dessert}, I decided to make a Guinness Chocolate Cake recipe that I found in an Avoca Handweavers cookbook. With all the activity of the day, however, I got distracted and didn’t follow the directions exactly. In fact, I made a complete hames of it! I accidentally mixed the sugar with the eggs and vanilla, instead of adding it to the butter and chocolate on the hob. And, then, because I had cake flour to hand, I decided to use it instead of Plain Flour {All-Purpose Flour}. Well, you can just imagine, the cake was a total flop! When I pulled it from the oven, I thought the recipe was to blame, but then I copped myself and had to admit that I had done nearly everything wrong.

Standing there in the kitchen, I cut a tiny slice from the caked just to be sure it was as bad as I thought. It was. That is when my daughters learned a new kitchen skill…knowing when to toss something into the bin with humour. Yes, that’s a food memory worth passing on to the next generation too. There’s no point in crying over spilt milk and there’s no point in getting upset when a recipe goes awry.

So, lesson learned, not wishing to make that mistake again, and hoping to save my daughters from following suit, I finally decided to spend a bit of time this week researching flour. Now, I finally understand why not all flour is the same and am happy to share this knowledge with you and my daughters.

Enjoy your baking. Stay positive. And, all the best!

~ XK

Cake Flour: with a protein content of between 7-9%, this flour is milled to a fine consistency and is usually bleached. Because it is low in protein, and thus low in gluten, it makes for a soft, fluffy, tender cake with a fine crumb. Cake Flour is idea for vanilla and white cakes, Chiffon cake, and angel food cake. It is not a good choice for a heavier cake, like chocolate cake for example.

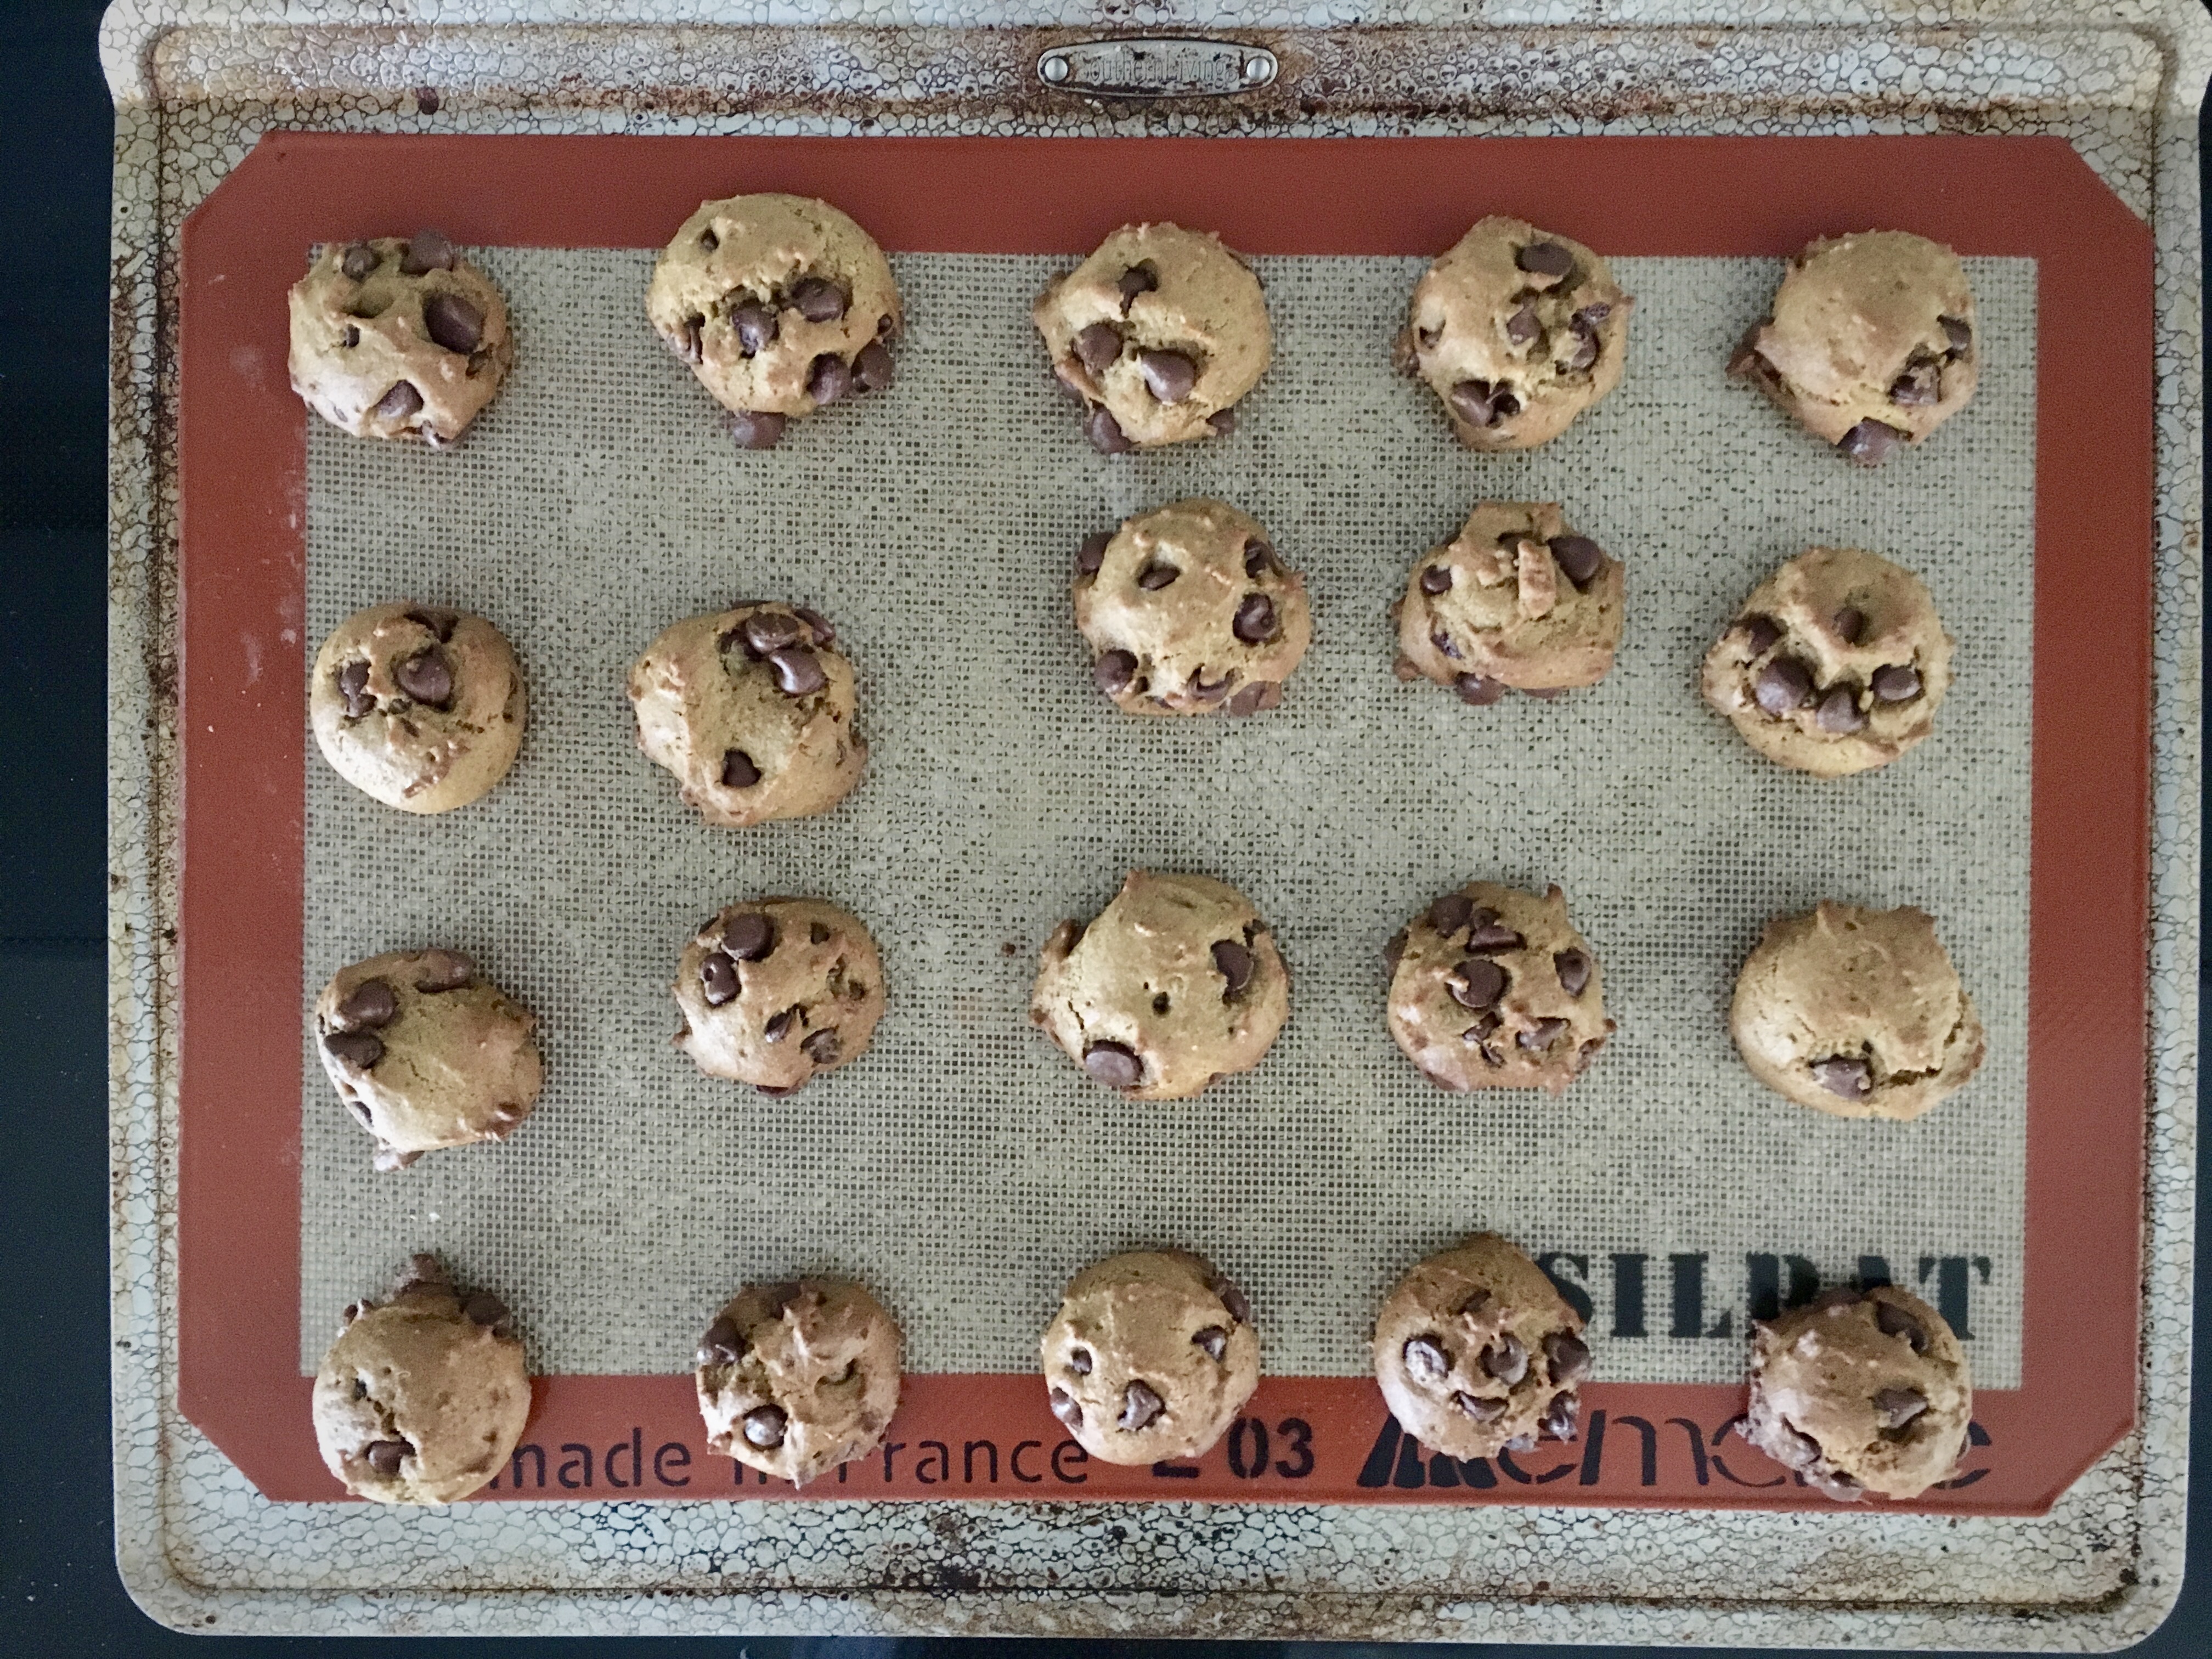
Cream Plain Flour/Plain Flour/All-Purpose Flour: with a protein content of between 8-12%, this is the flour to have in your kitchen if you only have room for one as it is the standard flour used for most cooking and baking. Cream Plain Flour, also known as All-Purpose Flour, typically has no raising agent {athough, Odlum’s has a low level of raising agent}. It is a good choice for making biscuits {cookies}, muffins, soda breads, cakes, pastry, pancakes, crumbles, fried foods, gravy, soups, and sauces.

Self-Raising Flour: with a protein content around 8.5%, Self-Raising Flour has a rising agent and, usually, a little salt mixed in. It is usually required in a recipe that does not need any additional raising agents. Self-Raising flour is ideal for sponge cakes, scones, muffins, pancakes, some types of biscuits {cookies} and tea breads.

Strong Flour/Bread Flour: with a protein content of 11-14%, this flour is milled from hard wheats, is higher in gluten, and is normally used in recipes that call for yeast. The gluten in this flour gives bread dough its elasticity and chewy characteristic. Kneading Strong Flour, also known as Bread Flour, develops the gluten strands, traps air and produces the holes one typically sees in bread. It is a good flour for making bread in a bread machine and is good for making pizza dough, rich fruit cakes and some pastry.  

Wholemeal Flour: with a protein content around 14%, this flour is made using the wheat berry {the bran, germ and endosperm}, with nothing added and nothing left out. It is high in fibre and has a slightly nutty flavour. Wholemeal Flour is also known as Brown Flour and is traditionally used in making Irish Soda Bread/Irish Brown Bread.

Wheatmeal Flour: with a protein content of around 14%, this flour is a mixture of white flour and wheat bran. As it is less coarse than Wholemeal Flour, it has the advantage of giving baked items greater volume. It’s a good choice for making Irish Soda Breads.

Additional Notes, Related Articles & Credit:

*Know Your Flours at Odlums.ie, TheFreshLoaf.com, Kingarthurbaking.com, and BonAppetit.com

**The Easiest Way to Make Cake Flour Substitute at thekitchn.com

***Types of Flour at Fabflour.co.uk and Dovesfarm.co.uk and Easyfood.co.uk

***Types of Flour at Fabflour.co.uk and Dovesfarm.co.uk and Easyfood.co.uk

Read Full Post »

Andy Williams may have been singing about Christmas when he crooned It’s the Most Wonderful Time of the Year, but for me, hands down, autumn is the hap-happiest season of all! Back in the day when I was a big-haired, cowboy boot wearing, Texas girl, I used to call this season… “sweater weather”. Back then, I lived for the cooler weekends when I could throw on a pair of well worn jeans, a cozy jumper {sweater} and head off to some grassy field an hour or so outside of Dallas for a bit of antique shopping.

fullsizeoutput_87a2

Now, my life is so different. I’m a wife and mother. We split our time between Ireland and America. And our home is fully furnished {finally!}. I still live for the weekends, but now I’m much more likely to get out for a hike, throw myself on the sofa and relax with a stash of newspapers and magazines or get creative in the kitchen whipping up recipes…{truth be told, a spot of retail therapy in Dundrum also makes the list!}

This past Bank Holiday Monday was a perfect day for being in the kitchen. Among other autumn treats, I made Pumpkin Maple Granola, which I double batched because it disappears so quickly. The base recipe is Nadia’s Granola. We love this incredibly more-ish treat but, let’s be honest, it’s nice to change things up every now and again. With that and sweater weather in mind, I created this simple, delicious, Pumpkin Pecan Maple Granola. It takes only 40 minutes to mix and bake and has 11 ingredients: pumpkin pureé, mixed spice, pecans and cranberries…oh my!  And, the smell will drive you around the bend: it’s like a yummy pumpkin spice candle.

fullsizeoutput_87a4

If you prefer to substitute currants or raisins for the cranberries…go for it. Ditto if you want to use a different type of nut…or not nuts at all. This granola doesn’t have any of that over-the-top sugariness that you’ll find in store bought granola. We enjoy it in a multitude of ways: over Weetabix, Special K, yogurt, fresh fruit, ice cream, or by the handful.

fullsizeoutput_87a0

I know the last few days have been cold in Ireland, but I hope you are making time for yourself and your friends/loved ones outdoors in our beautiful countryside. With Halloween less than 24 hours away, be safe, enjoy the candy, carved pumpkins, costumes and bonfires…autumn is truly a magical season.

~ XoK

Pumpkin Pecan Maple Granola

Makes 5 cups/600 grams

Ingredients

50 ml/2oz/¼ cup maple syrup

28g/1oz/¼ cup brown sugar

50 ml/2oz/¼ cup olive oil

½ teaspoon salt

1 teaspoon mixed spice {pumpkin spice}

1 teaspoon vanilla extract

76g/2.7oz/1/3 cup pumpkin pureé

340g/12oz/3 cups rolled oats

118g/4.2oz/1 cup raw pecans, roughly chopped into pieces

130g/4.6oz/1 cup raw pumpkin seeds

50g/1.8 oz/1/3 cup cranberries

Directions

1. Preheat oven to 150°C/300°F.

2. Mix first 7 ingredients in a large bowl.

3. Add oats and mix to coat.

4. Spread mixture out on a large, rimmed, baking sheet. Bake for 25 minutes. Stir every 5 minutes.

5. Add the pecans and pumpkin seeds and bake for another 15 minutes. Continue to stir every 5 minutes.

6. Remove the hot muesli from the oven and allow to cool completely before adding cranberries. Store in a sealed container to keep fresh.

Additional Notes, Related Articles & Credit:

* If you live in Ireland, you can buy Pumpkin pureé year round at Fallon & Byrne.

** Oats are said to reduce harmful LDL cholesterol. To learn more, check-out this article from Mayo Clinic online.

*** Getting outdoors is incredibly healthy for the body, the spirit and the mind. If you’re in Ireland, or visiting soon, check out these articles and websites for places to hike in Ireland. My personal favorites are Glendalough, Killiney Hill, Big Sugarloaf, Bray Head, The Gap of Dunloe, The Giant’s Causeway and the Howth Cliff Walk.

Read Full Post »

Since coming back from our holidays in August, I have been very intentional about how we live. Though we are typically pretty good, our lives had recently started to feel chaotic again. Simple, healthy, clean, honest, and wholesome is what I wanted us to move back towards and, as the mammy of the house, it was up to me to lead the charge.

fullsizeoutput_8782

I gently turned myself and my family {even the daughter who is miles away} towards getting more exercise, spending time in quiet contemplation, volunteering, and eating better. It took a little convincing of the two kids at the start of our move back to healthier living, but once they saw the tangible results {more sound sleep, better fitness, a few pounds shed, and less stress felt} everyone was in. Best of all…it only took six weeks before we were seeing and feeling the benefits and that, for me, felt like a small victory!

So, now, with the days growing shorter and the weather getting cooler, it is a touch harder to stay the course in terms of how we eat. And, let’s be honest, if you’re not eating properly, it’s much harder to do anything else well. I’m sure, like yourselves, we are craving foods that are hearty and warm, especially in the morning, which is why I really do love this Cinnamon Apple Porridge recipe. It is an autumn-inspired take on traditional Irish porridge.

fullsizeoutput_8785

With the addition of three simple ingredients, apples, cinnamon and toasted pumpkin seeds, it’s easy to make a vegan, gluten-free, hot and delicious breakfast in no time at all. In fact, I often make a big batch and either refrigerate or freeze the leftovers {in single servings} to have for the entire week which saves me time and energy…another small victory!

IMG_5158

What toppings are you putting on your porridge in the morning? Do share, I’m always looking for new ideas. In the meantime, here are a few more apple recipes to try, if  you’re on an apple kick like me.

Cinnamon Apple Porridge

Serves 4

Ingredients

1 cup/7oz steel cut (or pinhead) oats

4 cups/2 pints water, though you can use milk if you prefer

Directions

1. The night before you want porridge, bring the water to a rapid boil.

2. Slowly add the pinhead oats, mixing all the time, and bring the water back to the boil.

3. Turn off heat, cover and leave to set overnight.

4. Next morning, add more water (or milk), stir and reheat.

5. While the porridge is heating, core an apple and chop the apple slices into bite size pieces. Set aside.

6. Toast a handful of pumpkin seeds in a dry pan over medium heat on the hob {stove}.

7. Once the porridge is ready, spook into bowls, top with apple pieces, pumpkin seeds, and a sprinkle of cinnamon, and serve immediately. {Maple syrup is a nice addition too}.

Additional Notes, Related Articles & Credit:

* If you prefer stewed apples, you could always add the apples {skin and all} to the pinhead oats and cook until the mixture is creamy and the apples are so tender that they almost disappear…but that’s up to you. For the moment, I prefer my apples crisp and tart, which is why I add them uncooked. You could also add the cinnamon from the very beginning, if you prefer.

** Every wondered if cinnamon is safe or good for you? Read this Time Magazine online article to get the scoop.

*** We’ve been growing Irish apples in our back garden for years, but that pales in comparison to the fact that apples have been grown in Ireland for some 3,000 years! To learn more about Irish apple varieties and even buy some to grow yourself, visit Futureforests.ie


Apple Steel-Cut Oatmeal

Read Full Post »

fullsizeoutput_877c

It’s been ages since I last posted and a lot has happened in that time. My eldest child, who left for the west coast of America last year to go to university, changed her mind and transferred colleges. My youngest has hit her teen-years like a lioness on the hunt: I’ve been hanging onto her by the tail ever since. My sweet husband continues to do his thing. And I, for my sins, have gotten involved in a side hustle {that’s American speak for side business} that has me up to my eyeballs.

But it’s all good. The new school year has started. Everyone and everything is humming along nicely and I still have my home life in sight…though not always like it used to be. On days like today, when I’ve been working, I’m thankful for the many family-tested-and-approved {the latter being the most important!} recipes I have to hand. These are the ones, like tonight’s supper of lazy roast chicken and pan seared mushrooms, that are super easy to make and absolutely delicious.

Pan seared mushrooms remind me of my mother-in-law. She loved them. Like boiled potatoes, pan seared Brussels Sprouts in soy-sauce glaze, and boiled ham, they were a regular feature at her dining table. Now, they are at mine. I wonder, someday, will they be at my daughters’ table?

Food memories are strong. They’re not just about the dish…they’re about the food and the people and the place and the occasions around them. They can whisk us back to our childhood…or to take us back to a few lovely moments gathered round the table of a woman you whole heartedly admired.

But I digress…these lovely pan seared mushrooms smell amazing. They are good enough to serve at a dinner party. You might even make them as an appetizer for a cocktail get together, with a side of crusty bread to sop up the buttery juices. They would also be perfect on top of a perfectly seared steak, served along a juicy chicken breast, nestled into an omelet or popped into a sandwich bap.

~XoK

Pan Seared Mushrooms

Serves 4

Ingredients

3 tablespoons butter

12 ounces button mushrooms

fresh ground pepper/sea salt to taste

Directions

1. Rinse, dry, and chop mushrooms.

2. Heat butter in a large skillet over medium-high heat until butter begins to bubble.

3. Add mushrooms to the skillet in a single layer and cook, undisturbed, until bottom side is golden brown, about 3 minutes. Toss mushrooms, and continue to cook, reducing heat as needed to avoid scorching, until golden brown all over, about 3-5 minutes more.

4. Season with salt and pepper, to taste, and give the mushrooms a good stir.

5. Remove the mushrooms from the skillet with a slotted spoon and serve immediately.

Additional Notes, Related Articles & Credit:

* Storing mushrooms in the fridge is easy…do nothing to them. I repeat…do nothing to them. Simply remove them from your carry bag and pop them into the fridge. If they come in a shrink wrap package, do not open the plastic…I know…strange for me to say so given how much I detest plastic. But, truly, leave them alone and they will last a week.

** Wash or brush clean? I’ve always rinsed and quickly dried any mushrooms I’ve ever used and done so without problem. To be honest, I couldn’t be bothered brushing each one or peeling each one either. Yes, some people peel their mushrooms!

*** To stem or not to stem? If the mushrooms you purchased have woody stems, discard them just prior to use. Otherwise, keep them and use completely.

**** According to Ireland’s Bord Bia, mushrooms are grown in Ireland in the following counties: Monaghan, Meath, Wexford, Mayo, Kildare, Cavan and Tipperary. Bord Bia’s website also says that mushrooms are a good source of fibre, low in fat, they contain more vegetable protein per 100g than almost any vegetable, and they are richer than most vegetable in some vitamins such as B1 and niacin. Mushrooms also contain certain important minerals such as potassium, phosphorus, iron and copper, and are low in salt.

Read Full Post »

Pumpkin Chocolate Chip Cookies

The world is feeling so polar these days and with our eldest daughter way over on the west coast of America on her own…it feels a little bit unsafe to this mama…though I know, in reality…if I take a deep breath…it actually isn’t.

Regardless of where home is, what anyone does for a living, or what our political leanings are, I hope you/me/we, will make more time to create or pass on a tiny bit more gentleness, patience, and love. It is, after all, up to us to how we interact with one another. If someone treats you poorly today, let me be the first to say I am sorry for the hurt. It’s tough out there…so many demands…so much negativity…everyone in a rush…shouting…honking…bustling…doing…making noise. It’s exhausting and grating on our central nervous systems and hearts.

The world is not meant to be what it feels like it is becoming…what it has been for a while now. I’m a hopeless romantic, so with Wonder Woman in mind, I am shouting out today: “ONLY LOVE CAN SAVE THE WORLD”. And, if that doesn’t work…maybe biscuits {cookies} will help.

Which brings me to today’s post for Pumpkin Chocolate Chip Cookies. These tasty little treats are perfect this time of year.

Bowl of pumpkin chocolate chip cookies

The pumpkin and chocolate flavours work really well together {wouldn’t it be nice if we could say the same about American politicians ~ cheap shot, I know!}.

Drop scoop pumpkin chocolate chip cookies

Unlike many biscuits, these are cake-like and chewy. They are incredibly satisfying with a good mug of tea in the morning.

Pumpkin Chocolate Chip Cookies on a baking tray

One thing to note, they do not freeze well…nor does the dough refrigerate well. So, when you make them…you have to make them all. Depending on what size spoon or dough scoop you use, the recipe yields between 3-5 dozen cookies.

Tray of pumpkin chocolate chip cookies

Which is why I sent a batch of them to my daughter and her lovely new roommate at college. Here’s how I packed them up.

How to send homemade cookies in the mail

I packaged them in cling film (plastic wrap) and placed each cookie back-to-back.

Homemade card from fall printable

I tried to find an “Autumn is in the Air” printable…but this one was so adorable!

red, yellow, green autumn leaves

The autumn leaves in our garden are so beautiful this time of year.

Sending cookies in the mail

Some tissue paper, ribbon, and a few stickers and it’s ready for shipping!

You can buy American canned pumpkin in Dublin at Candy Lab in Temple Bar or  Fallon and Byrne. Sometimes, I have also seen it at Avoca in Kilmaconogue and at Cavistons in Glasthule…but this is hit and miss. I’m a Dublin girl, so I apologise for not being able to speak for the rest of the country. Happy Autumn!

~ XoK

Pumpkin Chocolate Chip Biscuits

Makes 3-5 Dozen

Ingredients

½ cup/4oz vegetable oil

1 cup/8.3oz/236g pumpkin puree

1 cup/198g/7oz sugar

1 egg, room temperature

1 teaspoon vanilla

1 teaspoon bread soda (baking soda)

1 teaspoon milk

2 teaspoons mixed spice (pumpkin spice)

2 teaspoons baking powder

½ teaspoon salt

1 cup/142g/5oz whole wheat flour

1 cup/142g/5oz self-raising flour (all purpose flour)

2 cups/400g/14oz chocolate chips

Directions

1. Preheat oven to 180°C/350°F. Spray baking sheets with nonstick spray or line with parchment paper or silpat sheets.

2. In a bowl, combine oil, pumpkin, sugar, egg, and vanilla.

3. In another bowl, stir baking soda and milk well. Add to the pumpkin mixture.

4. In a third bowl, stir mixed spice, baking powder, salt, and flour well. Add to pumpkin mixture.

5. Fold in the chocolate chips and leave batter to rest for 15 minutes.

6. Using a scoop, place batter on a baking sheet, approximately 2-inches apart, and bake for 9-12 minutes or until the cookies are lightly browned.

7. Remove the baking sheet from the oven and let the biscuits rest for 2-3 minutes. Remove the cookies with a spatula and transfer to a wire rack to fully cool.

Additional Notes, Related Articles & Credit:

* These websites were particularly helpful in figuring out the best way to pack the cookies for shipping: Land-O-Lakes; Kitchn;  Sally’s Baking Addiction;

** Here is the link for the printable I used, from On Sutton Place, to make the card.

*** If you can’t find the canned pumpkin puree in Ireland, here is a recipe from Alton Brown over at the Food Network. You can watch a video of the process too.

Read Full Post »

Meringue Layered Cake with Whipped Cream and Mixed Berries

In our Irish home there’s only one type of cake that’s served at birthday celebrations:  meringue. Serve it “traditional-style” and you’re rolling the meringue around a luscious layer of cream and berries…serve it “contemporary-style” and you’re sandwiching mixed berries and cream between layers of crisp meringue. Either way, this cake is always delicious and always a show-stopper.

One point to clarify…for anyone that’s interested…is this: a meringue is not a pavlova. There is a difference. After hotly debating this with someone recently, I did some research. Here are the facts:

A meringue is a simple and pure mixture of whisked egg whites and sugar. A crisp meringue is most usually a French meringue, where the egg whites are whisked and then caster sugar is incorporated. These meringues are baked at a low heat for a long period of time, whereby they are effectively “dried out” rather than “cooked”. A perfect Irish meringue is crisp on the outside, yet not as crisp as a French meringue, and chewy in the middle.

A pavlova, on the other hand, is a type of meringue, especially noted for its marshmallow-like centre. It is made with the addition of cornflour {cornstarch} and, frequently, vinegar.

In our home, meringue cake {roulade or layered} is nearly always made with raspberries, blackberries and strawberries…but it would be glorious with homemade lemon curd or, given the season that’s about to be, homemade wild elderberry curd! In the summer months, I am partial to substituting kiwi, pineapple and bananas for the usual berries…but my family disagree…they always prefer berries to anything else.

Whatever way you make it, I think you’re going to  this recipe!

~ XoK

Meringue Layer Cake

Serves 8

Ingredients

6 large egg whites

12oz sugar {caster}

500ml cream, whipped

1kilo mixed fruit, cut into bite-size pieces

Directions for Making Meringue

1. Preheat oven to 150°C/300°F. Line three baking trays with parchment paper and, using a pencil, draw one circle, 20cm/8-inch, on each piece of parchment paper. {I used a cake tin for this.} Flip the parchment paper over so the pencil circle is facing down towards the baking tray.

2. Beat the egg whites and half the sugar using an electric whisk until soft peaks form. Gradually add the remaining sugar, continuing to whisk until the meringue forms stiff peaks. To test: lift the beater out of the meringue and turn upside down. If the meringue peak holds its shape you are done.

3. Divide the meringue evenly between the three circles and, using an offset spatula, form a circular shape with a smooth top.

4. Bake meringues for 40- 45 minutes, or until dry to the touch. If your oven is not big enough to bake all three meringues at the same time or you don’t have a second oven, make a third of the recipe at a time and bake each layer individually. I have two ovens, so I bake two meringue layers in one and the third layer in the second oven. I keep a close eye on the oven with the two meringues: if they are not cooking evenly, I swap the shelves.

5. When they are done, remove the meringues from oven and cool completely on cooling racks.

Directions for Assembling

1. Very gently lift one meringue layer off of the parchment paper and place on a flat serving plate. Top with one-third the whipped cream, and sprinkle with one-third the fruit.

2. Repeat for second layer.

3. For the top layer, again gently lift the third meringue off of the parchment paper and place on the cake, cover with the last of the whipped cream and the last of the fruit. Serve immediately or refrigerate for up to 2 hours.

Additional Notes, Related Articles & Credit:

* It’s a bit of a needle in a haystack, but it’s so worth it: Darina Allen’a lemon curd recipe here.

** I worship at the feet of Yotam Ottolenghi’s meringues. Here is his devine recipe!


SaveSave

Read Full Post »

Fresh Basil Pesto Recipe

My kitchen looks like a bomb hit it this morning! For some reason I got up and started baking and cooking with abandon. Truth is, I don’t even mind the mess…it’s been lovely to work away in the kitchen. 😉

When I was rooting through the fridge, pulling out ingredients, I noticed I had a few packets of basil sitting in the crisper. Not wanting them to go to waste, I decided to make homemade basil pesto. Summer is, after all, only just around the corner and this basil recipe is so incredibly delicious over chicken or with pasta or even swirled into soup {especially my Tomato and Irish Whiskey soup}.

This pesto is herby, nutty, and has just the right amount of garlic flavour. It can be whipped up in the same amount of time it takes you to boil a pot of pasta {Can I get a “Mama Mia!?”} and you can double the recipe and put some away in the deep freeze. Enjoy!

~XoK

Fresh Basil Pesto

Makes about 1 cup

Ingredients

44g/2 cups basil leaves

16oz/44g/2-handfuls pine nuts

4g/2-handfuls freshly grated Parmesan cheese

1 clove garlic, peeled

9 tablespoons olive oil

sea salt and pepper to taste

Directions

1. Put the basil, pine nuts, Parmesan and garlic in a food processor or Vitamix {if you like your pesto silky smooth}.

2. Pour over 5 tablespoons olive oil and pulse in the food processor or mix on low in the Vitamix.

3. Drizzle in the remaining 4 tablespoons olive oil.

4. Taste, season with salt and pepper, and add more pine nuts, garlic, or Parmesan until you are happy with the flavour. Add more olive oil if you prefer a runnier consistency.


5. If not using immediately, transfer to an air-tight container and drizzle some olive oil over top or pour into a freezer bag, lay flat in your freezer, and use as needed.

Additional Notes, Related Articles & Credit:

* From the folks over at thekitchn.com, another idea for freezing homemade pesto

** If you’re interested in the history of pesto sauce, you can learn oodles here at thesplendidrecipes.com or here at saveur.com.

*** You can find tips for growing basil in the kitchen at thekitchn.com.


SaveSaveSaveSave

Read Full Post »

One salmon taco on a bed of lettuce and cucumber

Fish tacos, that great meal of the Baja Peninsula, should really be an Irish “thing” too. We are, after all, surrounded by water and we have some of the most delicious fresh fish available to us year round.

In our Irish home we use salmon to make fish tacos because we really can’t get enough salmon in our diet, but haddock, cod, or any firm white fish would be equally nice. Served on warm tortillas, with a crunchy mixed salad slaw, a bed of cool guacamole, and a good squeeze of lime, these tacos are delicious. They’re also a good way to get someone, who might not normally like fish, to try it.

Screen Shot 2017-09-18 at 10.18.43 PM

And, did you know that Cinco de Mayo is this Saturday? All of the recipes below, double easily, making them a perfect main course to serve a hungry, festive, crowd. So turn up the Latin music, put the cervezas on ice, and enjoy!

~XoK

Roasted Salmon Tacos with Mixed Salad Slaw

Serves 8

Ingredients for the Mixed Salad Slaw

8oz/½-lb mixed lettuce leaves, finely shredded

½ seedless cucumber, unpeeled, halved lengthwise, seeds removed and very thinly sliced

2 sticks of celery, chopped

2oz/59ml/¼-cup good white wine vinegar

salt and freshly ground black pepper, to taste

Directions for the Mixed Salad Slaw

At least an hour before you plan to serve the tacos, toss the lettuce, cucumber, celery, vinegar, 1 teaspoon salt and black pepper together in a large bowl. Cover and refrigerate.

Ingredients for Guacamole

2 ripe avocados

Juice of ½ lime

1 teaspoon finely chopped cilantro or parsley

2 tablespoons Garlicky Marinated Tomatoes or plain cherry tomatoes, chopped

Directions for Guacamole

1. In a small bowl, mash the avocado.  Stir in lime juice.

2. Add the cilantro or parsley and the Garlicky Marinated Tomatoes, stirring until just combined. Do not over stir.

3. Cover with cling film {plastic wrap}, making sure it touches the avocado and refrigerate.

Ingredients for Salmon

453g/16oz/1lb salmon

½ lime, juiced

olive oil

1 teaspoon of chili powder

1 teaspoon cumin,

½ teaspoon garlic powder

salt and pepper to taste

8 tortillas

Directions for Salmon and Tortillas

1. Pre-heat oven to 220°C/425°F/gas mark 7. Place oven rack in the middle of the oven. Line a baking tray with aluminium and top with a sheet of parchment paper.

2. Mix the chili powder, cumin and garlic powder in a small bowl and set aside.

3. Rinse the salmon, pat dry with kitchen roll(paper towel), and, if necessary, remove any bones.

4. Put the salmon fillets on the parchment paper, skin-side down, and squeeze lime juice over.

5. Pour over some olive oil and, with your hands, spread it on all sides of the fish.

6. Dust the fish with the mixed spices. Salt and pepper, as desired.

7. Roast in the oven for approximately 15 minutes or until the salmon is cooked all the way through. Roasting times will vary depending on your oven and the thickness of the salmon.

8. When it’s done, remove the fish from the baking tray and break it apart with a fork.

9. To warm the tortillas, wrap them in moist kitchen roll, pop them into the microwave for 30 seconds to one minute at full power. They should come out beautifully hot.

To Serve

1. Serve the fish on a platter with some lime wedges on the side.

2. Put the tortillas, wrapped in a cloth napkin, on a plate.

3. And bring both the fish and the tortillas to the table with a bowl of the crunchy salad slaw and the guacamole. Let each diner assemble his or her own tacos.

Additional Notes, Related Articles & Credit:

* Irish fish tales from Saveur.com

** If you prefer, you can substitute green and purple cabbage, thinly sliced, for the crunchy mixed salad.

*** If you want to get a jump start on the preparation, make the slaw and the guacamole the night before. If the guacamole turns brown on the top, carefully remove the brown bits and it will be lovely and green underneath.

SaveSaveSaveSave

SaveSaveSaveSave

SaveSave

SaveSave

Read Full Post »

Oven Roasted Parmesan Brussels Sprouts

I don’t remember eating Brussels sprouts as a child. In fact, it wasn’t until I lived in Ireland, where my mother-in-law served them sautéed in soy sauce, that I first tried them. It was love at first bite!

Now I roast Brussels sprouts all the time. Good enough to be eaten straight from the oven like a snack…these are equally delicious at room temperature. What’s more, despite their diminutive size, Brussels sprouts are high in fibre, vitamins and minerals, they can trigger the liver to produce detoxifying enzymes, they have been shown to reduce blood sugar levels, and they may protect against cancer. One thing to note, if you’re taking a blood thinner like Warfarin, research has shown Brussels sprouts may lessen the drug’s effectiveness due to the Vitamin K in them.

The secret to getting a good carmelisation on the sprouts is roasting them in a single flat layer, making sure they don’t overlap.

And, finally, you can turn these lovely little super foods into an awesome vegetarian meal by tossing  them with arugula and lentils or bulgur wheat.

Roasted Parmesan Brussels Sprouts

Serves 4-5

Ingredients

2lb/906g Brussels sprouts, washed, trimmed and halved length-wise

4 tablespoons olive oil

zest of a small lemon, plus 1 tablespoon of the juice

salt and pepper to taste

freshly grated Parmigiano-Reggiano to taste (optional)

Directions

1. Preheat oven to 220ºC/425ºF and set oven rack into the middle of the oven.

2. Place dry Brussels sprouts on a large baking tray.

3. Add the olive oil, salt and pepper, lemon juice, and grate the lemon zest over the tray {that way you get all the lovely oil from the lemon too} and mix with your hands until the Brussels sprouts are coated.

4. Roast in the oven for 15 minutes ~ the sprouts will begin to caramelize in places. Toss the sprouts and add freshly grated Parmesan to taste.

5. Continue roasting for another 15 minutes until the sprouts are tender.

Additional Notes, Related Articles & Credit:

* To read more about the health benefits of Brussels sprouts, visit Dr. Andrew Weil’s website here.

** A Mayo Clinic online article about Warfarin and foods to avoid may be read here.

*** And, if by chance Brussels sprouts and other cruciferous vegetables give you wind {gas}, you may find this article, also from Dr. Andrew Weil’s website, helpful!


Read Full Post »

Freshly made Sheet Pan Turmeric Meatballs

When life gets super busy, who has the time or the energy to stand in front of the hob and make dinner? Not me…and I’ll bet…not you either. Which is why I think, after you try this recipe, you’ll agree that these sheet pan meatballs are the bomb! Mix up six ingredients, roll them into little balls {or better yet…get the kids to do it!}, drop them onto a baking sheet, pop them in the oven…fifteen minutes later…you’re done. It really couldn’t be simpler.

In and Irish Home Sheet Pan Turmeric MeatballsReady for the oven: raw sheet pan meatballsFresh from the oven: Sheet Pan Meatballs

If you’re feeling particularly energetic and you want to fry them up…go for it…they’re great that way too. But I’m only going to offer this: when you put them into the oven there’s no grease splattered everywhere to clean up. Uh huh…I see the wheels of your mind clicking over!

These meatballs are delicious doused in a homemade spaghetti sauce {here’s mine}, but you could easily drop the into the kids’ macaroni n’ cheese, line them up in a bread roll with some homemade sriracha mayo, dot a frozen pizza with them, skewer them with cherry tomatoes, tiny mozzarella balls and basil leaves, really there’s just no end to their versatility.

~XoK

Sheet Pan Turmeric Meatballs

Makes 32 one-inch Meatballs

Ingredients

400g organic mince beef

1 free range egg

2 teaspoons ground turmeric

1 teaspoon mixed Italian herbs

2 globes garlic, peeled and crushed

sea salt and freshly ground pepper to taste

olive oil

Directions

1. Heat oven to 200ºC/400ºF and place oven shelf in the middle of the oven.

2. Mix all the ingredients, except for the olive oil, in a medium sized bowl with your hands and form meat into 3cm/1-1/2″ size balls.

3. Lightly coat a baking sheet with olive oil. Add the meatballs to the sheet pan and place in the middle of the oven and bake for 10 to 15 minutes, or until meatballs are cooked through.

Additional Notes, Related Articles & Credit:

* To read up on the health benefits of turmeric, here’s an article from the bbcgoodfood.com website.

** Over at Smittenkitchen.com, Deb Perelman has a recipe for sheet pan meatballs with turmeric chickpeas that also looks yummy.

*** Did you know that in Italy there is no traditional dish there called Spaghetti and Meatballs? Tis true! “Meatballs in general have multiple creation stories all across the world from köttbullars in Sweden to the various köftes in Turkey. Yes, Italy has its version of meatballs called polpettes, but they differ from their American counterpart in multiple ways. They are primarily eaten as a meal itself (plain) or in soups and made with any meat from turkey to fish. Often, they are no bigger in size than golf balls; in the region of Abruzzo, they can be no bigger in size than marbles and called polpettines. But those large meatballs, doused in marinara over spaghetti are 100 percent American. So how did spaghetti and meatballs evolve from polpettes? The answer is similar to every ethnic cuisine that traveled to this country; immigrants had to make do with the ingredients they could find and afford.” To read more, please visit: www.smithsonianmag.com.


Read Full Post »

Older Posts »