Feeds:
Posts
Comments

DSC00253In the spring of 2013, I had a real bee in my bonnet about taking the family to Washington, D.C. The driving factors for this all-American holiday were: 1) my husband and I wanted to take the kids on a trip of cultural and historical significance; 2) Barack Obama had just been re-elected to a second term in office and talk of American politics was still raging and; 3) the girls were just the right age to introduce them to a bigger dose of their American heritage.

My parents took my brothers and me to D.C. when we were about 3, 8 and 9 years old…a trip that took our family of five from Los Angeles, CA to Hartford, CT and return in a 1966 Mustang! Those were the days when a family road trip meant long hours spent playing “spot the license plate” and singing John Denver songs. Nevertheless, the city left such a profound mark on me that I would eventually return many times as a college student to work on Capitol Hill. At one time, I even thought I’d have a career in politics.

DSC00076From the beginning, my husband and I agreed we wanted to make the most of the experience and come away with a feeling of having garnered some knowledge. This meant planning the trip with military precision because, surprisingly, a week in Washington really isn’t enough time to see everything. Fortunately, there’s no better woman than yours truly to plan a holiday. Heck, if I can plan a July 4th celebration in Ireland for an American Ambassador and a 500+ people cycling event around Dublin City Centre at midnight for a fundraiser, surely I can figure out how a family of four can take in the sites, sounds and tastes of D.C.! Here’s how the trip went:

Day 1 ~ Travel Day. Get to D.C., check-in at Westin Georgetown Hotel. Unpack bags, walk to dinner at Westend Bistro and walk into Georgetown to stretch our legs and get some fresh air.

IMG_3636
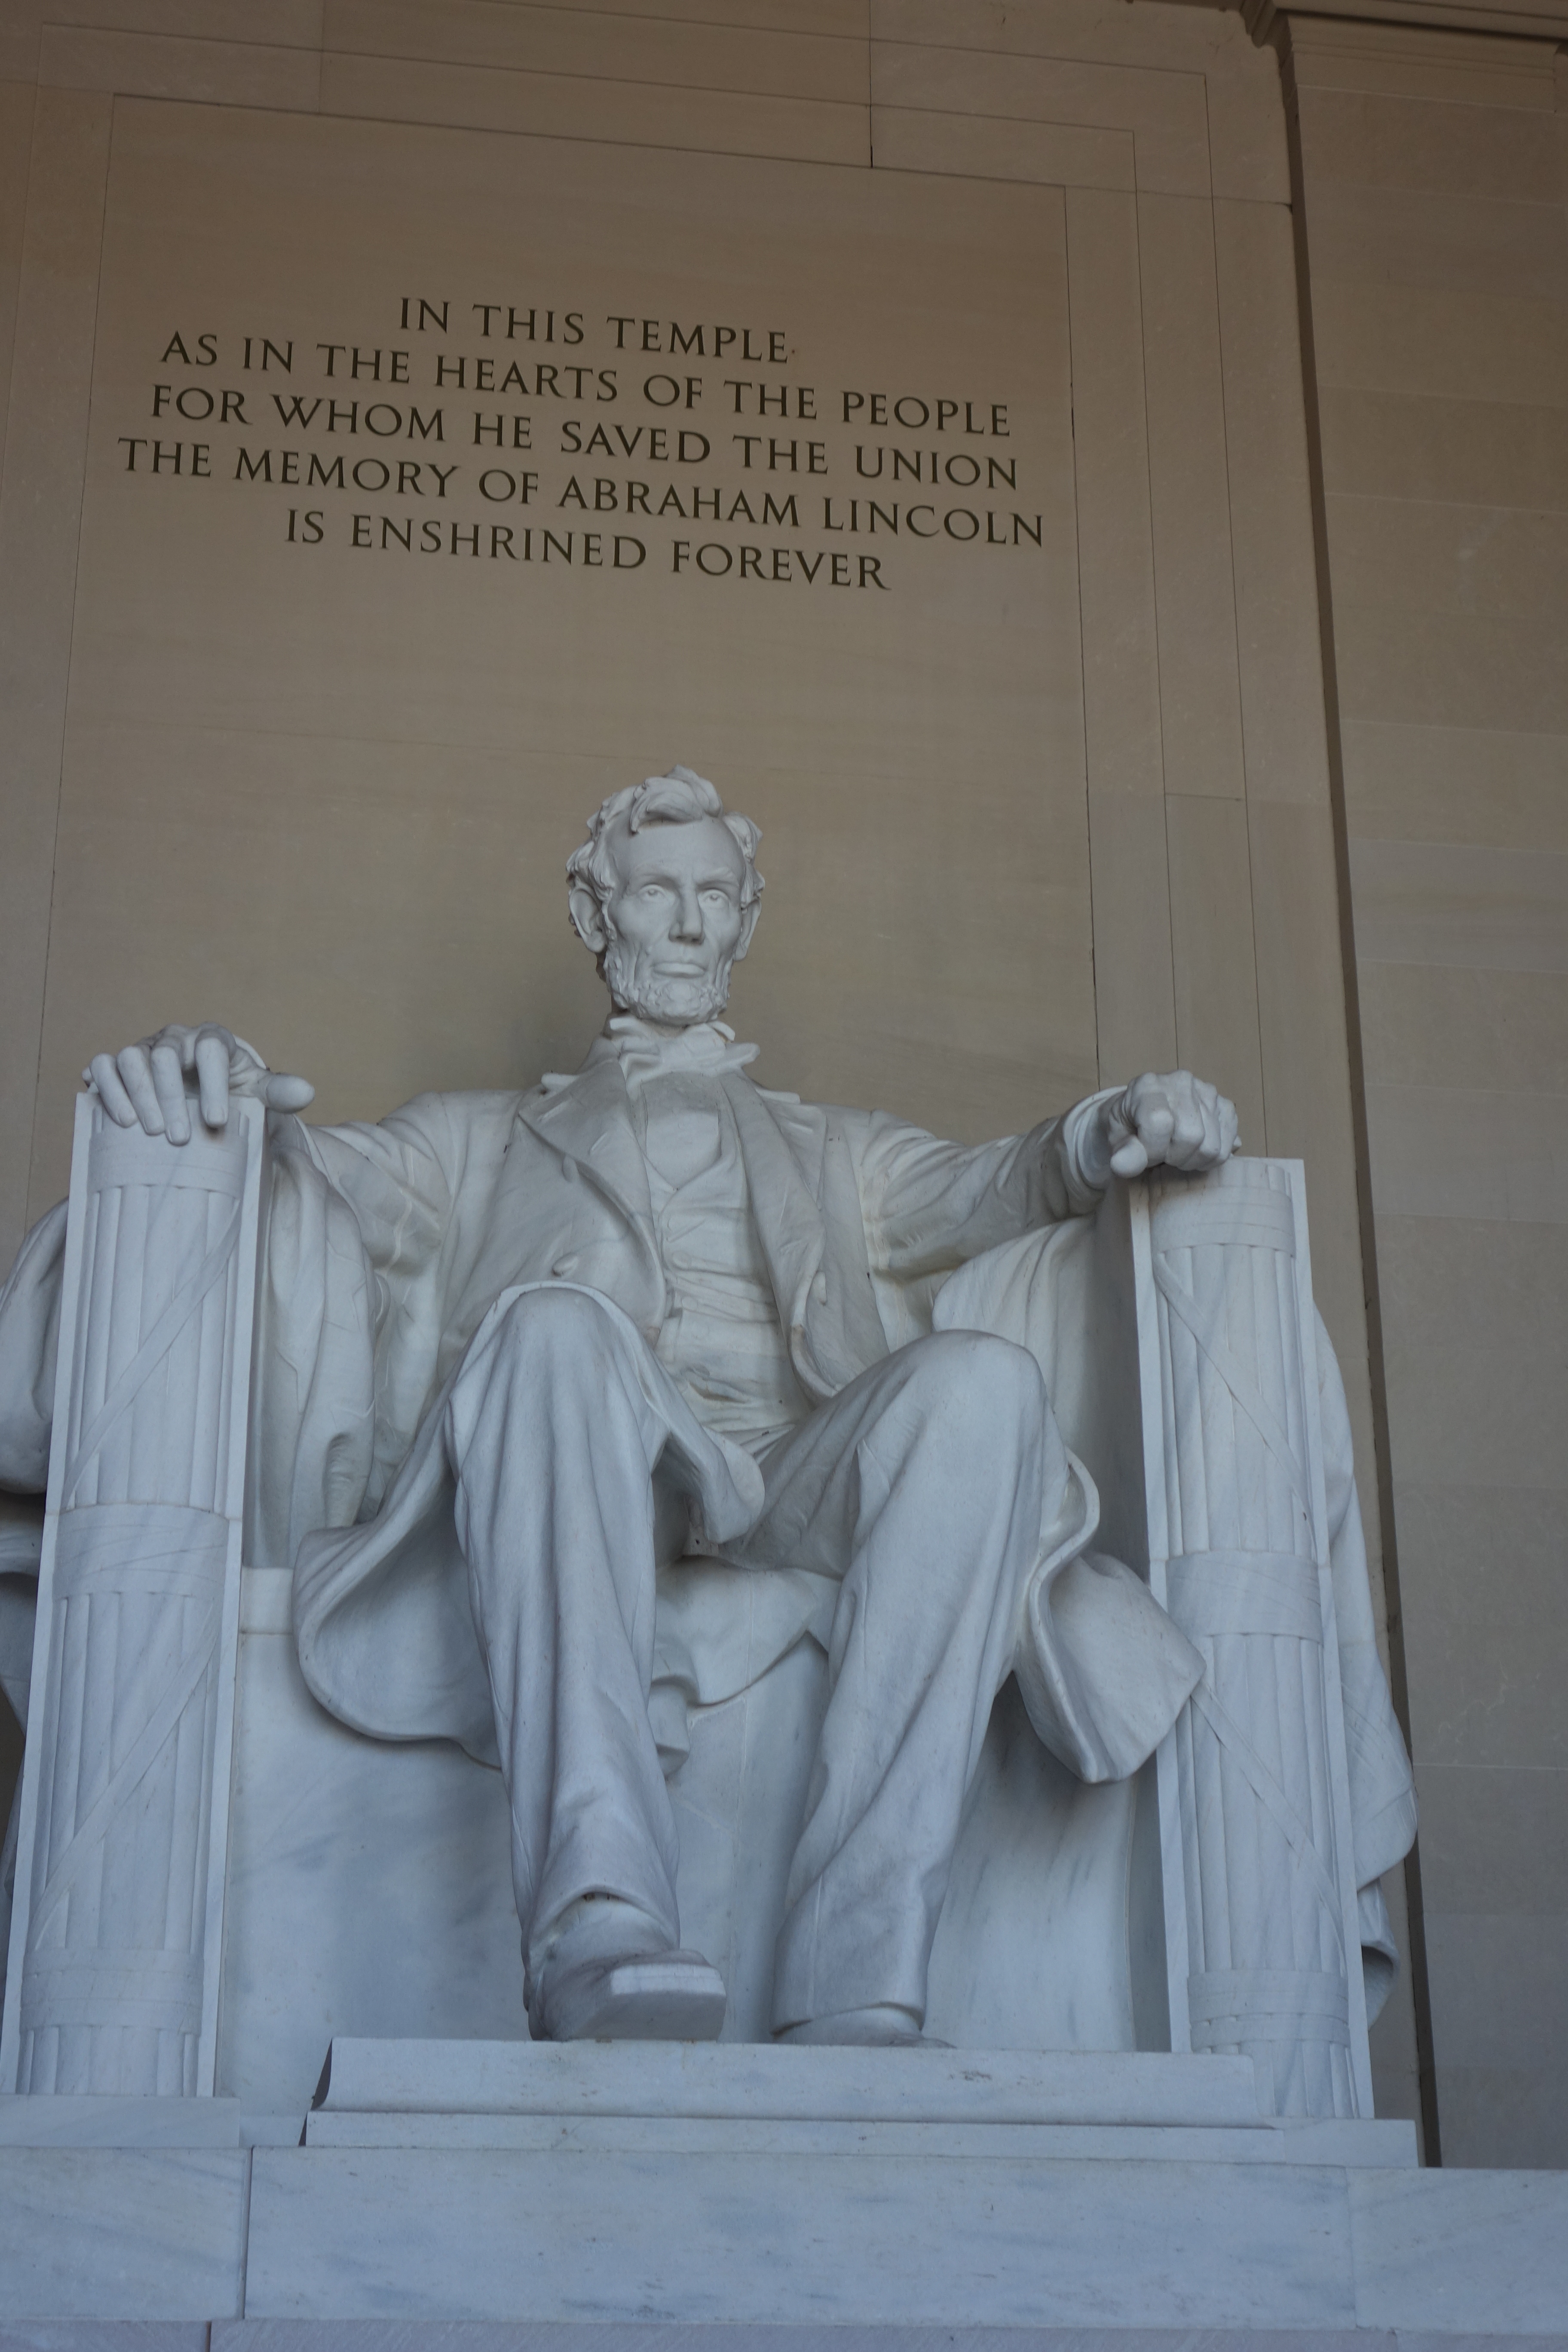
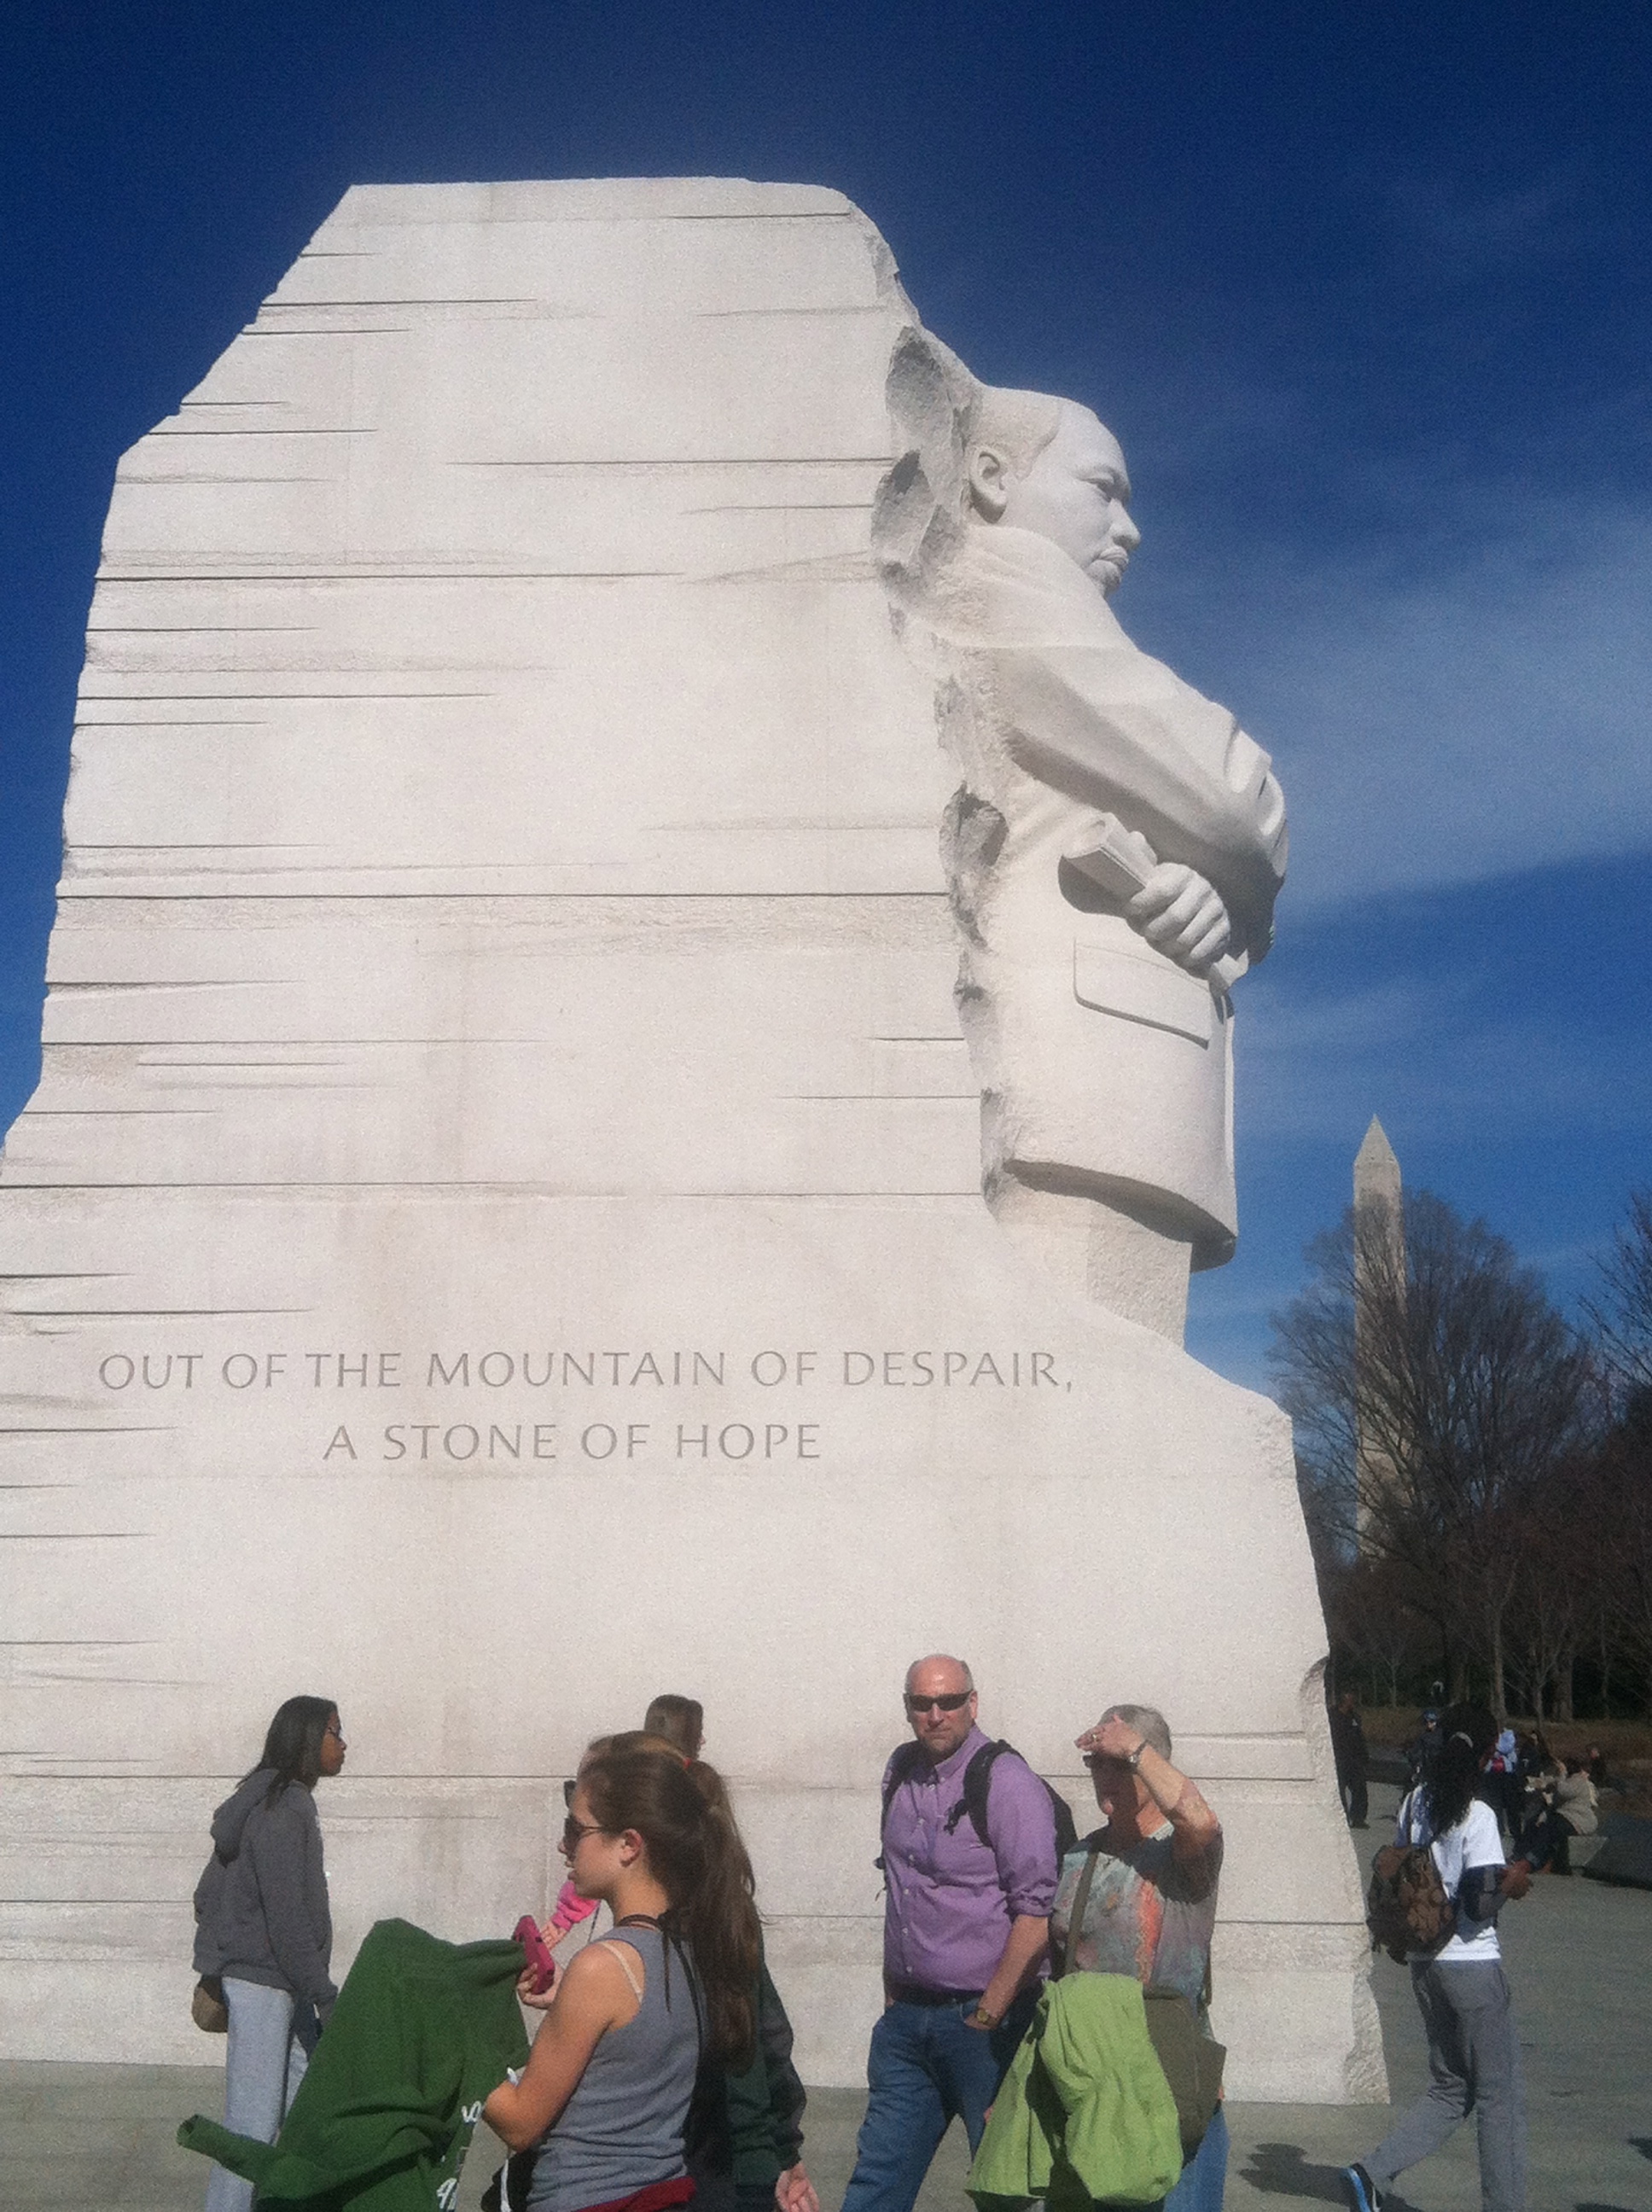
Day 2 ~Monument Day. Borrow bikes and helmets from the hotel. Breakfast at Le Pain Quotidien. Cycle to Georgetown University to show the girls an American college and then cycle over to the national monuments. You can take a trolley tour or double-decker bus tour, but riding bikes was great fun and left us in control of our day. Visit Lincoln Memorial, FDR Memorial, Thomas Jefferson Memorial, Martin Luther King Memorial, Korean War Memorial, Reflecting Pool, WWII Memorial, and the Washington Monument. Dinner at Meiwah and walk back to Georgetown for an ice cream at Thomas Sweet.

Day 3 ~ Museum Day. Breakfast at the hotel and a walk to the Air & Space Museum, American History Museum, and the Natural History Museum. Tip: Do a Google search of each museum prior to your trip to find out the exhibits you are interested in. Make a list and immediately upon entering a museum go in search of the things on your list. This way, you’ll see what you want to see and probably have time to wander about at your leisure or go to another museum without wasting time! After a day on our feet, we took a taxi back to the hotel and had dinner at Blue Duck Tavern and DSC00199
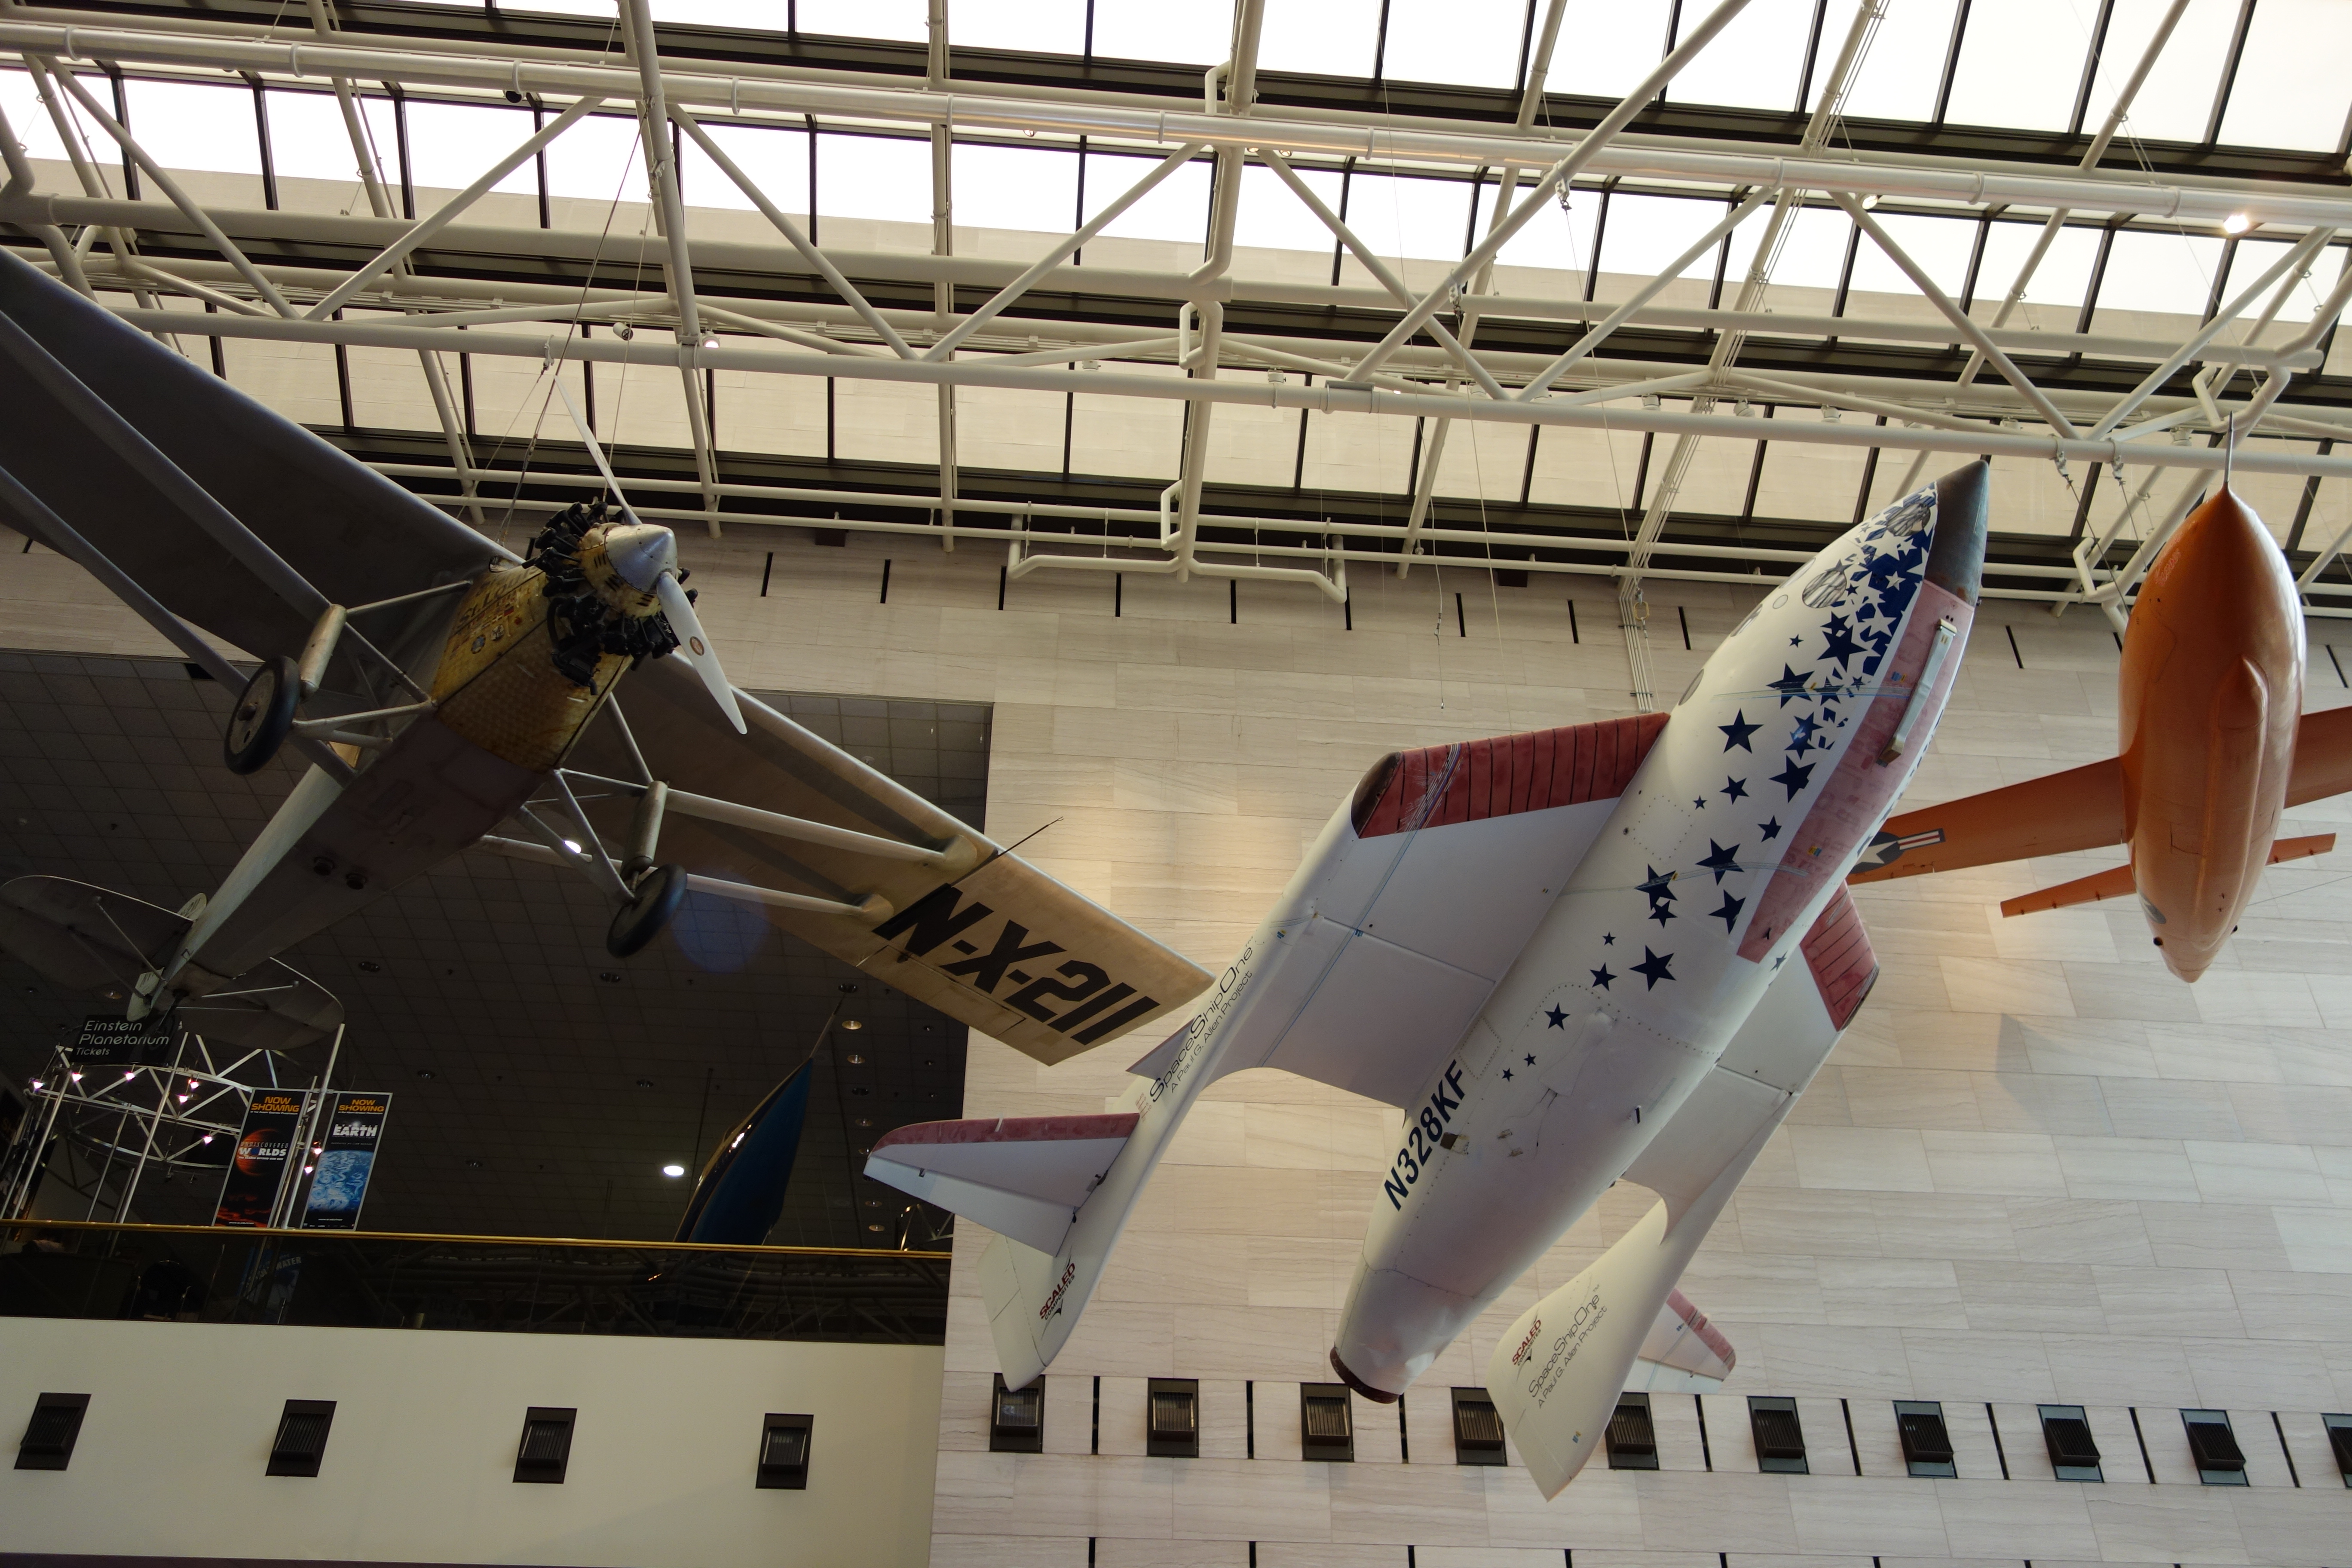
we walked into Georgetown to have frozen yogurt at Pinkberry.

Day 4 ~ Shopping Day. Back to Le Pain Quotidien for breakfast and then spent the day strolling around Georgetown shopping. The shops range from antiques to wigs, so there’s something for everyone. Pack a spare duffel bag in your luggage, as you’ll find all sorts of wonders to bring home. Here’s a great “Shopping in D.C.” article from the Washingtonian.com. Dinner at Cafe Milano…this isn’t your Cafe Milano as we know it in Ireland. This is better!

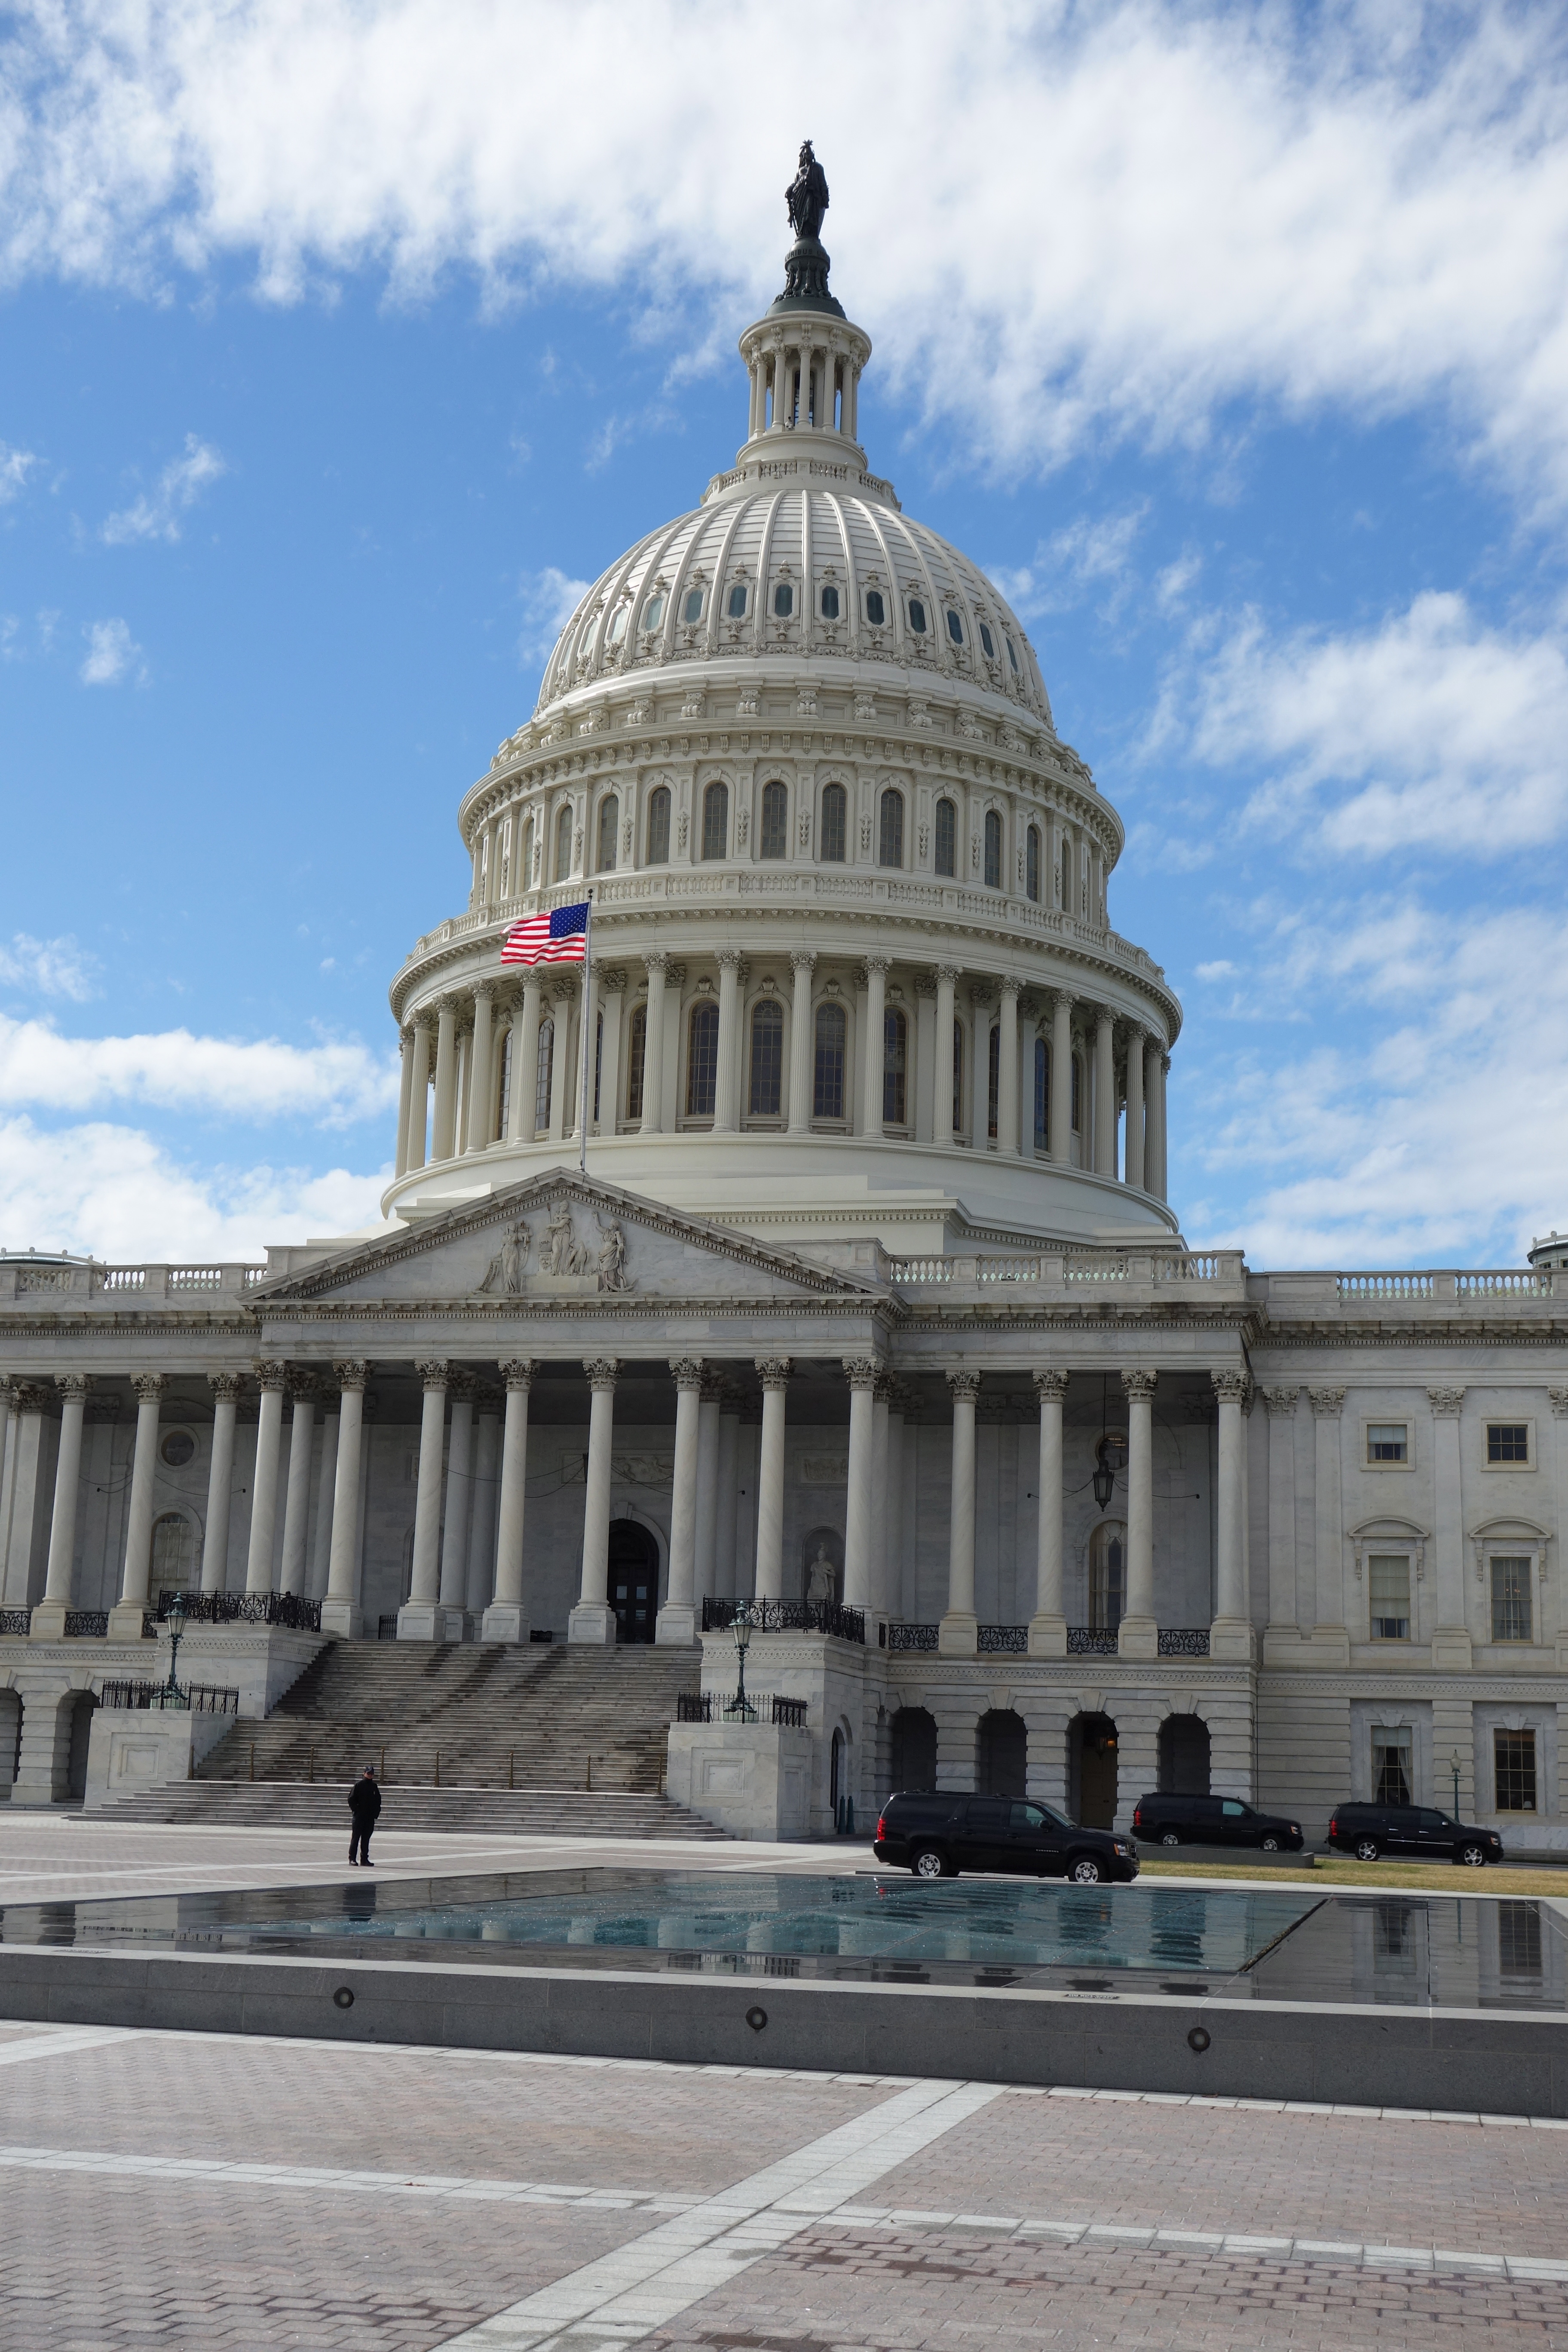
Day 5 ~ Capitol Hill Day. Breakfast at the Old Ebbitt Grill, a D.C. institution. Sight-seeing for the day: the Capitol Visitor Center, the Capitol Rotunda, The Senate and House Galleries, Library of Congress, Supreme Court Tour, the White House, and the White DSC00240House Visitor Center. At White House Gifts we had a family photo taken behind a replica of the Presidents’ Resolute Desk and Press Office Podium, which was fun for the kids. If you’re an American citizen, contact your Senator or State Representative to see about joining a tour led by a member of his or her staff and getting a pass to enter the Senate or House Galleries. For tours of the White House check out this site. Dinner was picked up at Chop’t on our way back to the hotel. We ate in our room and watched Night at the Museum: Battle of the Smithsonian (a fun way to get the kids to test their memory of the places we visited in D.C.!).

Day 6 ~ Mount Vernon. After breakfast at the hotel, we jumped into a taxi and took a twenty-minute drive to the gorgeous and interesting Mount Vernon. Mount Vernon is the plantation home of America’s first President, George Washington, and his wife DSC00343Martha. A visit there offers a glimpse into 18th-century life through beautiful gardens and grounds, intriguing museum exhibits, and immersive programs honoring the couple’s life and legacy. There is so much to see, we spent a whole day touring around at our leisure. Dinner at Founding Farmers, farm-to-table restaurant. Later we walked from the hotel into Georgetown to get cupcakes at Georgetown Cupcake.

Day 7 ~ Last day…The Spy Museum and brunch at Poste Moderne Brasserie at the Hotel Monaco. We didn’t have much time on this last day as we were flying back home. The kids loved The Spy Museum…my husband and I not so much…it felt very “touristy”. I have no regrets of going, however, as the kids had been so good all week about visiting places of cultural and historical significance.

DSC00362Tips for visiting D.C. with kids:

1. Wear your runners (tennis shoes) or your most comfortable walking shoes. If you are like us, you will be walking everywhere every day.

2. Do not carry backpacks. Many of the museums and destinations require security searches which can mean waiting in long lines. The girls and I carried cross-body bags and in them we each had a reusable plastic rain poncho, an umbrella, a water bottle, iPod/phone, headphones for using iPod/phone, and a map of DC. I also carried a notepad and pen and every day I had my notes for the places we would be seeing.

3. Pack appropriately for the weather. In the summer, DC is hot and humid. In the winter and early spring, it’s very cold. Autumn is a lovely time to visit, but be ready for rain.

IMG_36564. Before you travel, research each place you plan to visit online for special exhibit listings and opening and closing times. For each day you will be in DC have a typed agenda highlighting what you want to see and why you’re going. For example, we had five typed packets: Monument Day, Museum Day, Shopping Day, Capitol Hill Day and Mount Vernon Day. Each packet listed the places we were going, the highlights of each place, when the places opened and closed, and the historical or cultural significance of each. I realise this is a lot of extra work, but it saved us from having to carry a travel guide with us.

5. Pick up a map from the concierge of your hotel. They’re light weight and easy to carry.

Additional Resources:

1. For a resource of things to see and do check out 100 Things to do in Washington, D.C.

2. Excellent responses about what to see in Washington from DC locals at Ree Drummond’s blog.

3. Kid Friendly Museums and Hands On Attractions here.

4. Sight-seeing information from Old Town Trolley Tours here.


In our Irish home we believe there’s something magical about receiving a gift at Christmas that has been lovingly made by someone you know. Which is why we make edible handmade treats every year to give close friends, neighbours and teachers.

DSC_0005

These “Naughty & Nice” sweet treats are sure to make our friends smile this year (clearly the Irish Cream Liqueur is for adults only!). The granola recipe, originally posted here at In an Irish Home, was modified slightly: we added several handfuls of dried red cranberries to give it a real Christmassy-look. The Irish Cream Liqueur recipe, passed down by my father-in-law, Dan McGuire, is amazingly good and may be found at the end of this post.

And who doesn’t love an authentic Irish Shortbread Biscuit? With the addition of some gorgeous crystalised ginger, they’re perfect this time of year with a freshly brewed cup of tea. The recipe may be found here.

DSC_0410

Once tasted, I dare anyone to say they don’t love these Irish Mars Bars treats! Not only are they incredibly “moreish”, they are super easy to make. Even better, there’s no baking required. The recipe, posted at In an Irish Home, may be found here.

DSC_0048

Guinness Gingerbread is something we can’t get enough of in our Irish home. The ginger, cinnamon, cloves and nutmeg really smell like Christmas. Wrapped simply in some parchment paper and tied with a festive red bow, this is the perfect Irish edible gift.

DSC_0010

And finally, these Rocky Road Biscuits, which I first shared with you two years ago, are totally delicious and give off a real Christmas vibe if you grate in a bit of orange zest and top with a drizzle of melted white chocolate. They are an Irish childhood favourite and sure to be enjoyed by whomever you make them for.

Now, with less than a week to go before Christmas day, we wish you and your loved ones some very happy times in the kitchen ~ slan abhaile!

Dan McGuire’s Irish Cream Liqueur

Ingredients

14oz condensed milk

14oz evaporated milk

1 1/2 teaspoon coffee essence (or 1 teaspoon instant espresso)

1 teaspoon glycerine

6oz/3/4 cup Irish whiskey

Directions

1. Mix all the above ingredients in a large measuring cup and stir with a small whisk until well blended.

2. Put into clean, sterilised, glass jars, close and store in the fridge.

Related Articles:

Darina Allen’s delicious homemade edible gift ideas here.

Donal Skehan’s blog post on edible Christmas gives may be read here.

This Irish Times article on edible gifts from 2011 is still very useful.

An Edible Ireland blogpost on Chocolate Bark with Almonds & Candied Bacon was reviewed at I Can Has Cook? These are two great Irish food blogs!

Ireland’s Catherine Fulvio, of Ballyknocken House, offers this Almond Liqueur recipe and delicious brownie recipe to her readers this year.

Check out those free, downloadable, gifts tags here and here and here to use with your homemade edible gifts.


Mincemeat pies. If there’s anything that says Christmas in our Irish home it is these buttery-rich, sweet, MEAT-less wonders. Yes…it is somewhat confusing…meat is right there in the name…but these lovely treats are absolutely, positively, meat free. I know this because I’ve eaten my fair share! How could I not? Bite-sized deliciousness served on a plate with a dollop of boozy cream…who could resist?

A quick Google search on the history of mincemeat pies shows that they were once, a long time ago, an entirely different dish. Around since the 11th century, mince pies first became popular in British kitchens in the 1700s. Back then there was chopped beef or mutton in them, along with dried fruit and warm spices like cinnamon, nutmeg and cloves. Rich and savoury, they were a main course dish and not an after dinner pudding or tea time treat.

It wasn’t until the 18th century, when “cheap sugar arrived from slave plantations in the West Indies”, that the mince pie we know and love today was created. Sweet trumped meat and now the only animal protein you’ll find in a modern mince pie is beef suet, a raw fat found around the kidneys and joints of a cow or mutton ~ though increasingly even it is being left out by bakers who are sensitive to animal products in their diet.

Irish Mincemeat


In Ireland, mince pies make their appearance in shops, bakeries, and holiday markets in early November. Truth be told, my favourite store-bought pies come from Avoca HandweaversButler’s Pantry and Cavistons in Glasthule, though Lidl, Aldi and Dunnes make nice ones too. Very few of my Irish friends go to the trouble of making them. Even my lovely sister-in-law, Rosie, spends her pre-Christmas time in the kitchen making her family-famous Christmas pudding, rather than making mincemeat pies.

But for those die-hard Christmas types like myself, it’s really a straight-forward, and dare I say “fun”, process. The only two things you really must do to ensure the end result is worth the effort is: 1) make your own candied peel (easy-peasy); and 2) make the mincemeat far enough in advance (two to six weeks is about right) to allow the alcohol, fruit, and sugar mixture to fully mature.

Mincemeat pies are best served out-of-the-oven-warm, with a generous spoon of freshly whipped, and dare I say “whiskey-laced”, cream, but they are also very good at room temperature a day or two later too. On its own, mincemeat is wonderful mixed into vanilla ice cream, may be added to home-baked apple or pear tarts, served over yoghurt, or tossed into a fresh fruit salad. And, finally…if you’re looking to give homemade Irish Christmas gifts this year…a beribboned jar of handmade mincemeat (or candied peel for that matter) would be positively lovely.

Happy Christmas!

Mincemeat

(makes 10 cups)

Ingredients

8oz/300gm/2 cups sultanas

8oz/300gm/2 cups currants

4oz/150gm/1 cups raisins

6oz/200gm/1 1/2 cup candied peel

600gm/3 cups muscavado or dark brown sugar

2 cooking apples (or green apples), peeled, cored and coarsely grated

zest and juice of 2 organic lemons

6oz/3/4 cup of Irish whiskey

1lb/450gm beef (or vegetable) suet*

1 teaspoon of pre-mixed cinnamon, nutmeg and cloves (also known as mixed spice)

a pinch of salt

Directions

1. Combine all the ingredients into a large bowl and mix well.

2. Put the ingredients into sterilised jars, cover and leave two to six weeks to mature, stirring once a week.

3. Use what you need and keep the rest in a cool, dark place for up to a year.

* If you’re making mincemeat to give as gifts to be used on muesli or ice cream, leave out the beef suet.

Ballymaloe Mince Pies 

(Makes 20-24 Mince Pies)

Ingredients

225g (8oz) plain flour

175g (6oz) butter, chilled and cut into cubes

1 dessertspoon icing sugar, sieved

a pinch of salt

a little beaten egg or egg yolk and water to bind

1lb mincemeat (to see Darina’s mincemeat recipe, please see link below)

egg wash

Directions
1. Sieve the flour into a bowl.

2. Toss the butter into the flour and rub it in with your fingertips.

3. Add the icing sugar and a pinch of salt.

4. Mix with a fork as you gradually add in the beaten egg (do this bit by bit because you may not need all of the egg), then use your hand to bring the pastry together into a ball. It should not be wet or sticky.

5. Wrap in cling film and refrigerate for 1 hour.

6. Preheat the oven to 180c/350f/gas mark 4

7. Roll out the pastry until it’s quite thin – about 3mm (1/8 inch) Stamp into rounds 7.5 (3 inch) in diameter and line shallow bun tins with the discs.

8. Put a good teaspoonful of mincemeat into each tin, dampen the edges with water and put another round on top.

9. Brush with egg wash and decorate with pastry leaves or stars.

10. Bake the pies in the preheated oven for 20 minutes approx.

11. Allow them to cool slightly, then dredge with icing or caster sugar. Serve with Irish whiskey cream (or brandy butter.)


Notes, Related Articles & Credits:

A fun article about six Northern Irish brothers who make 20,000 mincemeat pies a day at this time of year.

Here’s a brief history of mincemeat pies.

Looking for some other Irish Christmas fun facts? Check out this blog post.

Irish Central always views Ireland from a slightly more cynical/humorous lens, but I like it. Check out their Christmas post for 2014 here.

In 2004, Darina Allen posted recipes for a nostalgic Irish Christmas meal. You can find it here but, be warned, it’s not for the faint of heart. The list of dishes is incredibly long.

The beautiful photo at the start of this posting is from Getty Images. It was taken by David Cordner. I would have used my own photo, except I haven’t made my mince pies yet because the mince is still marinating and Mr. Cordner’s photograph is incredibly beautiful!

Embed from Getty Images

October is a beautiful time in Ireland. The weather is crisp and cool, leaves are turning and falling, fires are seriously stoked in the evenings, and the scent of cinnamon, nutmeg and mixed spice fills the air. It is all so wonderful. As the month comes to an end, there is a growing excitement for Halloween night to arrive. In our Irish home the children have already selected their costumes and started to make plans.

Our youngest will be out trick-or-treating in the neighbourhood with a group of friends, while our eldest, who feels she is too old to dress up and go begging for candy, will be at home with her cohorts celebrating with a real old-fashioned Irish Halloween party.

In keeping with the customs of long ago, there will be a bonfire, fireworks, bobbing for apples, bowls of nuts and fruits, Colcannon (a dish of mashed potatoes, kale and onions), and a Bram Brack, a fruit filled bread traditionally eaten on and around Halloween.

Irish Barm BrackThe Bram Brack will have small items, wrapped in greaseproof paper (parchment paper), baked inside as a means for fortune-telling. A ring will symbolise love or marriage, a coin for wealth, a soup-pea for poverty, and a thimble for a life of spinsterhood or bachelorhood.

Interestingly, the recipe I’m using comes from Young Housewife’s Cookery Book by Brigid Russell. Published in 1928, the book was written for housewives “untrained in cookery skills”…in other words…the self-taught home-chef like me!

In preparation for this blog post and the party, I baked a loaf of Barm Brack over the weekend. It turned out really well, though I felt the recipe lacked complexity. I will add cinnamon, nutmeg and mixed spice when making it again. If you’re not a fan of those autumn spices, you could, of course, leave them out.

Barm Brack keeps nicely for about three days, after which it tends to get a little stale. When this happens, don’t toss it in the bin. Instead, toast it and serve it buttered with a hot cup of tea.

From our Irish home to yours, I wish you and your little ghosts and goblins a Happy Halloween.

Barm Brack

Makes One Loaf

Ingredients

2lbs flour

1/4 lb butter

1/4 lb currants

1/4 lb castor sugar

1/2 lb sultanas

1 egg

1oz yeast

2oz peel (candied)

Tepid milk

Directions

1. Heat the flour. (I placed mine in a large mixing bowl and popped it into a warm oven for about 15 minutes.)

2. Break the butter into the flour and add the sugar. (I cut the butter into small pieces and worked it into the flour with my hands until the flour resembled coarse bread crumbs.)

3. Put the yeast into the flour, and, with beaten egg and sufficient tepid milk, make the whole into a loose dough. (I sprinkled the yeast over the sugared flour, whisked the egg with a fork in a small bowl with one cup of room temperature milk. I added more milk straight from the carton into the bowl as needed.)

4. Knead for 8 to 10 minutes; put to rise in a warm place for 2 hours. (The dough was very stiff, but somewhat elastic…vague, I know, but that’s the only way to describe it.)

5. Add the prepared fruit and the finely-chopped peel and knead again for 8 minutes. (I did not add peel to my loaf, but I did add an extra 2 ounces of raisins. Here is where I would suggest adding 1/2 teaspoon ground cinnamon, 1/2 teaspoon nutmeg, and 1/2 teaspoon mixed spice.)

6. Place in a greased cake-tin, and again put to rise in a warm place for about 20 minutes. (I lightly buttered a loaf tin and I left the Barm Brack to rise for 30 minutes.)

7. Bake in a hot oven for about 1 hour. (I baked mine in an oven preheated to 180°C/350°F. When the top started to burn, I covered it with a piece of greaseproof paper to protect.)

8. When done, the loaf should be glazed by brushing over with a solution made from equal parts of sugar and boiling water. (I omitted this last step.)

Related Articles:

My Quick Irish Barm Brack Recipe is super easy to make.

A recipe for Irish Tea Brack, a similar but easier version of Barm Brac, may be found here.

An article from the Archeological Institute of America on the history of Halloween’s Celtic Roots may be read here.

A history lesson of Ireland’s Halloween customs may be found here.

Haunted houses in Ireland here.

Irish Halloween traditions here.

Irish Vegetable Soup

Soup Unblended…

Autumn is upon us and with the change in temperature outdoors we need warm, wholesome, foods to keep us energized and satisfied.

This soup will do nicely. It is vegetarian, but so flavourful you’ll hardly miss the meat! The parsnip gives the soup a hint of sweetness, but only slightly, and if you’re not a fan of parsnips you can omit them altogether and substitute in another vegetable. In fact, the beauty of this soup is you can throw nearly any combination of veggies into the pot and come out with a dish that is simply delicious.

And Soup Blended!

And Soup Blended!

I follow Darina Allen’s method for vegetable soup making, which is 1:1:3:5. That is one cup of onion (could be onions, leeks, shallots or a combination of the three): one cup of potatoes: three cups of vegetables: and five cups of stock. This is foolproof soup making. Warm and wholesome, this is perfect when served with a slice of Irish Brown Bread. Enjoy!

Autumn Vegetable Soup

Serves 6-8

Ingredients

2 tablespoon of butter
1 cup onion, chopped
1 cup potatoes, chopped
1 cup carrots, chopped
1/2 cup celery, chopped
1 parsnip, chopped
1/2 cup cauliflower, chopped
5 cups of vegetable (or chicken) stock
Salt and pepper to taste

Directions

1. Place the butter in a large pot and place over a medium high heat.

2. When butter is melted and foamy, add the onion and potato.

3. Sauté for 2 minutes, then cover and sweat for 8 minutes.

4. Add the stock, carrots, parsnip, celery, and cauliflower, lower the heat and simmer for about 20 minutes or until the vegetables are tender when you insert a fork.

5. Season with a little salt and pepper to taste and then either serve as a chunky vegetable broth or blitz with a hand blender to form a silky smooth soup.

Food. Glorious food. It’s everywhere: on our tellies, in the super market, at the farmer’s market, in our village shops. It’s even at the petrol station, in our cars, at the airport, in the books and magazines we read, on the radio, and in the malls we frequent. We are surrounded by food twenty-four-seven. Is it any wonder obesity is on the rise? In our parent’s and grandparent’s day, food was less readily available. It was also more cherished…particularly in Ireland.

There were no big-box supermarkets around when my in-laws were raising their twelve children. When Dada wanted a box of fruit or veg he either picked from his own back garden or he went into town (Dublin) and bought from street vendors. My husband can still remember vendors crying “Apples…six for a pound!” in their sing-song voices and “Get your chicky charlies…if you don’t wan ’em don’t mall em.” (Whatever that means!) Food was so beautifully simple then.

Today, not only is food more readily available, but we are bombarded with a multitude of food debates. Here are just a few that have been in the press recently:

Should we eat a plant-based diet or a meat based diet?

Is it better to buy organic or local?

Are grass-fed animals really healthier than corn-fed animals?

Should we drink/eat raw or pasteurised dairy products?

Is it ok to eat genetically modified foods or should we avoid them?

Which oil is best to cook with: olive, canola, vegetable or coconut?

Wild fish or farmed…other than the price, does it really matter?

Omega 3, 6, 9 and nutritional supplements…should we get our vitamins and minerals through food or pop vitamins?

Farmers market, village shop or super market…where should I do my shopping?

How much water am I supposed to drink every day?

Is your head swimming? Mine is! Food isn’t just overwhelming us, it’s exhausting us. As the mother of a busy family, I crave simplicity. I’m going to guess that you do too. So, where food is concerned, I am following these three simple rules:

Eat Real Food First.

Grow What We Can.

Eat Food in Season.

The first rule (Eat Real Food First.) involves eating a cleaner, healthier, diet before we eat rubbish. Real Food is the food our parents and grandparents gravitated towards…you know…food made with ingredients you can pronounce, food that has not been created in a laboratory. Eating Real Food means staying clear of anything “highly processed”. Real Foods are not low-fat, made with artificial sweeteners, bought in a takeaway or petrol station, bleached, or covered in sugar. They are foods made from a limited ingredient list and are found in nature. Once we’ve made a meal of Real Food, I don’t mind if we slip in some ( less wholesome) treats.

The second rule (Grow What We Can.) involves getting back to nature. In the beginning I started with just a few pots of herbs on the windowsill. When we moved to our home in the country, I created an organic culinary garden, where we grew tomatoes, potatoes, apples, pears, salads, herbs, rhubarb, berries, and other easily grown edibles. It has been a real pleasure watching my children go into the garden and pick food straight from a plant and eat it. I always know that when we take food straight from a plant and eat it we are getting all the nutrients provided by the sun and the rain and the soil.

The third rule (Eat Food in Season.) ensures we eat a large variety of food items throughout the year, which does two things: 1) increases our nutrient intake; and 2) ensures we eat a more broad range of foods. Before following this rule, my family might have eaten the same (limited) fruits, vegetables, and meats week in and week out for months on end. Now that we eat more “seasonally”, I find we eat foods we wouldn’t consider before and these “new” foods have nutrients that beautifully correspond to our body’s seasonal needs. Take, for example, Brussels Sprouts. These little cabbages are higher in Vitamin C than a glass of orange juice and are at their peak exactly when cold and flu season is at its highest and the body is looking for more Vitamin C to support the immune system. If you roast them in the oven with olive oil, salt and pepper, you’ll find they become naturally sweet. In our Irish Home, I have Brussels Sprouts in the fridge all winter and the family pop them like little treats!

To help my family follow these three food rules, I keep a copy of Bord Bia’s Calendar of Availability Guide for Fruit and Vegetables taped to the inside of the cupboard where I keep my collection of cookbooks. It’s a handy reminder of what I to cook and feed my family and it helps me know what to plant in our garden throughout the year. If you have trouble distinguishing the blue from the green dots, print out a copy of the Guide: it’s easier to see the difference.

availability_guide

So, as we say goodbye to spring/summer foods and hello to autumn/winter foods, I say let’s all move toward a simpler, healthier, more varied way of eating. Join me…won’t you?… and let’s share the joy of trying new foods together.

Related Articles:

Bord Bia’s (the Irish Food Board), Best in Season article here http://www.bestinseason.ie/about-us/

Here’s another good seasonal food chart: http://www.greatfood.ie/item_display.asp?cde=3&id=521

Michael Pollan’s article Six Rules for Eating Wisely here http://michaelpollan.com/articles-archive/six-rules-for-eating-wisely/

Here’s a family that made Real Food a priority for 100 days and wrote a book (and successful blog) about the experience.

Follow blogger Trevor Sargent over at Trevor’s Kitchen Garden for tips about how to grow your own foods.

Darina Allen says GIY (Grow It Yourself) is one of the most important initiatives to come out of Ireland in last 20 years.

For a list of Irish Farmer’s Markets, look here: http://www.bordbia.ie/consumer/aboutfood/farmersmarkets/pages/default.aspx

Irish Farmer’s Market website at http://irishfarmersmarkets.ie


Several weeks ago I promised to blog Chef Fran Broadbery’s Plum Island Grille Apple Tarte Tatin recipe. Unfortunately I’ve been struggling to get the recipe to work, which is why you haven’t seen it posted yet. Fran warned me it can be difficult (if not impossible) to take a recipe from a professional kitchen and convert it into a recipe suitable for a domestic kitchen, so I knew there was a chance the recipe wouldn’t work. Never fear, however, after many attempts I finally have a recipe that will work in any home kitchen…even if you’re not a domestic god or goddess!!

So, without further adieu, I am happy to present to you this wonderful Plum Island Grille inspired Apple Tarte Tatin. We are smack in the middle of apple season, so I hope you enjoy this wonderfully delicious, super easy, recipe. Cheers!

Step one: put apples in water with lemons.

Step one: put apples in water with lemons.

Step two: melt butter and add sugar.

Step two: melt butter and add sugar.

Step three: caramelise the butter and sugar.

Step three: caramelise the butter and sugar.

Step four: add the apples rounded side down and bake for 20 minutes.

Step four: add the apples rounded side down and bake for 20 minutes.

Step five: cover with puff pastry and bake.

Step five: cover with puff pastry and bake.

Step six: remove from oven.

Step six: remove from oven.

Step seven: carefully invert the Tarte Tatin onto a plate.

Step seven: carefully invert the Tarte Tatin onto a plate.

Step eight: top with vanilla ice cream and serve.

Step eight: top with vanilla ice cream and serve.

Apple Tarte Tatin 

Serves 6-8 

Ingredients

1 sheet of puff pastry (you can make your own, but why bother!)

110g/4oz unsalted butter

225g/8oz sugar

4 apples, peeled, cored and cut into halves or quarters (Granny Smith are perfect, but really any apple is fine)

1 lemon, cut in half

Directions

1. Pre-heat oven to 200°C/400°F.

2. Place apples (peeled, cored and cut) into a medium size bowl. Cover with water and squeeze the juice of the lemon into the water. Put the lemon halves into the water as well.

3. In a skillet, melt the butter over moderate heat. Stir in the sugar. The mixture will be grainy at first, but be patient…and don’t turn up the heat. The sugar will melt and become caramel.

4. Drain the water off the apples and dry with kitchen roll (paper towel). Remove the caramel from the heat and add the apples rounded side down.

5. Put the skillet in the oven and bake for 20 minutes or until a knife can be easily inserted into the apple.

6. Remove skillet from oven and cover with a sheet of puff pastry slightly larger than the size of the skillet. Tuck the edges of the pie crust into the hot skillet. Be careful not to burn yourself.

7. Return the skillet to the oven for another 15-20 minutes or until the crust is golden brown.

8. Remove the Tarte Tatin from the one and set on a rack to cool.

9. Run a knife around the edge of the pie crust to separate it from the skillet. Shake the skillet a few times to loosen the apples and caramel. Place a pie plate over the skillet. Carefully grip the plate and the skillet and flip over so the pie plate is on the bottom and the skillet is on the top.

10. Gently lift the skillet from the plate. Rearrange any apples that have shifted during the inverting and scrape any stubborn caramel off the skillet and onto the Tarte Tatin. If some of the caramel is stuck to the skillet, place back in the oven until it’s spoonable or drizzel-able and spoon or drizzle over the Tarte Tatin on the plate.

11. Serve while still warm, topped with a scoop of vanilla ice cream or freshly whipped cream.

Notes:

* Cold Tarte Tatin makes for a delicious breakfast dish.

** Pears, quince, and fruits of a similar hardness can be cooked like apples to make Tarte Tartin.

*** I used my grandma’s old skillet in this recipe, but you can use an oven proof sauté pan.

Related Articles:

1. Rhubarb Tarte Tatin at Tartelette

2. Sausage Tarte Tatin made by Donal Skehan

3. Darina Allen’s Tarte Tatin recipe as published in The Irish Examiner

Chef Fran Broadbery

Chef Fran Broadbery

It’s not every day I sit down with an Irish chef and it’s not every day I nearly miss a flight to America. Today I did both…virtually at the same time!

Dear Readers…if you’re flying anywhere this summer on Aer Lingus, Ireland’s national airline, listen up… Aer Lingus requires all passengers check-in two to three hours before all flights…and they mean it! If you’re not at the ticket counter when the “last call” for your flight is made, you’re snookered. Chances are you’re not getting to your final destination on the flight of your choice. In fact, you may not get to your final destination at all. I know: I learned it the hard way.

In typical fashion, I arrived at Dublin Airport 90 minutes before my plane from Dublin to Boston was scheduled to depart. I was feeling pretty chuffed (happy) with myself: 90 minutes felt positively luxurious. No husband, no kids, and clutching nothing but my carry-on bag, I sauntered over to one of those kiosk-yokes to check in. When a “Flight Closed” message flashed up on the screen before me, I wasn’t the least bit worried. Instead, I walked over to the “Flight Closing” desk and waited patiently {about 10 minutes} to clear up the problem.

“Didn’t you hear the two last calls for your flight?!”, said the young Aer Lingus representative dressed in green.

The last two whats?, I replied calmly. “My flight doesn’t leave for 90 minutes.”

“That may well be the case,” she said, “but check-in for all Aer Lingus international flights is three hours before take off. You have missed the last call for your plane. You’ll have to see if you can get a later flight…which is, unfortunately, showing oversold at the moment.”

Arguing the case, no matter how politely, got me nowhere so I hustled myself over to the next queue (line) to see if I could get on my flight. Five minutes passed…my position in the queue wasn’t improving and my heart was beginning to pound like a jack hammer. You see Dear Readers, I was meeting my youngest daughter at summer camp on the other side of the Atlantic and I HAD TO GET ON THAT FLIGHT!!!!

No longer calm and smug but rather stressed and glowing sweating, I thought all was lost until an Aer Lingus supervisor called to me saying, “Today is your lucky day!” It turned out the man directly behind me in the last queue was also supposed to get on my flight and, since there were two of us who’d screwed up, they were going to do us a favour by getting us through security, immigration, and customs and onto the plane. “You’d better not do this again!”, my new friend and I were chastised.

Cruising through lines like the ancient Israelites passing through the Red Sea {thanks to Moses}, my friend and I struck up a conversation. Turns out he was delayed getting to the airport because of a problem at the car hire (rental) place. Hertz or Avis or another company was giving him a hard time and he wasn’t able to check-in before the dreaded “last calls”.

It was in the U.S. Customs line that we finally exchanged names and handshakes and I asked him what he did. “I’m a chef!”, he replied in a soft Irish accent.

Hmmm…a chef!…an Irish food blogger saved by an Irish chef!…sounds too good to be true.

“You’d better watch out,” I warned, “I may just have to interview you on the flight to Boston.”

My new friend chuckled, “If we make this flight, I’ll be happy to talk.”

As luck would have it, we made the flight and, what’s more, Aer Lingus sat us together. A captured interviewee: my day just went from bad to great! So, Dear Readers, without further adieu, it is my pleasure to introduce to you my seat-mate and good luck charm…Chef Fran Broadbery.

Plum Island Grill Food

Tempura Shrimp, Thai Seafood Stew, and Apple Tarte Tatin served at Plum Island Grille

Q. So, Fran, what can you tell me about your restaurant?

A. It’s called Plum Island Grille and it’s on Plum Island, a beautiful barrier island with a single drive road leading up to a picturesque “old school” restaurant. It’s about a half-hour north of downtown Boston.

Q. What kind of food do you serve?

A. Oh, Jaysus…really good food {laughter}. No, seriously, it’s Mediterranean, strong French, with a hint of Thai.

Q. That sounds delicious. How did the Thai part work its way in?

A. I met my wife in a Thai restaurant and I’ve always loved Thai food. I guess you could say I’ve always had a soft spot for Thai.

Q. Did you meet your wife in Thailand?

A. No…I met her in the Chili Club in Dublin.

Q. Oh, I remember that place…it is great.

A. Yea, I worked in the kitchen there as a dishwasher and a precook. Anna the chef, she was about 83 years of age, took me under her wing and taught me some of the tricks of making proper Thai cuisine. She was one of the best chefs I ever worked with in my life.

Q. You’re Irish but you live in America now…how did that happen?

A. When I was twenty-one, my then girlfriend moved home to America and I went to Europe to sow a few “wild oats” and learn more about food. I went from Barcelona to Scandinavia cooking for about a year. Food, fun, drink…but in the end, I missed my girlfriend and headed back to Dublin on Dec 21 and was in Boston by Dec 24th. Arriving in Boston on Christmas Eve blew my mind! My girlfriend and I drove up to New Hampshire on Christmas morning…something I’ll never forget…no one had ever told me how beautiful America is. I never expected it. I fell in love with the countryside immediately.

Q. Obviously your girlfriend was American. Did it work out?

A. Twenty-two years later, two boys, and a flying restaurant…it certainly did. My life is busy but good!

Q. What influence, if any, has your upbringing had on Plum Island Grille?

A. Ireland…not so much…my Mum…plenty. My mum was not a good cook but there are certain dishes of hers that I remember fondly and I’ve tried to recreate them at Plum Island Grill. There are dishes from the Irish sea and the Irish land: salted and smoked cod chowder, wild mushroom soup, perfectly boiled ham, and, oh my God, my mother’s scones. I can never replicate them but I do make them. So, I’d say Ireland itself isn’t much of a strong influence but my mother definitely is.

Q. Where did you go to school.

A. I started school in Wexford and then did two years of school in Tallaght. I only remember it as the fluorescent green school where there was a very pretty accounting teacher…and therefore I love accounting. I then went to Blackrock College for 5th year and on to Bolton Street for architecture and property management (real estate) and, finally, finished at Trinity College with a degree in architecture.

Q. From architecture to becoming a chef…how did that happen?

A. Architecture is the creation of something from scratch…food is very similar.

Q. You mentioned that you are one in a family of eighteen children! What was that like growing up?

A. I loved my childhood. It was hard. We were poor. We struggled. But, we built an amazing family bond that will never be broken. When I see my family now…even if it’s a year or two between visits…there is no awkwardness…it’s like we see each other every day. I’m floored by my family. Thank God for Viber!

Q. How often do you get back to Ireland?

A. At least once a year, if not twice.

Q. I have to ask…what’s it like to be married to an American…as you know…I am American and married to an Irish man.

A. Kathleen has never been like any other American I’ve known. If she was I probably wouldn’t have married her! {more laughter!} She is a mind-blowing woman on so many levels. Tall, dark, beautiful and elegant…amazingly witty…and yet sweet at the same time. I am challenged by Kathleen on a daily basis and for that I am very grateful. My life is never boring with her and it never will be. She wont’ let me rest on my laurels and I like it that way. She’s an interesting lady.

Q. One last question…what is your favourite thing to eat?

A. Pan seared John Dory over perfectly hand-whipped potatoes, julienned zucchini, carrot and summer squash, finished with a vanilla-orange guerre blanc.

Q. Mmmm…that sounds delicious. Ok, Fran…thank you very much for getting me on this flight today and for giving me this unexpected yet lovely interview! It’s been a pleasure.

A. It was an interesting way to meet you. I really enjoyed it too.

Note: If you’re in Boston, you can call into Plum Island Grill at 2 Sunset Blvd, Newbury, MA 01951. Phone: 978-463-2290. Website: http://www.plumislandgrill.com. Tomorrow I’ll post one of Chef Fran Broadbery’s recipes.

Irish Elderflower Cordial

At this time of year the hedgerows around Ireland are full of pink and yellow and white blossoms that are so very fragrant. It’s an absolute pleasure to walk around small country roads just to take in their lovely sweetness.

One flower in particular, the Elderflower, has me captivated. Growing like lace caps on a bushy green {and sometimes very tall} shrub, these gorgeous little flowers can be brewed with the simplest of ingredients to make a cordial (flavoured syrup) that is refreshingly delicious.

You may think it takes ages to make Elderflower cordial but it doesn’t. Five minutes or less picking the blooms and another five in the kitchen doing a bit of work, plus an overnight sitting under the canopy of a clean tea towel, and you’re done. Easy-peasy.

Elderflower cordial is a summer time staple in our Irish home. I am sure it will be the same in your home once you give it a try.

Wild Irish Elderflower Cordial

Ingredients

10-15 elderflower sprays, pick on a dry day and stay clear of plants close to the ground or in high trafficked areas

1 litre cold water

2lbs caster sugar

1 lemon sliced, skin scrubbed clean first

2oz citric acid (available at a chemist (pharmacy/drugstore)

Directions

1. After picking the elderflower sprays, turn upside down and give them a good sturdy shake to remove any bugs. Next, pick off any leaves, cut down the stems, and bring into the kitchen.

2. Put the water into a small saucepan and bring to a boil. Add the sugar and stir with a spoon until completely dissolved. Allow to cool to room temperature.

3.  Pour the sugar water into a large bowl. Add the elderflower sprays. Zest the lemon and add to the bowl. Slice the lemon and add to the bowl. Push the flowers and lemon slices under the sugar water and stir. Cover the bowl with a clean tea towel and leave for 24 hours.

4. Strain the mixture through a clean muslin cloth. At this point you may add the optional citric acid. Pour into a clean bottle, seal, and keep in the fridge until ready to use. We prefer a 1:6 ratio of elderflower cordial to sparkling water but you can serve it at whatever strength you prefer.

Notes: This cordial would be lovely added to a tall glass of crisp Prosecco, sparkling wine, gin or vodka.

Not every day is a good day In an Irish Home. Some days are average, some days are not so great, and some days are dreadful enough that we need a bit of heavenly help to make it through the hours.

Yesterday was one such day: a close family member was in hospital having surgery and, well, you know yourself, no operation is without its possible complications so there was a good deal of worry going round. While the clock ticked away quietly in the background and we waited for word from the Professor (surgeon), I did what any good Irish woman does in these situations…I started to pray.

Now don’t get me wrong…I am no Holy woman, or even a good Catholic for that matter, but I do have a strong sense of faith and I pray regularly. For the most part, my prayers are of a conversational nature…”Hello God…it’s me…again!” or “Thank you, Lord, for the parking space near the shop door!” Other times, however, I need the comfort of a traditional prayer or set of prayers to calm my heart and mind and, in those moments, I turn to the old Catholic standby…the Rosary.

To those unfamiliar with the Catholic Rosary, it is an instrument of prayer and mediation. It’s real purpose is to allow a person to mediate on the mysteries of Christ’s life. I, however, like to use the Rosary to centre my mind and bring myself and/or my problems closer to God.

A Rosary consists of four Mysteries (the Joyful, the Sorrowful, the Glorious, and the Luminous), and each of these Mysteries is broken into five “Decades”, representing an event in the life of Jesus. Each Mystery is assigned to a different day of the week. For example: the Joyful Mysteries are prayed  Monday and Saturday; the Sorrowful Mysteries on Tuesday and Friday; The Glorious Mysteries on Wednesday and Sunday; and the Luminous (also known as the Mysteries of Light) on Thursday. Also, as you can see from the diagram below, a Rosary is broken up into various prayers:.

Diagram for saying the Rosary

Diagram for saying the Rosary

To begin praying the Rosary, one starts by making the Sign of the Cross (saying “In the name of the Father, and the Son, and the Holy Spirit. Amen.”) and then reciting the Apostles’ Creed. Next, one prays the Our Father, three Hail Marys, and a Glory Be to the Father on the beads connecting the crucifix (cross) to the rest of the beads. Then begin the Mysteries: start by announcing the Mystery, followed by announcing the first Decade of the Mystery. Pray one Our Father, ten Hail Mary’s, and one Glory Be to the Father and follow this with the Fatima prayer. Announce the next Decade and recite the same thirteen prayers (one Our Father, ten Hail Mary’s, one Glory be to the Father, one Fatima prayer again and then do it three more times (for a total of five times). Finally, there is one last Our Father, Hail Mary and  Glory Be, and a concluding prayer of the Hail Holy Queen prayer and the Sign of the Cross.

For anyone interested in praying the Rosary, below I’ve written out the four Mysteries and their Decades, the Fatima prayer, the Hail Holy Queen prayer and an extra prayer to the Hail Holy Queen that my mother-in-law always says when she says the Rosary. And, just to finish off this post, the surgery went well and the patient should be home tomorrow mid-day…thank God!

Prayers of the Rosary

Sign of the Cross: In the name of the Father, and the Son, and the Holy Spirit. Amen.

Apostles’ Creed (your version may be different depending on when you learned it and where you’re from): I believe in one God, the Father Almighty, Creator of heaven and earth; and in Jesus Christ, His only Son, our Lord: Who was conceived by the Holy Spirit, born of the Virgin Mary; suffered under Pontius Pilate, was crucified, died and was buried. He descended into hell; the third day He rose again from the dead; He ascended into heaven, is seated at the right hand of God the Father Almighty; from thence He shall come to judge the living and the dead. I believe in the Holy Spirit, the Holy Catholic Church, the communion of Saints, the forgiveness of sins, the resurrection of the body, and life everlasting. Amen.

Our Father: Our Father, Who art in Heaven, hallowed be Thy name; Thy Kingdom come, Thy will be done on earth as it is in Heaven. Give us this day our daily bread; and forgive us our trespasses as we forgive those who trespass against us; and lead us not into temptation, but deliver us from evil. Amen.

Hail Mary: Hail Mary full of Grace, the Lord is with thee. Blessed are thou among women and blessed is the fruit of thy womb Jesus. Holy Mary Mother of God, pray for us sinners now and at the hour of our death Amen.

Glory Be to the Father: Glory be to the Father and to the Son and to the Holy Spirit. As it was in the beginning is now, and ever shall be, world without end. Amen.

Fatima Prayer: O My Jesus, forgive us our sins, save us from the fires of Hell and lead all souls to Heaven, especially those who are in most need of Thy mercy.

Hail Holy Queen: Hail, holy Queen, Mother of mercy, hail, our life, our sweetness and our hope. To thee do we cry, poor banished children of Eve: to thee do we send up our sighs, mourning and weeping in this vale of tears. Turn then, most gracious Advocate, thine eyes of mercy toward us, and after this our exile, show unto us the blessed fruit of thy womb, Jesus. O clement, O loving, O sweet Virgin Mary! Amen.

Pray for us, O holy Mother of God. That we may be made worthy of the promises of Christ.

Let us pray.

O God, whose only-begotten Son, by his life death and resurrection, has purchased for us the rewards of eternal life; grant we beseech you, that meditating on these Mysteries of the most holy Rosary of the Blessed Virgin Mary, we may both imitate what they contain, and obtain what they promise, through the same Christ our Lord. Amen.

The Four Mysteries and Their Decades

The Joyful Mysteries & Its Five Decades

1. The Annunciation – Mary is visited by the Angel Gabriel and asks her if she will be the Mother of the Saviour.

2. The Visitation – Mary visits her cousin Elizabeth who says, “Hail Mary, full of Grace, the Lord is with thee.”

3. The Nativity – Jesus is born.

4. The Presentation – Mary and Joseph present Jesus at the Temple after his birth to present him.

5. The Finding in the Temple – Mary and Joseph find Jesus in the Temple discussing his faith with the Elders.

The Sorrowful Mysteries & Its Five Decades

1. The Agony in the Garden – The thought of our sins and His coming suffering causes the agonizing Savior to sweat blood.

2. The Scourging at the Pillar –  Jesus is stripped and scourged until His body is one mass of bloody wounds.

3. The Crowning with Thorns – Jesus’s claim to kingship is ridiculed by putting a crown of thorns on His head and a reed in His hand.

4. The Carrying of the Cross – Jesus shoulders His own cross and carries it to the place of crucifixion while Mary follows Him sorrowing.

5. The Crucifixion – Jesus is nailed to the cross and dies after three hours of agony witnessed by His Mother.

The Glorious Mysteries & Its Five Decades

1. The Resurrection –  Jesus rises from the dead on Easter Sunday, glorious and immortal, as He has predicted.

2. The Ascension – Jesus ascends into Heaven forty days after His resurrection to sit at the right hand of God the Father.

3. The Descent of the Holy Spirit – Jesus sends the Holy Spirit in the form of fiery tongues on His Apostles and disciples.

4. The Assumption – Mary, having completed the course of her earthly life, is assumed body and soul into heavenly glory.

5. The Crowning of Mary – Mary is crowned as Queen of heaven and earth, Queen of angels and saints.

The Luminous (also known as the Mysteries of Light) & Its Five Decades

1. Baptism in the Jordan – God proclaims that Jesus is his beloved Son.

2. Self-manifestation at the wedding of Cana – At Mary’s request, Jesus performs his first miracle.

3. Proclamation of the Kingdom of God, with His call to conversion – Jesus calls all to conversion and service to the Kingdom.

4. The Transfiguration – Jesus is revealed in glory to Peter, James, and John.

5. Jesus’ institution of the Eucharist – Jesus offers his Body and Blood at the Last Supper.


Related Articles: 

To hear the Rosary said in Irish, please go to Coróin Mhuire

The Rosary in Irish (Gaelic) over at Catholic Online

Rosary ideas for kids on Pinterest here

The Rosary as a Tool for Mediation at Loyola Press

How to Say the Rosary at EWTN