In a world of fake news…it’s hard to know the truth. So it is with some skepticism that I write today that Jamie Oliver may be retiring. For years, Britain’s cheeky, yet charming, celebrity chef has been talking about wanting to spend more time with his wife and five children. Thus far, however, he’s continued turning out fabulous cookbooks and good tv shows, all the while teaching the world to eat more healthily and mindfully.
I have been a big fan of Jamie Oliver for years, partly because I love his ease with food and recipes and also…strange as it may seem…because he reminds me of my younger brother. Both men are kind-hearted, popular with women, great with kids, teachers of many, and they love to cook. Funny enough…about a year before Jamie Oliver made it big, I said to my little brother…”you should write a cookbook for guys…with all your talk of a handful of this, a bunch of that…you don’t measure anything…you cook from the heart”. Who knew this laid back style of cooking would take the world by storm?
Anyway, if the news is true, I doubt he’ll be gone from the spotlight for long. At 42, Jamie’s got a lot of years ahead of him to share his genius.
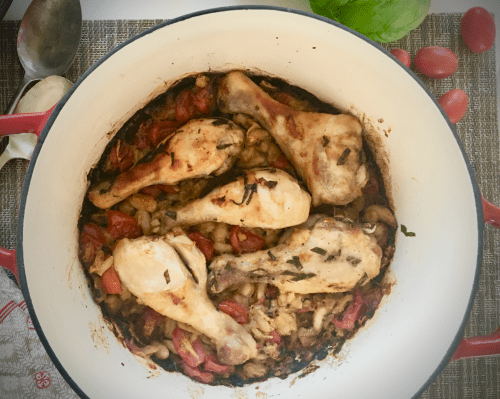
Speaking of genius…today’s blog post for Tender & Crisp Chicken Legs with Sweet Tomatoes is quite simply…amazing. It has been one of my go-to dishes for the longest time. What makes it such a star is how you literally, in Jamie’s words, chuck everything into a pot and whack it into the oven. Then you can go and do something for 90 minutes and when it’s done you’ll have a feast to feed the family.
This dish is so good, it doesn’t need tweaking and it is so beautiful that you’ll be proud to present it at a dinner party along side a crusty loaf of bread and a big garden salad. Some might say this is a summer-time dish, but I think it’s perfect on these cold, dark, winter nights. Enjoy!
Jamie Oliver’s Tender & Crisp Chicken Legs with Sweet Tomatoes
Serves 4
Ingredients
4 higher-welfare chicken legs, jointed
sea salt
freshly ground black pepper
1 big bunch fresh basil, leaves picked, stalks finely chopped
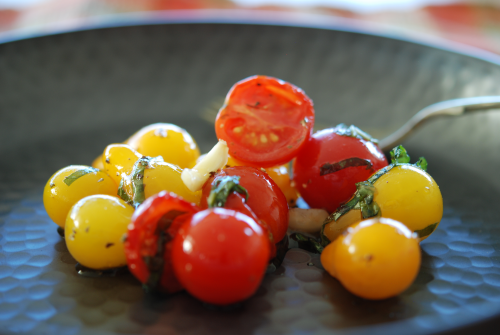
2 big handfuls red and yellow cherry tomatoes and ripe plum or beefsteak tomatoes, cherry tomatoes halved, plum tomatoes quartered
1 whole bulb garlic, broken into cloves
1 fresh red chile, finely chopped {I use a pinch of dried chile flakes}
Olive oil
One 14.5-ounce/410g tinned cannelini beans, drained and rinsed, optional
2 handfuls new potatoes, scrubbed, optional
Directions
1. Heat your oven to 180°C/350°F/gas mark 4. Season your chicken pieces all over and put them into a snug-fitting pan in one layer.
2. Throw in all the basil leaves and stalks, then chuck in your tomatoes.
3. Scatter the garlic cloves into the pan with the chopped chile and drizzle over some olive oil. Mix around a bit, pushing the tomatoes underneath.
4. Place in the oven for 1½ hours, turning any of the exposed tomatoes halfway through, until the chicken skin is crisp and the meat falls off the bone.
5. If you fancy, you can add some drained cannelini beans or some sliced new potatoes to the pan and cook them with the chicken. Or you can serve the chicken with some simple mashed potato. Squeeze the garlic out of the skins before serving. You could even make it part of a pasta dish – remove the chicken meat from the bone and shred it, then toss into a bowl of linguini or spaghetti and serve at once.
Additional Notes, Related Articles & Credit:
* For another delicious, easy to make, chicken dish…please see my friend Linda McCaffrey’s gorgeous chicken casserole. It’s another one pot dish I think you’ll love.
Read Full Post »


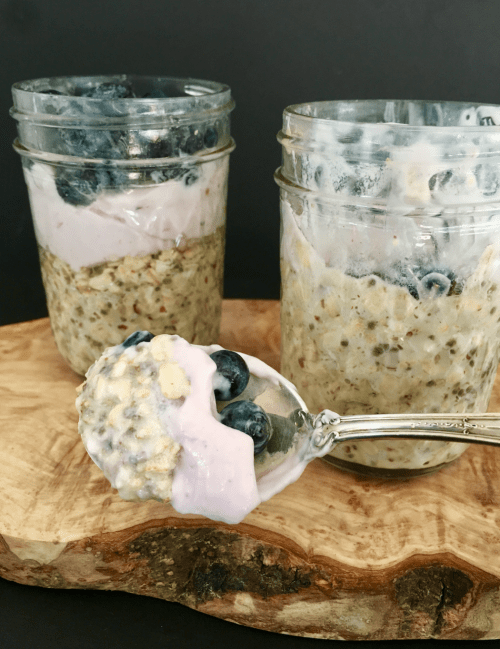
 Overnight porridge {oatmeal} is a familiar thing in our Irish home. To make, I bring a pot of steel cut oats, covered in water, to the boil and then turn off the heat and leave overnight. In the morning, I add a little extra water to the oats, give them a quick stir and reheat. This recipe couldn’t be simpler to make.