Feeds:
Posts
Comments

Posts Tagged ‘Irish Food Blog’

IMG_0061

For weeks I’ve been playing a game of “Watch and Wait” with mother nature. Whether on a walk in the countryside or a drive into town, I have been watching and waiting patiently for the blackberries ripening in the hedgerows near our home to be ready for picking.

Blackberries

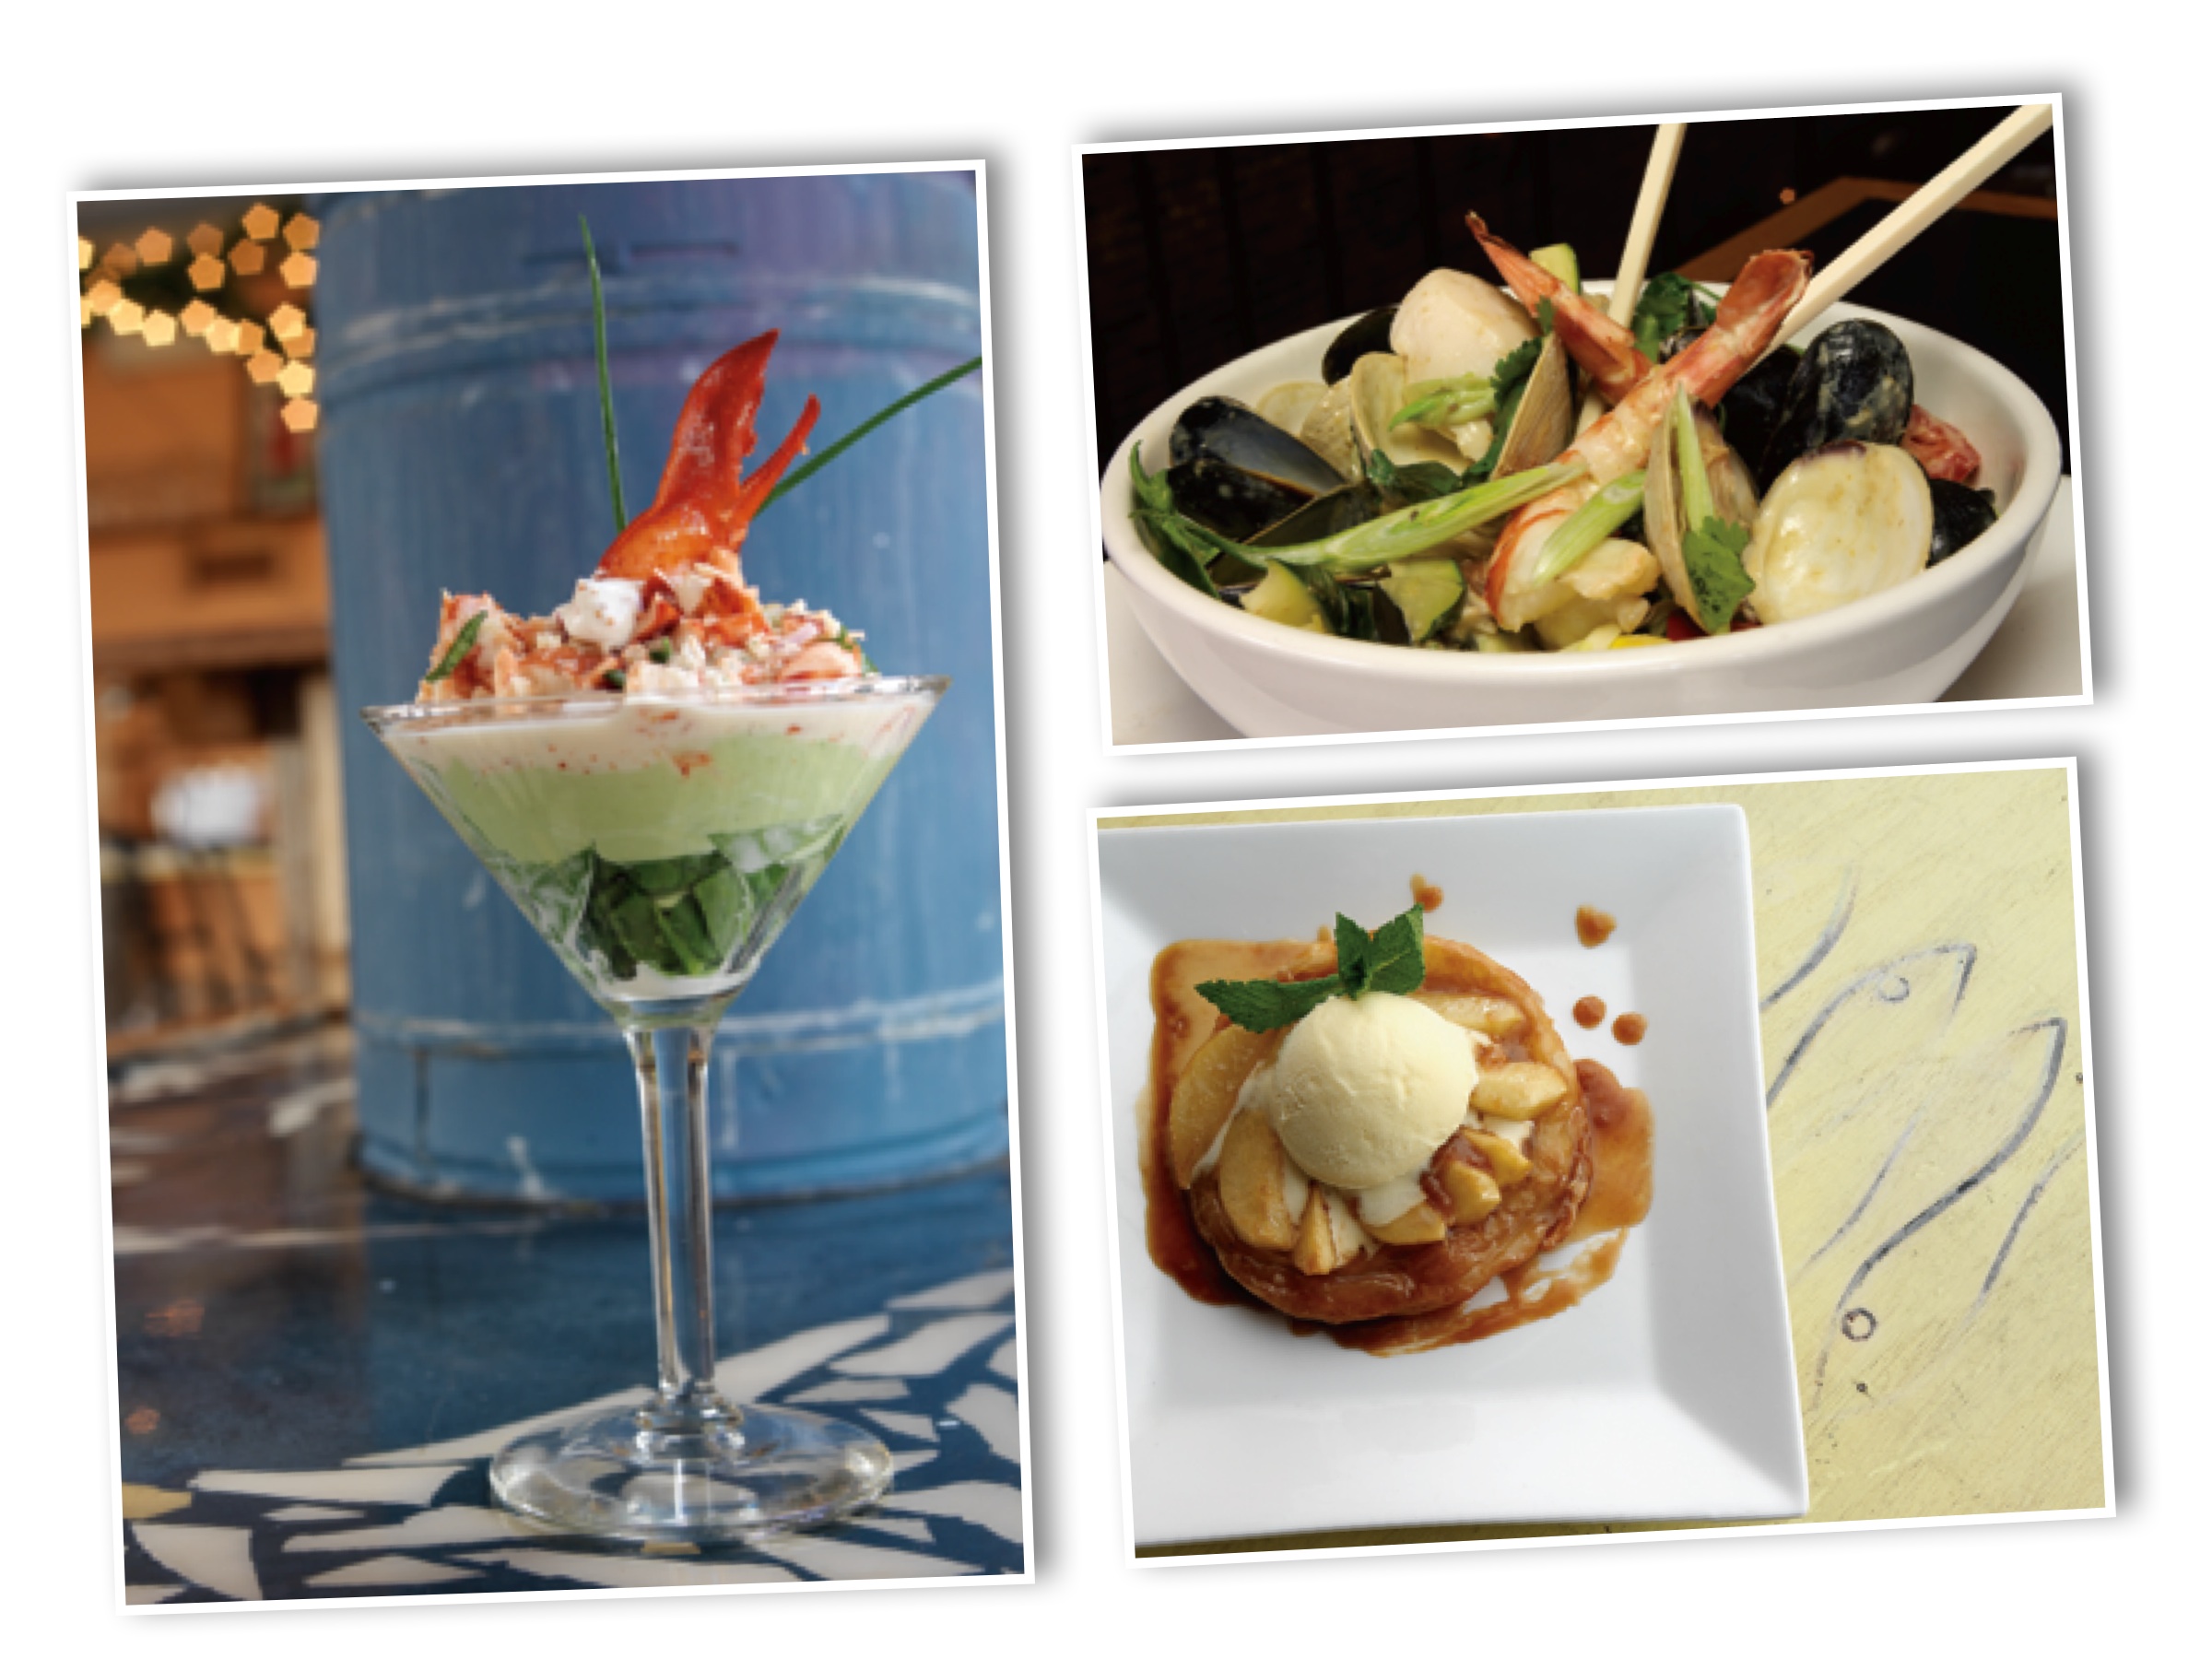
While the berries have morphed in colour from green to red to a deep black-purple, I’ve been daydreaming about the many things I might make: scones, jam, cobbler, sorbet, ice cream, flavoured vinegar, even a blackberry whiskey concoction. It seems the list of things to do with blackberries is endless!

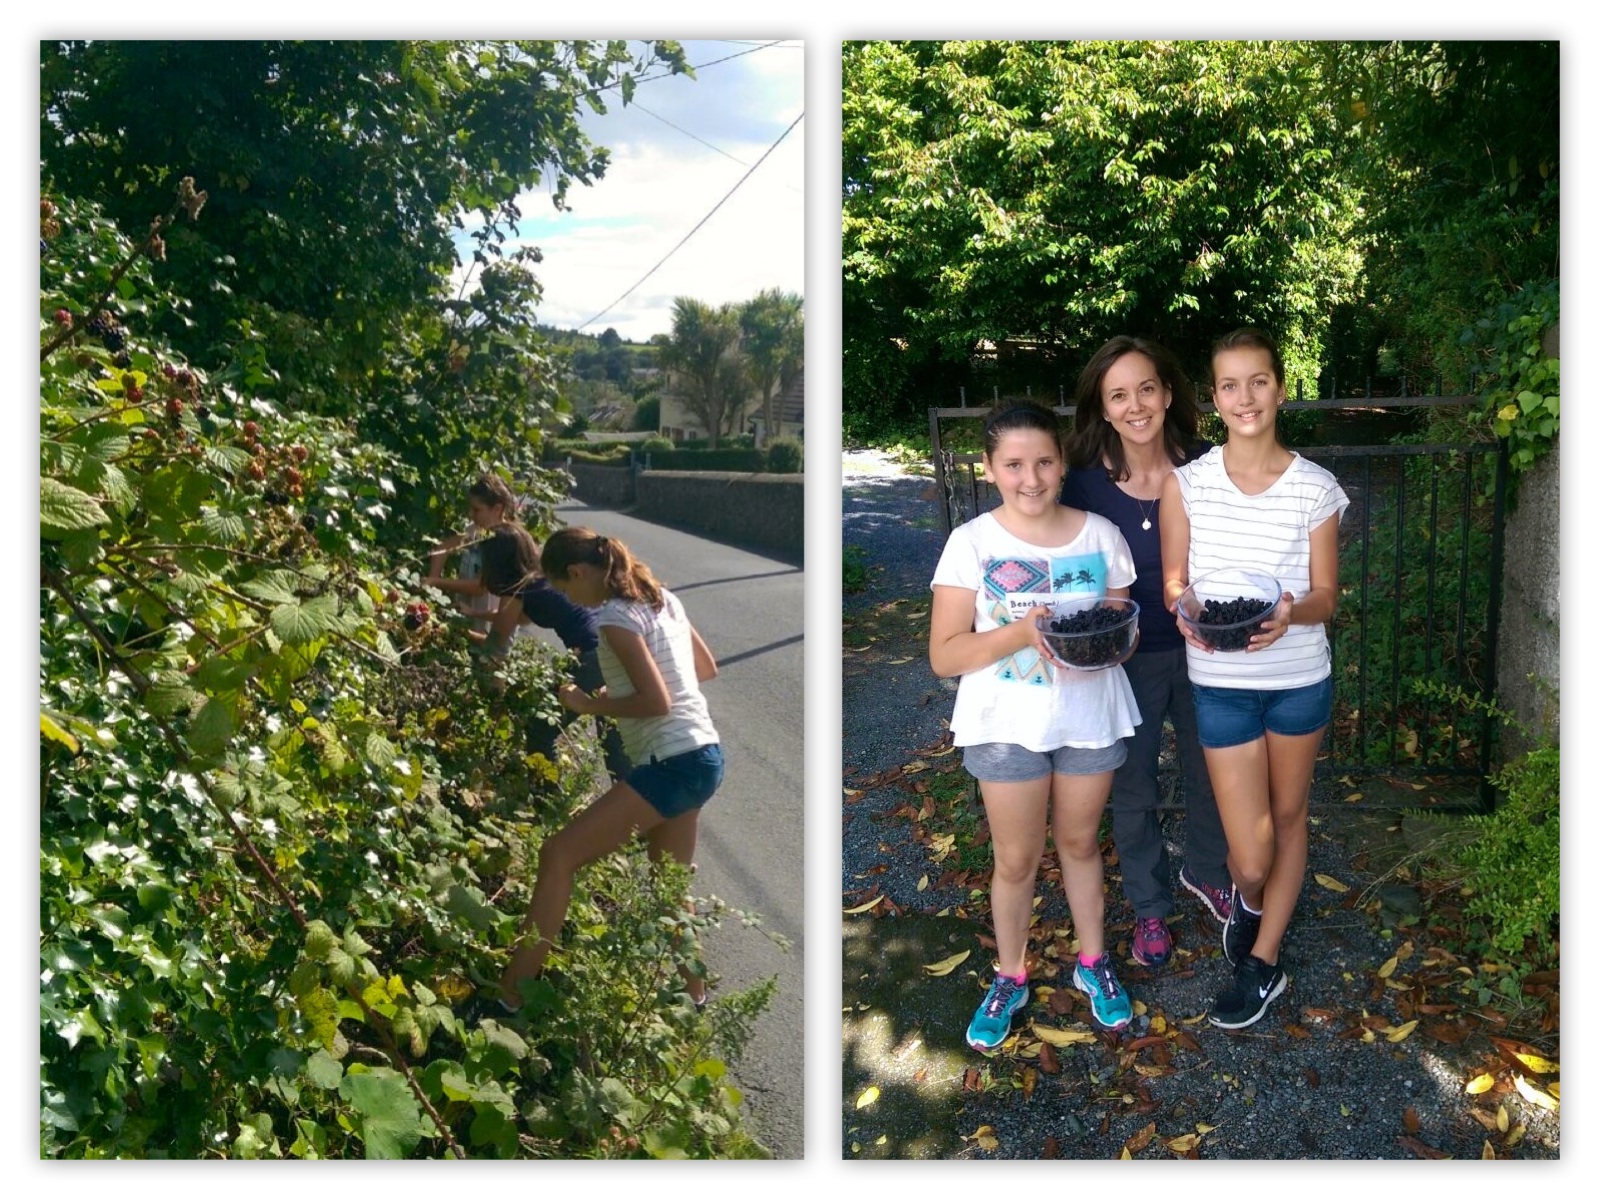
Finally, last weekend, I could wait no more. Truth be told…I nearly crashed my car last Thursday for looking at the berries ripening in the summer sun. I invited my friend Susan and her daughter Ellen to join my younger daughter and me for a morning of picking wild blackberries. It may not be true, but I have in my mind that it’s best to pick fruit and vegetables in the morning, when the energy of the earth is surging through a plant. So, with our bowls in hand, we four girls headed down the road to a hedgerow that was bursting with berries. When we’d picked it clean, we spotted more in a nearby field and, with the farmer’s permission, we hopped the gate and picked until our hearts’ were content. (My daughter did keep saying, “Mom we have to leave some for the birds!”)

Blackberries 2

Wild blackberries have been eaten in Ireland since Neolithic times. They come in many forms, possibly even several hundreds of micro species. Some are small and mean-looking, others fat and plump. None resemble the large, mostly tasteless, perfect triangle-shaped berries found in the supermarket. Packed with fibre and antioxidants, blackberries are a rich source of vitamin C and, best of all, when picked at their peak of ripeness, wild Irish blackberries are gorgeously delicious.

In no time at all, we girls were scraped and prickled by the thorny bushes and our fingers were stained red-pink from the sweet berry juice. We didn’t mind, however, as we were happy to have our bowls filled to the brim with nature’s bounty and countless ideas for what to do with them running through our heads.

Picking blackberries is a rite of passage in Ireland and I’m so glad to be able to share in this tradition with my daughters and our friends. I hope you and yours find time to enjoy a blackberry picking expedition of your own this year too!

IMG_9883

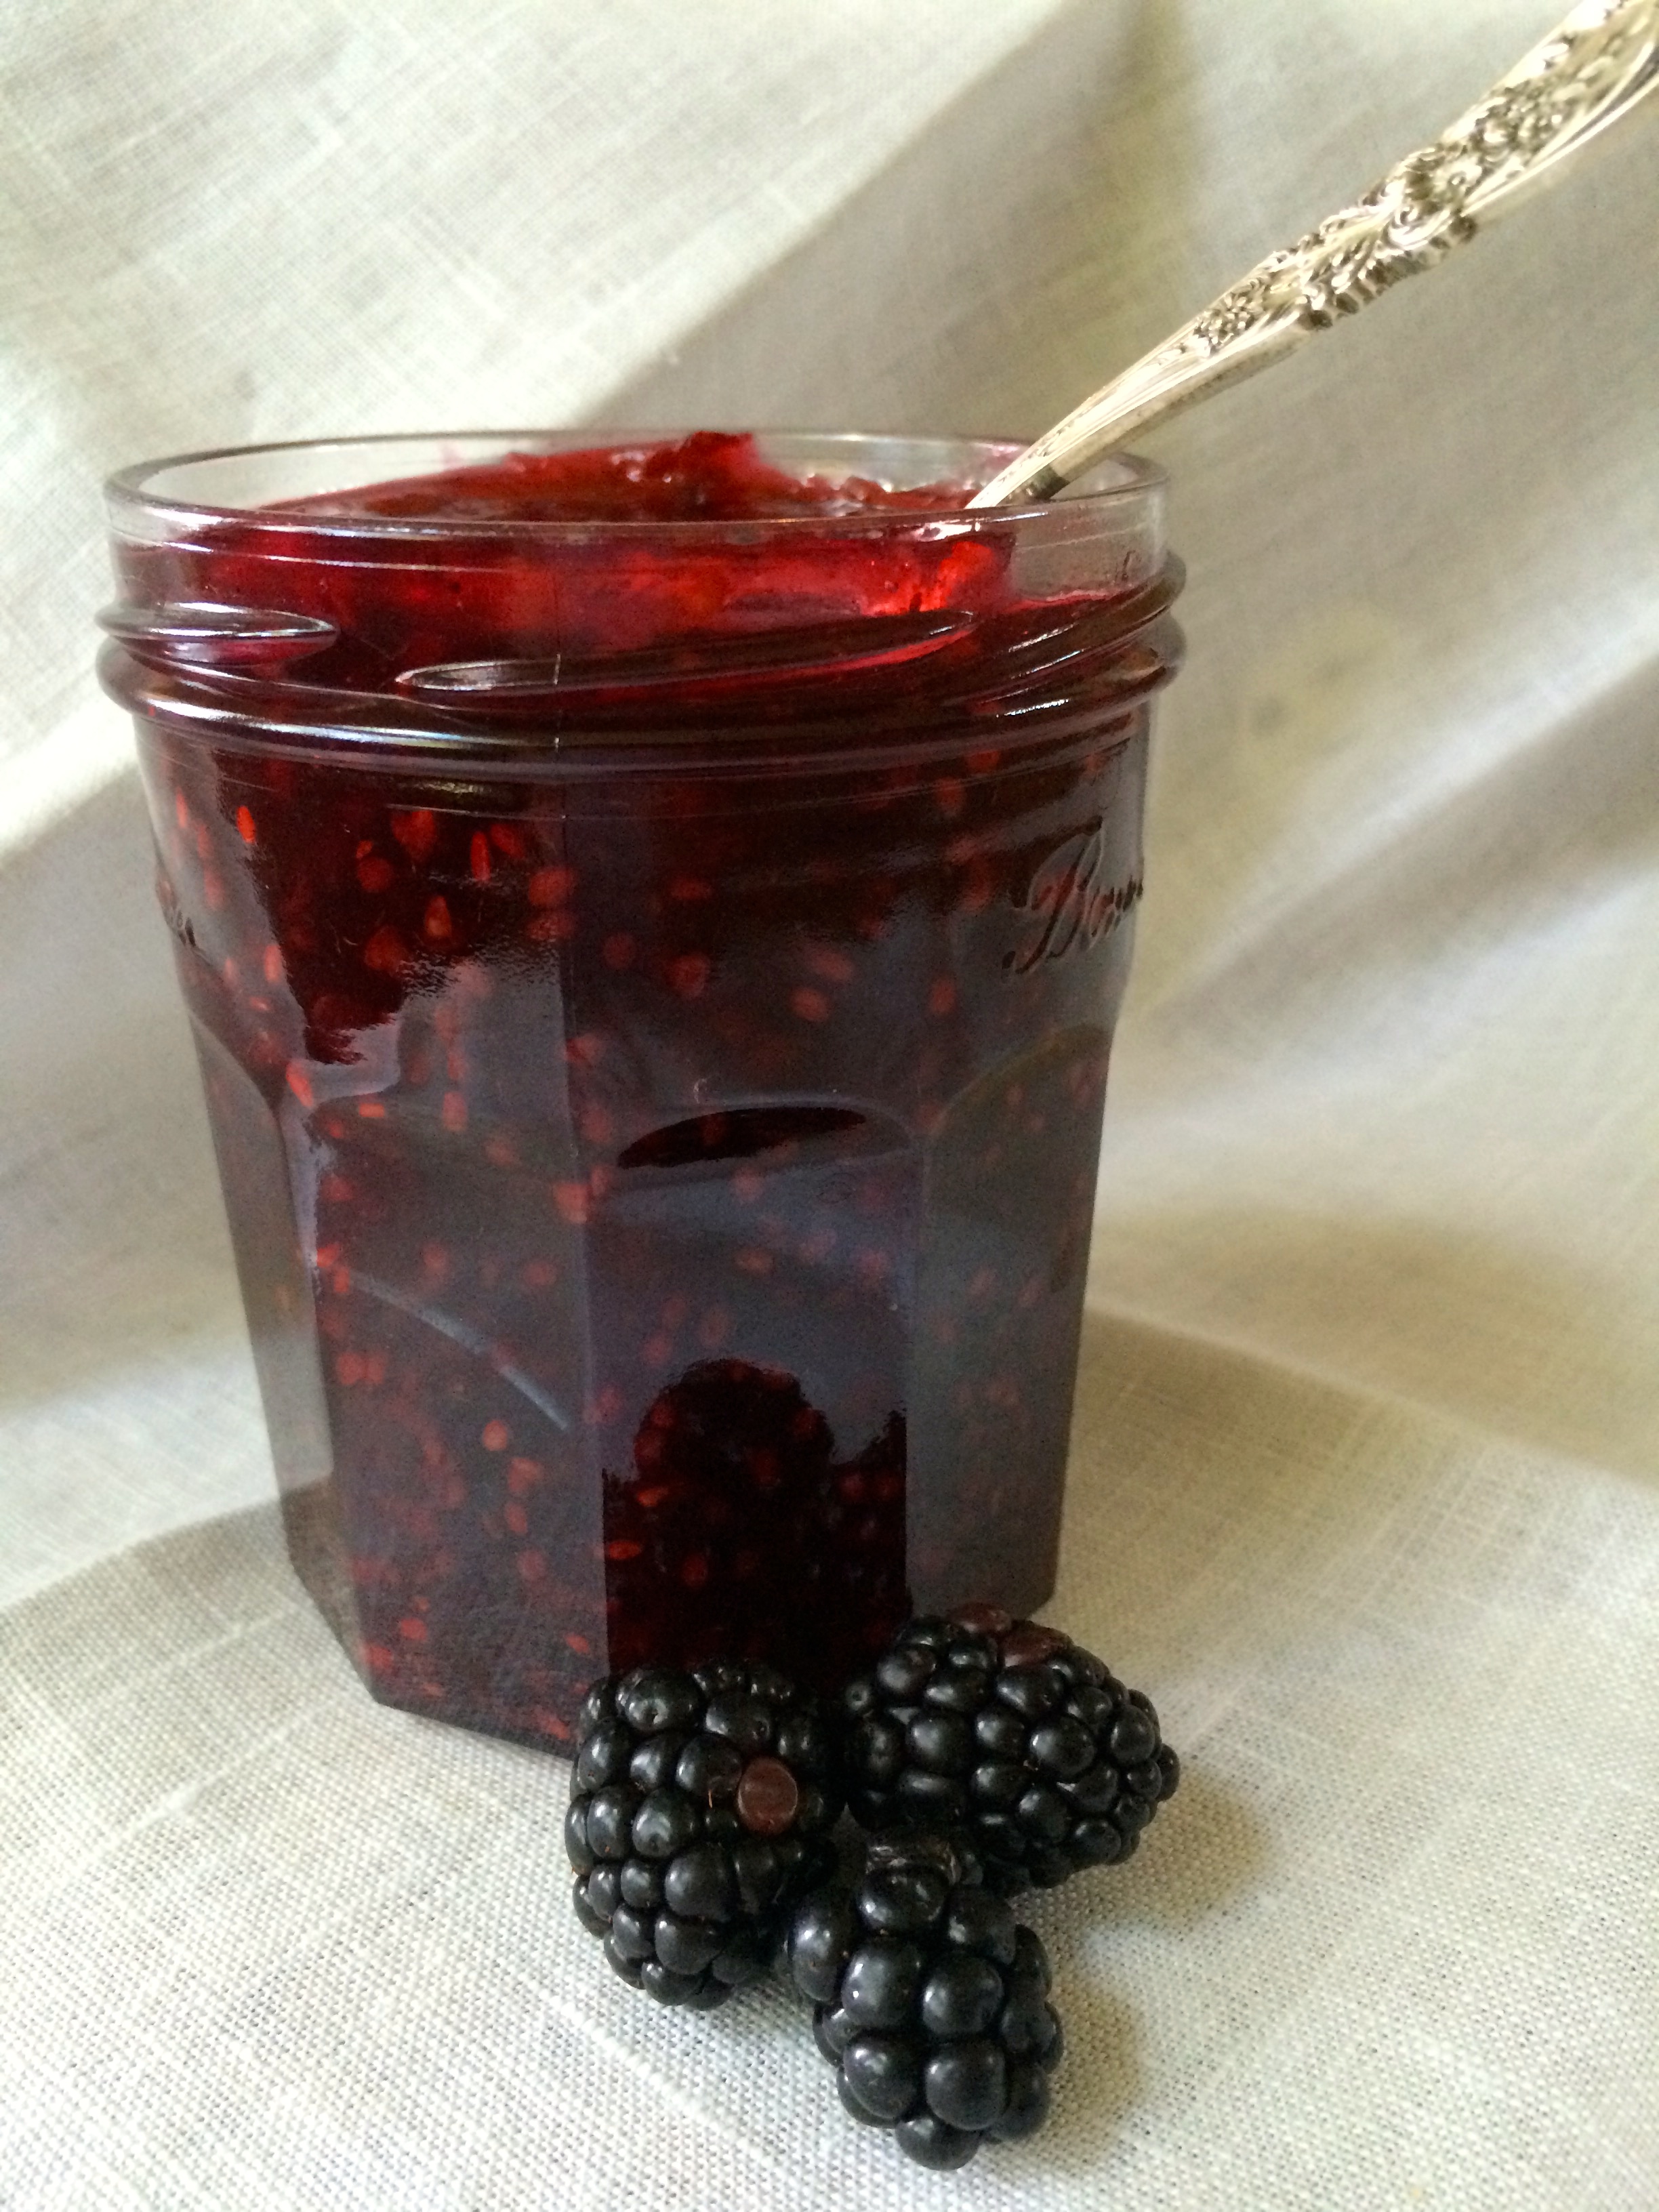
Classic Irish Blackberry Jam

Makes 4 x 250ml jars

Ingredients

1kg/2 lbs Sugar
1kg/2 lbs Blackberries
Juice and zest of one lemon

Directions

1. Place a salad plate in your freezer. This will be used to test whether or not your jam is ready later.

2. Place sugar, blackberries and juice and zest of one lemon in a large pot.

3. Bring the mixture to the boil, stirring until all the sugar dissolves.

4. If you like whole berries in your jam, stir occasionally and cook for approximately 15 minutes. If you like your jam with the berries crushed, use a potato masher to crush the berries and continue cooking as previously directed.

5. While the berries are cooking, put clean glass jars and lids into a large pot and cover with water. Bring to the boil, then turn the heat down and simmer the jars and lids to sterilize.

5. When the 15 minutes are up, take the plate out of your freezer and drop a dollop of hot jam onto it. Let the jam cool for a few minutes on the plate and then, with your finger, push a bit of the jam up towards the middle to see if it “crinkles”. If it does, the jam has set and you are ready to bottle it. If not, continue to boil for another 5 minutes, then test again.

6. Remove from the heat and carefully transfer to hot, dry, sterilized jars. Fill them as near to the top as possible. Cover each with a disc of wax paper and seal tightly with a lid. Keep in a cool dark place for up to 12 months.

Notes:

* If the jam doesn’t set after cooling and potting, tip it all back into the pan and boil again, adding the juice of a small lemon.

* If mould develops on the surface of the jam in a jar, remove it with a spoon, along with about half an inch (1 cm) of the jam underneath…rest assured, the rest of the jam will not be affected…and place a waxed disc dipped in brandy on top.

Additional Reading:

Irish Blackberry Ripple Ice Cream over at Irish Food Guide blog.

If you’re musically inclined, visit 8Notes.com to hear The Blackberry Blossom song, an Irish folk song.

The golden rules for picking blackberries can be found here at Good Food Ireland’s website.

For a wee bit of folklore regarding Irish blackberries visit the Irish Cultures & Customs website.

Seamus Heaney, Irish poet, playwright, lecturer, and recipient of the 1995 Nobel Prize in Literature, wrote a poignant poem about blackberries…you can read it here.

It may be called “English’s Fruit Nursery Ltd“, but you can buy blackberry plants from this company in Enniscorthy, Co. Wexford!

Check-out these gorgeous looking Blackberry and Custard Doughnuts over at Donal Skeehan’s website…I may just have to try these and report back!!

Visit here for a video on how to test jam from BBC Good Food.

Read Full Post »

Two moms talk about teen anxiety over a cup of tea and a side of caramels.
Recently my friend Niamh and I spent a few hours catching up over a cuppa and some homemade caramel. As you do, we talked about life: our homes and gardens, the people we know, and our children. It’s when we were talking about our children that Niamh said…

“You know…they need to kill-us-off in order to grow up.” 

And for about an hour we talked about what she meant. She’s no stranger to teens, my friend Niamh. She has three and she is surviving. I, on the other hand, have only one at the moment and, some days, am barely hanging in there.

Don’t get me wrong, we have our moments of greatness. But for the past year-and-a-half, those are becoming “occasions” and not “the norm”. What happened to my sweet girl with the great belly laugh, who used to say, “thank you” and “I love you” and “look what I made for you Mama!”?

I miss that girl.

Sometimes I secretly wonder if she’s been abducted by aliens in the middle of the night and replaced with a girl who looks like ours but is often surly, angry, insensitive, self-centered, and entitled.

In the past year I have thought “is it us?”…have we done something to change her? Are we too controlling? Have we become her bully…always passing judgement on the way she looks, how much time she spends on social media or how she never seems to buckle down and just get her flippin’ homework done at night?

Screen Shot 2015-01-19 at 8.40.44 AMThanks to Niamh, I am starting to look at our teen angst differently: they need to kill-us-off in order to grow up. Clearly we’re not talking about grab the kitchen knife and stab us in the heart kind of “killing”. We’re talking about the “separate themselves from us” kind. Either way, it is slow and painful for us. And, in reality, it’s not fun for them either. In pushing us away…our teens oscillate between wanting their independence from us and wanting to depend on us, which makes for an intensely confusing time.

Case in point…the other day our daughter was complaining about 1) not being able to find her gloves; 2) having to get up at 6am for school; 3) sharing a bathroom with her younger sister; and 4) being forced to eat a hot home-cooked breakfast before going to school…all this grief before 7am. Then, in the car, she says to me, “Mom, I wish I could go back to being young again so I didn’t have so much responsibility.”

I didn’t know whether to laugh or to throw my arms around her and give her a cuddle. She’s up before the sun, faces a tough day at school, plays sport, comes home after dark, and then has at least two to three hours of homework. On the weekend, she’s got more sport and more homework. Thanks to peer pressure and social media…she’s also got to stay up-to-date with Instagram, Tumblr, Snapchat and Vine. My husband and I think she’s relaxing when she’s looking at her computer but, in reality, she’s scanning those pages much the same way we scan The Irish Times, The Sunday Business Post, The New York Times and The Wall Street Journal. It’s fun but it’s also work.

Screen Shot 2015-01-19 at 8.34.37 AMKilling us in order to grow up…that’s what our teens are doing. If we want to keep our teens close in the years ahead, we’re going to have to pick our battles. I don’t mind telling you that I sought out some professional help on this one. My recent visit to a therapist taught me that we need to decide what we want in the long run. Do we want our kids leaving home one day “thankful to be gone” or “looking forward to calling in”? The other piece of advice I was left with is this: let them fail…let them make mistakes. Sounds simple but it bloody well isn’t!

Our daughter goes to a fee paying school and I can tell you that when she chooses to blather away an hour rather than study for an important test…I see red! When she doesn’t turn in a homework assignment or paper she’s completed because she’s forgotten to put it in the right place and she can’t put her hand on it…I feel frustrated by her disorganization!! When she’s roaring and shouting at me because she can’t find something in her room in the morning (because it looks like a nuclear bomb went off)…I want to shout back…”THEN CLEAN YOUR ROOM WHEN YOU GET HOME!!!” None of these reactions are helpful to her or me.

My friend Moe recently said to me…”When my son gets frustrated and starts shouting, I imagine that we’re at the train station, walking along the platform. His destination is Crazy Town and I don’t have to get on the train with him. I can let him climb aboard and wave to him from the safety of the platform.” I like this imagery. Now, when our daughter starts getting puffed up and cross, I try to remember what Moe said…she’s headed to Crazy Town and I don’t have to go.

Screen Shot 2015-01-19 at 9.00.10 AMRaising a teen…be it a son or a daughter…is not easy. I think it’s helpful to realise these years are not easy for them either. In the heat of the moment, let’s remember why they are killing us off (hint: they have to grow up)…and be sure to pick our battles carefully (so what if his/her room is a mess)…and stay focused on what we want our relationships with them in the future to be like (positive and loving)…and let them fail (failure leads to success)…and, finally, remember the phrase “Next stop Crazy Town” (you don’t have to get on board too!). Then and only then will we all survive in one piece. Lastly, be thankful for dear friends who remind us that, though it may kill us, our kids will grow up. Now…where are those caramels?

Vanilla Caramels

Ingredients

225g (8oz) salted butter

225g (8oz) granulated sugar

4 tablespoons treacle or golden syrup (light corn syrup)

1 teaspoon vanilla

400g (14oz) tin of condensed milk

8x12in baking sheet, lined with parchment paper

Directions

1. Line baking sheet with parchment paper and set aside.

2. Melt the butter is a heavy-bottomed saucepan (about 8″ wide) over a medium-low heat.

3. Add the sugar and then add the treacle or golden syrup.

4. Add the vanilla and stir until well mixed.

5. Add the condensed milk and stir constantly until the caramel is a rich golden brown colour. To know if the caramel is done cooking, use a candy thermometer. When the temperature reaches 118ºC/245ºF, you’re done. To confirm, fill a small glass with ice cold water and drop a tiny amount of the hot caramel syrup into the water. Pull the cool caramel from the water and check the consistency. The caramel should be firm but pliable.

6. Carefully pour the hot caramel syrup onto the baking sheet. Using an off-set spatula, quickly spread the caramel syrup to desired thickness. Let cool completely.

7. When caramels are cool, lift them off the baking sheet and onto a cutting board. Cut the caramels into candies with a sharp knife. If the caramels stick to your knife, spray your knife with nonstick cooking spray.

8. Wrap the caramels in wax paper a little longer than the caramels, twisting the ends to close. Caramels will keep at room temperature for about two weeks.

Additional Notes, Related Articles & Credit:

1. 15 Sites and Apps Kids are Heading to Beyond Facebook from Common Sense Media.

2. Teen drama overload article at NPR.org.

3. Irish Whiskey Salted Caramel Recipe at Cheese and Chocolate

4. This New York Times article that came out on October 11, 2017 is brilliant: though, having been in the trenches as long as I have, it could have gone into even more depth. It’s well worth your time to read it, however.

5. Have Smartphones Destroyed a Generation is another recent article, from The Atlantic, that is worth reading. And, this continuing conversation over at NPR.org with the author of The Atlantic article, Jean Twenge, is good too.


Read Full Post »

In our Irish home we believe there’s something magical about receiving a gift at Christmas that has been lovingly made by someone you know. Which is why we make edible handmade treats every year to give close friends, neighbours and teachers.

DSC_0005

These “Naughty & Nice” sweet treats are sure to make our friends smile this year (clearly the Irish Cream Liqueur is for adults only!). The granola recipe, originally posted here at In an Irish Home, was modified slightly: we added several handfuls of dried red cranberries to give it a real Christmassy-look. The Irish Cream Liqueur recipe, passed down by my father-in-law, Dan McGuire, is amazingly good and may be found at the end of this post.

And who doesn’t love an authentic Irish Shortbread Biscuit? With the addition of some gorgeous crystalised ginger, they’re perfect this time of year with a freshly brewed cup of tea. The recipe may be found here.

DSC_0410

Once tasted, I dare anyone to say they don’t love these Irish Mars Bars treats! Not only are they incredibly “moreish”, they are super easy to make. Even better, there’s no baking required. The recipe, posted at In an Irish Home, may be found here.

DSC_0048

Guinness Gingerbread is something we can’t get enough of in our Irish home. The ginger, cinnamon, cloves and nutmeg really smell like Christmas. Wrapped simply in some parchment paper and tied with a festive red bow, this is the perfect Irish edible gift.

DSC_0010

And finally, these Rocky Road Biscuits, which I first shared with you two years ago, are totally delicious and give off a real Christmas vibe if you grate in a bit of orange zest and top with a drizzle of melted white chocolate. They are an Irish childhood favourite and sure to be enjoyed by whomever you make them for.

Now, with less than a week to go before Christmas day, we wish you and your loved ones some very happy times in the kitchen ~ slan abhaile!

Dan McGuire’s Irish Cream Liqueur

Ingredients

14oz condensed milk

14oz evaporated milk

1 1/2 teaspoon coffee essence (or 1 teaspoon instant espresso)

1 teaspoon glycerine

6oz/3/4 cup Irish whiskey

Directions

1. Mix all the above ingredients in a large measuring cup and stir with a small whisk until well blended.

2. Put into clean, sterilised, glass jars, close and store in the fridge.

Related Articles:

Darina Allen’s delicious homemade edible gift ideas here.

Donal Skehan’s blog post on edible Christmas gives may be read here.

This Irish Times article on edible gifts from 2011 is still very useful.

An Edible Ireland blogpost on Chocolate Bark with Almonds & Candied Bacon was reviewed at I Can Has Cook? These are two great Irish food blogs!

Ireland’s Catherine Fulvio, of Ballyknocken House, offers this Almond Liqueur recipe and delicious brownie recipe to her readers this year.

Check out those free, downloadable, gifts tags here and here and here to use with your homemade edible gifts.


Read Full Post »

Mincemeat pies. If there’s anything that says Christmas in our Irish home it is these buttery-rich, sweet, MEAT-less wonders. Yes…it is somewhat confusing…meat is right there in the name…but these lovely treats are absolutely, positively, meat free. I know this because I’ve eaten my fair share! How could I not? Bite-sized deliciousness served on a plate with a dollop of boozy cream…who could resist?

A quick Google search on the history of mincemeat pies shows that they were once, a long time ago, an entirely different dish. Around since the 11th century, mince pies first became popular in British kitchens in the 1700s. Back then there was chopped beef or mutton in them, along with dried fruit and warm spices like cinnamon, nutmeg and cloves. Rich and savoury, they were a main course dish and not an after dinner pudding or tea time treat.

It wasn’t until the 18th century, when “cheap sugar arrived from slave plantations in the West Indies”, that the mince pie we know and love today was created. Sweet trumped meat and now the only animal protein you’ll find in a modern mince pie is beef suet, a raw fat found around the kidneys and joints of a cow or mutton ~ though increasingly even it is being left out by bakers who are sensitive to animal products in their diet.

Irish Mincemeat


In Ireland, mince pies make their appearance in shops, bakeries, and holiday markets in early November. Truth be told, my favourite store-bought pies come from Avoca HandweaversButler’s Pantry and Cavistons in Glasthule, though Lidl, Aldi and Dunnes make nice ones too. Very few of my Irish friends go to the trouble of making them. Even my lovely sister-in-law, Rosie, spends her pre-Christmas time in the kitchen making her family-famous Christmas pudding, rather than making mincemeat pies.

But for those die-hard Christmas types like myself, it’s really a straight-forward, and dare I say “fun”, process. The only two things you really must do to ensure the end result is worth the effort is: 1) make your own candied peel (easy-peasy); and 2) make the mincemeat far enough in advance (two to six weeks is about right) to allow the alcohol, fruit, and sugar mixture to fully mature.

Mincemeat pies are best served out-of-the-oven-warm, with a generous spoon of freshly whipped, and dare I say “whiskey-laced”, cream, but they are also very good at room temperature a day or two later too. On its own, mincemeat is wonderful mixed into vanilla ice cream, may be added to home-baked apple or pear tarts, served over yoghurt, or tossed into a fresh fruit salad. And, finally…if you’re looking to give homemade Irish Christmas gifts this year…a beribboned jar of handmade mincemeat (or candied peel for that matter) would be positively lovely.

Happy Christmas!

Mincemeat

(makes 10 cups)

Ingredients

8oz/300gm/2 cups sultanas

8oz/300gm/2 cups currants

4oz/150gm/1 cups raisins

6oz/200gm/1 1/2 cup candied peel

600gm/3 cups muscavado or dark brown sugar

2 cooking apples (or green apples), peeled, cored and coarsely grated

zest and juice of 2 organic lemons

6oz/3/4 cup of Irish whiskey

1lb/450gm beef (or vegetable) suet*

1 teaspoon of pre-mixed cinnamon, nutmeg and cloves (also known as mixed spice)

a pinch of salt

Directions

1. Combine all the ingredients into a large bowl and mix well.

2. Put the ingredients into sterilised jars, cover and leave two to six weeks to mature, stirring once a week.

3. Use what you need and keep the rest in a cool, dark place for up to a year.

* If you’re making mincemeat to give as gifts to be used on muesli or ice cream, leave out the beef suet.

Ballymaloe Mince Pies 

(Makes 20-24 Mince Pies)

Ingredients

225g (8oz) plain flour

175g (6oz) butter, chilled and cut into cubes

1 dessertspoon icing sugar, sieved

a pinch of salt

a little beaten egg or egg yolk and water to bind

1lb mincemeat (to see Darina’s mincemeat recipe, please see link below)

egg wash

Directions
1. Sieve the flour into a bowl.

2. Toss the butter into the flour and rub it in with your fingertips.

3. Add the icing sugar and a pinch of salt.

4. Mix with a fork as you gradually add in the beaten egg (do this bit by bit because you may not need all of the egg), then use your hand to bring the pastry together into a ball. It should not be wet or sticky.

5. Wrap in cling film and refrigerate for 1 hour.

6. Preheat the oven to 180c/350f/gas mark 4

7. Roll out the pastry until it’s quite thin – about 3mm (1/8 inch) Stamp into rounds 7.5 (3 inch) in diameter and line shallow bun tins with the discs.

8. Put a good teaspoonful of mincemeat into each tin, dampen the edges with water and put another round on top.

9. Brush with egg wash and decorate with pastry leaves or stars.

10. Bake the pies in the preheated oven for 20 minutes approx.

11. Allow them to cool slightly, then dredge with icing or caster sugar. Serve with Irish whiskey cream (or brandy butter.)


Notes, Related Articles & Credits:

A fun article about six Northern Irish brothers who make 20,000 mincemeat pies a day at this time of year.

Here’s a brief history of mincemeat pies.

Looking for some other Irish Christmas fun facts? Check out this blog post.

Irish Central always views Ireland from a slightly more cynical/humorous lens, but I like it. Check out their Christmas post for 2014 here.

In 2004, Darina Allen posted recipes for a nostalgic Irish Christmas meal. You can find it here but, be warned, it’s not for the faint of heart. The list of dishes is incredibly long.

The beautiful photo at the start of this posting is from Getty Images. It was taken by David Cordner. I would have used my own photo, except I haven’t made my mince pies yet because the mince is still marinating and Mr. Cordner’s photograph is incredibly beautiful!

Read Full Post »

Irish Vegetable Soup

Soup Unblended…

Autumn is upon us and with the change in temperature outdoors we need warm, wholesome, foods to keep us energized and satisfied.

This soup will do nicely. It is vegetarian, but so flavourful you’ll hardly miss the meat! The parsnip gives the soup a hint of sweetness, but only slightly, and if you’re not a fan of parsnips you can omit them altogether and substitute in another vegetable. In fact, the beauty of this soup is you can throw nearly any combination of veggies into the pot and come out with a dish that is simply delicious.

And Soup Blended!

And Soup Blended!

I follow Darina Allen’s method for vegetable soup making, which is 1:1:3:5. That is one cup of onion (could be onions, leeks, shallots or a combination of the three): one cup of potatoes: three cups of vegetables: and five cups of stock. This is foolproof soup making. Warm and wholesome, this is perfect when served with a slice of Irish Brown Bread. Enjoy!

Autumn Vegetable Soup

Serves 6-8

Ingredients

2 tablespoon of butter
1 cup onion, chopped
1 cup potatoes, chopped
1 cup carrots, chopped
1/2 cup celery, chopped
1 parsnip, chopped
1/2 cup cauliflower, chopped
5 cups of vegetable (or chicken) stock
Salt and pepper to taste

Directions

1. Place the butter in a large pot and place over a medium high heat.

2. When butter is melted and foamy, add the onion and potato.

3. Sauté for 2 minutes, then cover and sweat for 8 minutes.

4. Add the stock, carrots, parsnip, celery, and cauliflower, lower the heat and simmer for about 20 minutes or until the vegetables are tender when you insert a fork.

5. Season with a little salt and pepper to taste and then either serve as a chunky vegetable broth or blitz with a hand blender to form a silky smooth soup.

Read Full Post »

Food. Glorious food. It’s everywhere: on our tellies, in the super market, at the farmer’s market, in our village shops. It’s even at the petrol station, in our cars, at the airport, in the books and magazines we read, on the radio, and in the malls we frequent. We are surrounded by food twenty-four-seven. Is it any wonder obesity is on the rise? In our parent’s and grandparent’s day, food was less readily available. It was also more cherished…particularly in Ireland.

There were no big-box supermarkets around when my in-laws were raising their twelve children. When Dada wanted a box of fruit or veg he either picked from his own back garden or he went into town (Dublin) and bought from street vendors. My husband can still remember vendors crying “Apples…six for a pound!” in their sing-song voices and “Get your chicky charlies…if you don’t wan ’em don’t mall em.” (Whatever that means!) Food was so beautifully simple then.

Today, not only is food more readily available, but we are bombarded with a multitude of food debates. Here are just a few that have been in the press recently:

Should we eat a plant-based diet or a meat based diet?

Is it better to buy organic or local?

Are grass-fed animals really healthier than corn-fed animals?

Should we drink/eat raw or pasteurised dairy products?

Is it ok to eat genetically modified foods or should we avoid them?

Which oil is best to cook with: olive, canola, vegetable or coconut?

Wild fish or farmed…other than the price, does it really matter?

Omega 3, 6, 9 and nutritional supplements…should we get our vitamins and minerals through food or pop vitamins?

Farmers market, village shop or super market…where should I do my shopping?

How much water am I supposed to drink every day?

Is your head swimming? Mine is! Food isn’t just overwhelming us, it’s exhausting us. As the mother of a busy family, I crave simplicity. I’m going to guess that you do too. So, where food is concerned, I am following these three simple rules:

Eat Real Food First.

Grow What We Can.

Eat Food in Season.

The first rule (Eat Real Food First.) involves eating a cleaner, healthier, diet before we eat rubbish. Real Food is the food our parents and grandparents gravitated towards…you know…food made with ingredients you can pronounce, food that has not been created in a laboratory. Eating Real Food means staying clear of anything “highly processed”. Real Foods are not low-fat, made with artificial sweeteners, bought in a takeaway or petrol station, bleached, or covered in sugar. They are foods made from a limited ingredient list and are found in nature. Once we’ve made a meal of Real Food, I don’t mind if we slip in some ( less wholesome) treats.

The second rule (Grow What We Can.) involves getting back to nature. In the beginning I started with just a few pots of herbs on the windowsill. When we moved to our home in the country, I created an organic culinary garden, where we grew tomatoes, potatoes, apples, pears, salads, herbs, rhubarb, berries, and other easily grown edibles. It has been a real pleasure watching my children go into the garden and pick food straight from a plant and eat it. I always know that when we take food straight from a plant and eat it we are getting all the nutrients provided by the sun and the rain and the soil.

The third rule (Eat Food in Season.) ensures we eat a large variety of food items throughout the year, which does two things: 1) increases our nutrient intake; and 2) ensures we eat a more broad range of foods. Before following this rule, my family might have eaten the same (limited) fruits, vegetables, and meats week in and week out for months on end. Now that we eat more “seasonally”, I find we eat foods we wouldn’t consider before and these “new” foods have nutrients that beautifully correspond to our body’s seasonal needs. Take, for example, Brussels Sprouts. These little cabbages are higher in Vitamin C than a glass of orange juice and are at their peak exactly when cold and flu season is at its highest and the body is looking for more Vitamin C to support the immune system. If you roast them in the oven with olive oil, salt and pepper, you’ll find they become naturally sweet. In our Irish Home, I have Brussels Sprouts in the fridge all winter and the family pop them like little treats!

To help my family follow these three food rules, I keep a copy of Bord Bia’s Calendar of Availability Guide for Fruit and Vegetables taped to the inside of the cupboard where I keep my collection of cookbooks. It’s a handy reminder of what I to cook and feed my family and it helps me know what to plant in our garden throughout the year. If you have trouble distinguishing the blue from the green dots, print out a copy of the Guide: it’s easier to see the difference.

availability_guide

So, as we say goodbye to spring/summer foods and hello to autumn/winter foods, I say let’s all move toward a simpler, healthier, more varied way of eating. Join me…won’t you?… and let’s share the joy of trying new foods together.

Related Articles:

Bord Bia’s (the Irish Food Board), Best in Season article here http://www.bestinseason.ie/about-us/

Here’s another good seasonal food chart: http://www.greatfood.ie/item_display.asp?cde=3&id=521

Michael Pollan’s article Six Rules for Eating Wisely here http://michaelpollan.com/articles-archive/six-rules-for-eating-wisely/

Here’s a family that made Real Food a priority for 100 days and wrote a book (and successful blog) about the experience.

Follow blogger Trevor Sargent over at Trevor’s Kitchen Garden for tips about how to grow your own foods.

Darina Allen says GIY (Grow It Yourself) is one of the most important initiatives to come out of Ireland in last 20 years.

For a list of Irish Farmer’s Markets, look here: http://www.bordbia.ie/consumer/aboutfood/farmersmarkets/pages/default.aspx

Irish Farmer’s Market website at http://irishfarmersmarkets.ie


Read Full Post »

Several weeks ago I promised to blog Chef Fran Broadbery’s Plum Island Grille Apple Tarte Tatin recipe. Unfortunately I’ve been struggling to get the recipe to work, which is why you haven’t seen it posted yet. Fran warned me it can be difficult (if not impossible) to take a recipe from a professional kitchen and convert it into a recipe suitable for a domestic kitchen, so I knew there was a chance the recipe wouldn’t work. Never fear, however, after many attempts I finally have a recipe that will work in any home kitchen…even if you’re not a domestic god or goddess!!

So, without further adieu, I am happy to present to you this wonderful Plum Island Grille inspired Apple Tarte Tatin. We are smack in the middle of apple season, so I hope you enjoy this wonderfully delicious, super easy, recipe. Cheers!

Step one: put apples in water with lemons.

Step one: put apples in water with lemons.

Step two: melt butter and add sugar.

Step two: melt butter and add sugar.

Step three: caramelise the butter and sugar.

Step three: caramelise the butter and sugar.

Step four: add the apples rounded side down and bake for 20 minutes.

Step four: add the apples rounded side down and bake for 20 minutes.

Step five: cover with puff pastry and bake.

Step five: cover with puff pastry and bake.

Step six: remove from oven.

Step six: remove from oven.

Step seven: carefully invert the Tarte Tatin onto a plate.

Step seven: carefully invert the Tarte Tatin onto a plate.

Step eight: top with vanilla ice cream and serve.

Step eight: top with vanilla ice cream and serve.

Apple Tarte Tatin 

Serves 6-8 

Ingredients

1 sheet of puff pastry (you can make your own, but why bother!)

110g/4oz unsalted butter

225g/8oz sugar

4 apples, peeled, cored and cut into halves or quarters (Granny Smith are perfect, but really any apple is fine)

1 lemon, cut in half

Directions

1. Pre-heat oven to 200°C/400°F.

2. Place apples (peeled, cored and cut) into a medium size bowl. Cover with water and squeeze the juice of the lemon into the water. Put the lemon halves into the water as well.

3. In a skillet, melt the butter over moderate heat. Stir in the sugar. The mixture will be grainy at first, but be patient…and don’t turn up the heat. The sugar will melt and become caramel.

4. Drain the water off the apples and dry with kitchen roll (paper towel). Remove the caramel from the heat and add the apples rounded side down.

5. Put the skillet in the oven and bake for 20 minutes or until a knife can be easily inserted into the apple.

6. Remove skillet from oven and cover with a sheet of puff pastry slightly larger than the size of the skillet. Tuck the edges of the pie crust into the hot skillet. Be careful not to burn yourself.

7. Return the skillet to the oven for another 15-20 minutes or until the crust is golden brown.

8. Remove the Tarte Tatin from the one and set on a rack to cool.

9. Run a knife around the edge of the pie crust to separate it from the skillet. Shake the skillet a few times to loosen the apples and caramel. Place a pie plate over the skillet. Carefully grip the plate and the skillet and flip over so the pie plate is on the bottom and the skillet is on the top.

10. Gently lift the skillet from the plate. Rearrange any apples that have shifted during the inverting and scrape any stubborn caramel off the skillet and onto the Tarte Tatin. If some of the caramel is stuck to the skillet, place back in the oven until it’s spoonable or drizzel-able and spoon or drizzle over the Tarte Tatin on the plate.

11. Serve while still warm, topped with a scoop of vanilla ice cream or freshly whipped cream.

Notes:

* Cold Tarte Tatin makes for a delicious breakfast dish.

** Pears, quince, and fruits of a similar hardness can be cooked like apples to make Tarte Tartin.

*** I used my grandma’s old skillet in this recipe, but you can use an oven proof sauté pan.

Related Articles:

1. Rhubarb Tarte Tatin at Tartelette

2. Sausage Tarte Tatin made by Donal Skehan

3. Darina Allen’s Tarte Tatin recipe as published in The Irish Examiner

Read Full Post »

Chef Fran Broadbery

Chef Fran Broadbery

It’s not every day I sit down with an Irish chef and it’s not every day I nearly miss a flight to America. Today I did both…virtually at the same time!

Dear Readers…if you’re flying anywhere this summer on Aer Lingus, Ireland’s national airline, listen up… Aer Lingus requires all passengers check-in two to three hours before all flights…and they mean it! If you’re not at the ticket counter when the “last call” for your flight is made, you’re snookered. Chances are you’re not getting to your final destination on the flight of your choice. In fact, you may not get to your final destination at all. I know: I learned it the hard way.

In typical fashion, I arrived at Dublin Airport 90 minutes before my plane from Dublin to Boston was scheduled to depart. I was feeling pretty chuffed (happy) with myself: 90 minutes felt positively luxurious. No husband, no kids, and clutching nothing but my carry-on bag, I sauntered over to one of those kiosk-yokes to check in. When a “Flight Closed” message flashed up on the screen before me, I wasn’t the least bit worried. Instead, I walked over to the “Flight Closing” desk and waited patiently {about 10 minutes} to clear up the problem.

“Didn’t you hear the two last calls for your flight?!”, said the young Aer Lingus representative dressed in green.

The last two whats?, I replied calmly. “My flight doesn’t leave for 90 minutes.”

“That may well be the case,” she said, “but check-in for all Aer Lingus international flights is three hours before take off. You have missed the last call for your plane. You’ll have to see if you can get a later flight…which is, unfortunately, showing oversold at the moment.”

Arguing the case, no matter how politely, got me nowhere so I hustled myself over to the next queue (line) to see if I could get on my flight. Five minutes passed…my position in the queue wasn’t improving and my heart was beginning to pound like a jack hammer. You see Dear Readers, I was meeting my youngest daughter at summer camp on the other side of the Atlantic and I HAD TO GET ON THAT FLIGHT!!!!

No longer calm and smug but rather stressed and glowing sweating, I thought all was lost until an Aer Lingus supervisor called to me saying, “Today is your lucky day!” It turned out the man directly behind me in the last queue was also supposed to get on my flight and, since there were two of us who’d screwed up, they were going to do us a favour by getting us through security, immigration, and customs and onto the plane. “You’d better not do this again!”, my new friend and I were chastised.

Cruising through lines like the ancient Israelites passing through the Red Sea {thanks to Moses}, my friend and I struck up a conversation. Turns out he was delayed getting to the airport because of a problem at the car hire (rental) place. Hertz or Avis or another company was giving him a hard time and he wasn’t able to check-in before the dreaded “last calls”.

It was in the U.S. Customs line that we finally exchanged names and handshakes and I asked him what he did. “I’m a chef!”, he replied in a soft Irish accent.

Hmmm…a chef!…an Irish food blogger saved by an Irish chef!…sounds too good to be true.

“You’d better watch out,” I warned, “I may just have to interview you on the flight to Boston.”

My new friend chuckled, “If we make this flight, I’ll be happy to talk.”

As luck would have it, we made the flight and, what’s more, Aer Lingus sat us together. A captured interviewee: my day just went from bad to great! So, Dear Readers, without further adieu, it is my pleasure to introduce to you my seat-mate and good luck charm…Chef Fran Broadbery.

Plum Island Grill Food

Tempura Shrimp, Thai Seafood Stew, and Apple Tarte Tatin served at Plum Island Grille

Q. So, Fran, what can you tell me about your restaurant?

A. It’s called Plum Island Grille and it’s on Plum Island, a beautiful barrier island with a single drive road leading up to a picturesque “old school” restaurant. It’s about a half-hour north of downtown Boston.

Q. What kind of food do you serve?

A. Oh, Jaysus…really good food {laughter}. No, seriously, it’s Mediterranean, strong French, with a hint of Thai.

Q. That sounds delicious. How did the Thai part work its way in?

A. I met my wife in a Thai restaurant and I’ve always loved Thai food. I guess you could say I’ve always had a soft spot for Thai.

Q. Did you meet your wife in Thailand?

A. No…I met her in the Chili Club in Dublin.

Q. Oh, I remember that place…it is great.

A. Yea, I worked in the kitchen there as a dishwasher and a precook. Anna the chef, she was about 83 years of age, took me under her wing and taught me some of the tricks of making proper Thai cuisine. She was one of the best chefs I ever worked with in my life.

Q. You’re Irish but you live in America now…how did that happen?

A. When I was twenty-one, my then girlfriend moved home to America and I went to Europe to sow a few “wild oats” and learn more about food. I went from Barcelona to Scandinavia cooking for about a year. Food, fun, drink…but in the end, I missed my girlfriend and headed back to Dublin on Dec 21 and was in Boston by Dec 24th. Arriving in Boston on Christmas Eve blew my mind! My girlfriend and I drove up to New Hampshire on Christmas morning…something I’ll never forget…no one had ever told me how beautiful America is. I never expected it. I fell in love with the countryside immediately.

Q. Obviously your girlfriend was American. Did it work out?

A. Twenty-two years later, two boys, and a flying restaurant…it certainly did. My life is busy but good!

Q. What influence, if any, has your upbringing had on Plum Island Grille?

A. Ireland…not so much…my Mum…plenty. My mum was not a good cook but there are certain dishes of hers that I remember fondly and I’ve tried to recreate them at Plum Island Grill. There are dishes from the Irish sea and the Irish land: salted and smoked cod chowder, wild mushroom soup, perfectly boiled ham, and, oh my God, my mother’s scones. I can never replicate them but I do make them. So, I’d say Ireland itself isn’t much of a strong influence but my mother definitely is.

Q. Where did you go to school.

A. I started school in Wexford and then did two years of school in Tallaght. I only remember it as the fluorescent green school where there was a very pretty accounting teacher…and therefore I love accounting. I then went to Blackrock College for 5th year and on to Bolton Street for architecture and property management (real estate) and, finally, finished at Trinity College with a degree in architecture.

Q. From architecture to becoming a chef…how did that happen?

A. Architecture is the creation of something from scratch…food is very similar.

Q. You mentioned that you are one in a family of eighteen children! What was that like growing up?

A. I loved my childhood. It was hard. We were poor. We struggled. But, we built an amazing family bond that will never be broken. When I see my family now…even if it’s a year or two between visits…there is no awkwardness…it’s like we see each other every day. I’m floored by my family. Thank God for Viber!

Q. How often do you get back to Ireland?

A. At least once a year, if not twice.

Q. I have to ask…what’s it like to be married to an American…as you know…I am American and married to an Irish man.

A. Kathleen has never been like any other American I’ve known. If she was I probably wouldn’t have married her! {more laughter!} She is a mind-blowing woman on so many levels. Tall, dark, beautiful and elegant…amazingly witty…and yet sweet at the same time. I am challenged by Kathleen on a daily basis and for that I am very grateful. My life is never boring with her and it never will be. She wont’ let me rest on my laurels and I like it that way. She’s an interesting lady.

Q. One last question…what is your favourite thing to eat?

A. Pan seared John Dory over perfectly hand-whipped potatoes, julienned zucchini, carrot and summer squash, finished with a vanilla-orange guerre blanc.

Q. Mmmm…that sounds delicious. Ok, Fran…thank you very much for getting me on this flight today and for giving me this unexpected yet lovely interview! It’s been a pleasure.

A. It was an interesting way to meet you. I really enjoyed it too.

Note: If you’re in Boston, you can call into Plum Island Grill at 2 Sunset Blvd, Newbury, MA 01951. Phone: 978-463-2290. Website: http://www.plumislandgrill.com. Tomorrow I’ll post one of Chef Fran Broadbery’s recipes.

Read Full Post »

Irish Elderflower Cordial

At this time of year the hedgerows around Ireland are full of pink and yellow and white blossoms that are so very fragrant. It’s an absolute pleasure to walk around small country roads just to take in their lovely sweetness.

One flower in particular, the Elderflower, has me captivated. Growing like lace caps on a bushy green {and sometimes very tall} shrub, these gorgeous little flowers can be brewed with the simplest of ingredients to make a cordial (flavoured syrup) that is refreshingly delicious.

You may think it takes ages to make Elderflower cordial but it doesn’t. Five minutes or less picking the blooms and another five in the kitchen doing a bit of work, plus an overnight sitting under the canopy of a clean tea towel, and you’re done. Easy-peasy.

Elderflower cordial is a summer time staple in our Irish home. I am sure it will be the same in your home once you give it a try.

Wild Irish Elderflower Cordial

Ingredients

10-15 elderflower sprays, pick on a dry day and stay clear of plants close to the ground or in high trafficked areas

1 litre cold water

2lbs caster sugar

1 lemon sliced, skin scrubbed clean first

2oz citric acid (available at a chemist (pharmacy/drugstore)

Directions

1. After picking the elderflower sprays, turn upside down and give them a good sturdy shake to remove any bugs. Next, pick off any leaves, cut down the stems, and bring into the kitchen.

2. Put the water into a small saucepan and bring to a boil. Add the sugar and stir with a spoon until completely dissolved. Allow to cool to room temperature.

3.  Pour the sugar water into a large bowl. Add the elderflower sprays. Zest the lemon and add to the bowl. Slice the lemon and add to the bowl. Push the flowers and lemon slices under the sugar water and stir. Cover the bowl with a clean tea towel and leave for 24 hours.

4. Strain the mixture through a clean muslin cloth. At this point you may add the optional citric acid. Pour into a clean bottle, seal, and keep in the fridge until ready to use. We prefer a 1:6 ratio of elderflower cordial to sparkling water but you can serve it at whatever strength you prefer.

Notes: This cordial would be lovely added to a tall glass of crisp Prosecco, sparkling wine, gin or vodka.

Read Full Post »

Irish Scrambled Eggs

Irish scrambled eggs. Fluffy. Creamy. And, oh, so delicious…why did I fight so long to hang on to my American way of making ye? Why indeed. Like many things one clings to when they feel adrift in a sea not their own, I couldn’t wouldn’t give up my way of making scrambled eggs until recently.

This story starts with a young version of myself, standing at my mother’s side, learning to make scrambled eggs for breakfast. Break eggs into a bowl, add milk, put a dollop of butter in a hot frying pan…wait for the butter to foam…add the beaten eggs and milk mixture to the pan and cook quickly…whirling a spatula in a chopping motion…until the eggs form dry, separate, curds. Plate and eat immediately…simple to make.

Irish Eggs

Fast forward fifteen years…I’m now standing at my husband’s side, watching as he scrambles eggs for breakfast. Break eggs into a bowl, add salt and pepper to taste. Put two dollops of butter in a saucepan on low heat and add milk to the saucepan…wait for the butter to melt into the milk…add the beaten eggs and cook gently…stirring with a wooden spoon…until the eggs are set. Plate on a slice of warm buttered toast and serve immediately…also simple to make, but unacceptable to this Yankee girl.

DSC02891

Yes, it is sad but true to say, I was set in my American ways and unwilling to give up anything the things that reminded me of home for the longest time. I believed, as many immigrants do, that everything from home is always better.

DSC02895


What eventually changed my mind? Two very sweet little girls.

DSC02897

You see, when you’re raising children who are both Irish and something else {in our case, Irish and American} it is sometimes often times easier to let go of long-held traditions for different, and somewhat uncomfortable, new ones…out of love.

DSC02905

And, that Dear Readers, is what happened to me and my belief about how to make scrambled eggs. My American mother taught me to make scrambled eggs dry, served with a dollop of salsa (the Texas girl in me) or ketchup (the New Englander girl in her) and toast on the side. My Irish husband taught me otherwise. Our Irish American children cajoled me into changing my preference for how this breakfast dish is made such that, finally, I came round to making {and enjoying} scrambled eggs the Irish way…slowly, stirred in saucepan with a wooden spoon until barely set. I hope you enjoy them too!

Irish Scrambled Eggs

Serves One

Ingredients

2 eggs

salt and pepper to taste

1 oz butter

2 tablespoons milk

Directions

1. Crack two eggs into a bowl, add salt and pepper to taste, and mix with a fork.

2. Put butter, in a small saucepan, over low heat, and add milk.

3. When butter melts into milk, add eggs and stir constantly with a wooden spoon until eggs are set {they look about 75% cooked and slightly wet}.

4. Serve over warm buttered toast, with a sprinkling of chopped parsley, and eat immediately.


Read Full Post »

« Newer Posts - Older Posts »